Robocopy or Robust File Copy is a directory replication command-line tool from Microsoft. It was first released a part of the Windows NT 4.0 Resource Kit and it is available as a part of Windows Vista and Windows 7 as a standard feature. For Windows XP users you need to download the Windows Resource Kit in order to use Robocopy.
Robocopy can be used to mirror directories, as well as for any batch or synchronous copy needs. The best feature of Robocopy is that when you mirror directories it can copy NTFS attributes and other file properties as well. It provides features such as multithreading, mirroring, synchronization mode, automatic retry, and the ability to resume the copying process. Robocopy is replacing Xcopy in the newer versions of Windows although you can find both the tools in Windows 10.

If you are comfortable using the command line then you can directly run Robocopy commands from the command line using the command syntax and options . But if you’re not comfortable using the command line then don’t worry as you can add a graphical user interface (GUI ) to go along with the tool. So let’s see how you can add Graphical User Interface to the Microsoft Robocopy using the below-listed tutorial.
- Add a Graphical User Interface (GUI) To the Microsoft Robocopy
- RoboMirror
- RichCopy
Add a Graphical User Interface (GUI) To the Microsoft Robocopy
These are the two tools using which you can add a Graphical User Interface (GUI) to the Microsoft Robocopy command-line tool:
- RoboMirror
- RichCopy
Let us discuss how these tools can be used to add Graphical User Interface (GUI) to the Microsoft Robocopy command-line tool one by one.
RoboMirror
RoboMirror provides a very simple, clean, and user-centered GUI for Robocopy. RoboMirror allows for easy synchronization of two directory trees, you can perform a robust incremental backup, and it also supports volume shadow copies.
In order to add Graphical User Interface (GUI) to the Robocopy command-line tool using RoboMirror, first of all, you need to download RoboMirror. To download RoboMirrror, visit the official website of RoboMirror .
After downloading is completed follow the below steps to install RoboMirror:
1.Open the downloaded setup of RoboMirror .
2.Click on the Yes button when asked for confirmation.
3.RoboMirror setup wizard will open, just click on the Next button.

- Select the folder where you want to install the setup of RoboMirror . It is suggested to install the setup in the default folder.

5.Click on the Next button.
6.Below screen will open up. Again click on the Next button.

7.If you want to create a desktop shortcut for the RoboMirror then checkmark “ Create a desktop icon “. If you do not want to do so then simply uncheck it and click on the Next button.

8.Click on the Install button.

9.When the installation is completed, click on the Finish button and the RoboMirror setup will be installed.

To use RoboMirror to add Graphical User Interface to Robocopy command-line tool follow the below steps:
1.Open RoboMirror then click on the Add task option available at the right side of the window.

- Browse for the Source folder and the Target folder by clicking on the Browse button.

3.Now under “ Copy extended NTFS attributes ” you choose to copy the extended NTFS attributes.
4.You can also choose to delete the extra files and folders in the target folder that are not present in the source folder, just checkmark “Delete extra files and folders” . This gives you an exact copy of the source folder that you are copying.
5.Next, you also have an option to create a volume shadow copy of the source volume during the backup.
6.If you want to exclude the files and folders from backing up then click on the “ Excluded items ” button and then select the files or folders which you wish to exclude.

7.Review all your changes then click OK.
8.On the next screen, you can either perform the backup directly or schedule it to be run at a later time by clicking on the Schedule button.

- Checkmark the box next to “ Perform automatic backups “.

10.Now from the drop-down menu, choose when you want to schedule backup i.e. Daily, Weekly, or Monthly.

11.Once you have selected then click on the OK button to continue.
12.Finally, click on the Backup button to start the backup if not scheduled for later.

13.Before the backup process begins, the pending changes are displayed so that you can cancel the backup and change the settings for the tasks you need to.
14.You also have the option to view the history of the backup tasks you have performed by clicking on the History button .

RichCopy
RichCopy is a discontinued file copy utility program developed by Microsoft Engineer. RichCopy also has a nice & clean GUI but it is more powerful and faster than some other file copying tool available for the Windows operating system. RichCopy can copy several files simultaneously (multi-threaded), it can be invoked either as a command-line utility or via a graphical user interface (GUI). You can also have different backup settings for different backup tasks.
Download RichCopy from here . After downloading is completed follow the below steps to install RichCopy:
1.Open the downloaded setup of RichCopy.
2.Click on Yes button when asked for confirmation.

3.Select the folder where you want to unzip the files . It is suggested not to change the default location.

4.After selecting the location. Click on the OK button.
5.Wait for a few seconds and all the files will be unzipped to the selected folder.
6.Open the folder which contains the unzipped files and double click on RichCopySetup.msi.

7.RichCopy setup wizard will open, click on the Next button.

8.Again click on the Next button to continue.

9.On the license agreement dialog box, click on the radio button next to the “ I Agree ” option and then click on the Next button.

10.Select the folder where you want to install the RichCopy. It is suggested not to change the default location.

11.Click on the Next button to proceed.
- Microsoft RichCopy installation will start.

13.Click on yes button when asked for confirmation.
14.When the installation is completed, click on the Close button.
To use RichCopy follow the below steps:
1.Click on the Source button to select multiple files that is available on the right side.

2.Select one or multiple options such as files, folders, or drives that you wish to back up.

3.Select the destination folder by clicking on the Destination button available right below the source option.
4.After selecting the source folder and destination folder, click on the Options button and the below dialog box will open.

5.There are several options that are available which you can set for each backup profile separately or for all the backup profiles.
6.You can also set a timer to schedule backup tasks by checking the checkbox next to Timer.

7.After setting the options for backup. Click on the OK button to save changes.
8.You can also start the Backup manually by clicking on Start button available in the top menu.

Recommended:
- What Is Usoclient & How To Disable Usoclient.exe Popup
- Fix Multimedia Audio Controller Driver Issue
- Fix Can’t Print PDF Files from Adobe Reader
- How to Format Hard Drive on Windows 10
Both RoboCopy and RichCopy are free tools that are good for copying or backing up files in Windows faster than simply using the normal copy command. You can use any of them to add Graphical User Interface (GUI) to Microsoft RoboCopy command-line tool . If you still have any questions regarding this guide then feel free to ask them in the comment section.
If you’re facing issues in printing your PDF files on Adobe Reader then don’t worry as the problem can be easily solved by updating printer’s driver, setting your printer as the default printer, etc. But before continuing you should try to print another PDF file and if you’re able to print successfully then the PDF file you were earlier trying to print was corrupted. But if you still can’t print pdf files from adobe reader then continue with the advanced troubleshooting guide.
- Fix Can’t Print PDF Files from Adobe Reader
- Method 1: Miscellaneous Fixes
- Method 2: Update Printers driver
- Method 3: Set your Printer as the Default Printer
- Method 4: Try to print PDF as an image
- Method 5: Save another copy of the PDF file
- Method 6: Reinstall your Printer Drivers
- Method 7: Re-install Acrobat Reader
Fix Can’t Print PDF Files from Adobe Reader
Make sure to create a restore point just in case something goes wrong.
Method 1: Miscellaneous Fixes
1.Try to print the webpage you’re currently on, press Ctrl + P and print the document and see if you’re able to.

2.Instead of PDF file try to print a text or images file , if you’re are able to print then the problem is with Adobe Reader and updating it might fix the issue.

3.Power Cycle the Printer:
- Restart your PC and power off the Printer then disconnect it from the PC.
- Don’t start the Printer, just press and hold the power button of the printer for 10 seconds.
- Now connect the printer to the PC then power ON the PC and once the system starts, you can power ON your printer.
Method 2: Update Printers driver
To update the printer driver follow these steps.
1.Press Windows key + X then select Device Manager.

2.Expand Print queues then select the printer for which you want to update the drivers.
3.Right-click on the selected Printer and select Update driver.

4.Select Search automatically for updated driver software.

5.Windows will automatically install the latest drivers available for your printer.

Manually Install the Latest Printer Drivers
1.Press Windows Key + R then type “ services.msc ” and hit enter.

2.Find Print Spooler service then right-click on it and select Stop.

3.Again press Windows Key + R then type printui.exe /s /t2 and hit enter.
4.In the Printer Server Properties window search for the printer that is causing this issue, select it and then click on the Remove button.
5.Next, remove the printer and when asked for confirmation to remove the driver as well, select yes.

6.Now again go to services.msc and right-click on Print Spooler and select Start.

7.Next, navigate to your printer manufacturer’s website like HP , Dell , Canon , download and install the latest printer drivers from the website.
For example , in case you have an HP printer then you need to visit HP Software and Drivers Downloads page . Where you can easily download the latest drivers for your HP printer.
8.If you’re still not able to fix slow network printing error or can’t Print PDF Files from Adobe Reader then you can use the printer software that came with your printer. Usually, these utilities can detect the printer on the network and fix any issues that are causing the printer to appear offline.
For example, you can use HP Print and Scan Doctor to fix any issues regarding HP Printer.
Method 3: Set your Printer as the Default Printer
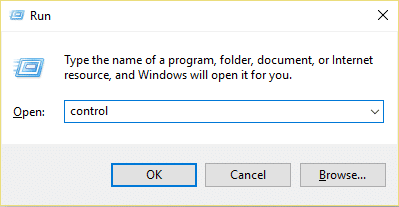
1.Press Windows Key + R then type control and hit Enter to open Control Panel.
2.From the Control Panel click on Hardware and Sound.

3.Next, click on Device and Printers.

- Right-click on your Printer and select Set as default printer.

5.Restart your PC to save changes.
Method 4: Try to print PDF as an image
1.First, open your PDF file in Acrobat Reader.

2.Now from the Adobe Reader toolbar click on the print icon or press Ctrl + P.
3.From the print window, click on the Advanced button.
4.In the Advanced Print Setup window checkmark “ Print As Image ” and click OK.
<img loading=“lazy” src=“https://techcult.com/wp-content/uploads/2019/10/From-the-print-window-click-on-the-Advanced-button.png" onerror=“this.onerror=null;this.src=‘https://blogger.googleusercontent.com/img/a/AVvXsEhe7F7TRXHtjiKvHb5vS7DmnxvpHiDyoYyYvm1nHB3Qp2_w3BnM6A2eq4v7FYxCC9bfZt3a9vIMtAYEKUiaDQbHMg-ViyGmRIj39MLp0bGFfgfYw1Dc9q_H-T0wiTm3l0Uq42dETrN9eC8aGJ9_IORZsxST1AcLR7np1koOfcc7tnHa4S8Mwz_xD9d0=s16000';" alt=“In the Advanced Print Setup window checkmark “Print As Image” and click OK - 45”>
5.Next, click the Print button and see if you’re able to print the PDF file as an image.

Method 5: Save another copy of the PDF file
1.Open the PDF file in Acrobat Reader then press Shift + Ctrl + S to open Save As dialog box.

Note: From the Acrobat Reader menu click on File and select Save As.
2.Navigate to where you want to save the file, type a new name and click Save.

3.Now try to print this newly created PDF and see if you’re able to Fix Can’t Print PDF Files from Adobe Reader.
Method 6: Reinstall your Printer Drivers
1.Press Windows Key + R then type control printers and hit Enter to open Devices and Printers.

- Right-click on your printer and select “ Remove device ” from the context menu.

3.When the confirm dialog box appears , click Yes.

4.After the device is successfully removed, download the latest drivers from your printer manufacturer website .
5.Then reboot your PC and once the system restarts, press Windows Key + R then type control printers and hit Enter.
Note: Make sure your printer is connected to the PC via USB, ethernet or wirelessly.
6.Click on the “ Add a printer ” button under Device and Printers window.

7.Windows will automatically detect the printer, select your printer and click Next.

- Set your printer as default and click Finish.

This is how you can update the driver and after this, you can try to print the documents once again.
Method 7: Re-install Acrobat Reader
1.Press Windows Key + I to open Settings then click on Apps.

2.From the left hand make sure to select Apps & features.
3.Now from the “ Search this list ” box type Acrobat in it.

4.Click on Adobe Acrobat Reader DC then click on the Uninstall button under it.

5.Now download the latest version Adobe Acrobat Reader from the official website .
6.Install the latest version of Acrobat Reader on your PC and Reboot your PC.
7.Again try to print the PDF file and this time you will be able to print it without any issues.
Recommended:
- Fix Windows Media Player Server Execution Failed Error
- 3 Ways to Delete Files Protected by TrustedInstaller
- How to Connect a Bluetooth Device on Windows 10
- How to Format Hard Drive on Windows 10
I hope the above steps were able to help you Fix Can’t Print PDF Files from Adobe Reader but if you still have any queries regarding this guide then feel free to ask them in the comment’s section.
