
- How to Fix Battle.net Update Stuck at 0% in Windows 10
- Method 1: Basic Troubleshooting Methods
- Method 2: Run Battle.net as Administrator
- Method 3: Run Blizzard Repair Tool
- Method 4: Modify Windows Defender Firewall Setting
- Method 5: Disable Antivirus Temporarily (If Applicable)
- Method 6: Create New User Profile
- Method 7: Reinstall Battle.net
How to Fix Battle.net Update Stuck at 0% in Windows 10
Read and implement the below-discussed methods in your Windows 10 computer for resolving battle.net update stuck issue and prevent the same.
Method 1: Basic Troubleshooting Methods
Follow these basic methods to fix the error.
1A. Restart PC
The general trick to resolve all the temporary glitches associated with Battle.net is to restart your computer. You can restart your PC by following the steps.
Navigate to the Windows Power User menu by pressing the Windows and X keys simultaneously.
Select Shut down or sign out .
Finally, click on Restart .

Once you have restarted the service, check if you can access the game without any errors.
1B. Check System Requirements
If you are facing battle.net update get stuck at 0% on startup, you have to check the basic requirements of the Battle.net games and ensure that your PC satisfies them.
Minimum Requirements:
- CPU : Intel Core i5-760 or AMD FX-8100 or later
- CPU SPEED : Info
- RAM : 4 GB RAM (8GB for integrated graphics such as Intel HD Graphics)
- OS : Windows 7 / Windows 8 / Windows 10 64 bit
- VIDEO CARD : NVIDIA GeForce GTX 560 2GB or AMD Radeon HD 7850 2GB or Intel HD Graphics 530 (45W)
- PIXEL SHADER : 5.0
- VERTEX SHADER : 5.0
- FREE DISK SPACE : 70 GB
- DEDICATED VIDEO RAM : 2 GB
Recommended Requirements:
- CPU : Intel Core i7-4770 or AMD FX-8310 or later
- CPU SPEED : Info
- RAM : 8 GB
- OS : Windows 10 64 bit
- VIDEO CARD : NVIDIA GeForce GTX 960 or AMD Radeon R9 280 or later
- PIXEL SHADER : 5.1
- VERTEX SHADER : 5.1
- FREE DISK SPACE : 70 GB
- DEDICATED VIDEO RAM : 4 GB
1C. Ensure Proper Network Connection
An unstable internet connection leads to battle.net update get stuck, also if there are any obstacles between your router and your computer, they may interfere with the wireless signal and will cause intermittent connection problems.
You can run a Speedtest to know the optimum level of network speed required for the proper connection.

Ensure that your device satisfies the below criteria.
- Find the signal strength of your network and if it is very low, clear all the obstructions in between the way.
- Avoid too many devices connected to the same network.
- Always buy a modem/router verified by your Internet Service Provider (ISP) and they are free of conflicts.
- Do not use old, broken, or damaged cables. Replace the cables if necessary.
- Make sure the wires from the modem to the router and the modem to the wall are stable and out of disturbance.
If there are any internet connectivity issues, check our guide How to Troubleshoot Network Connectivity Problems on Windows 10 to troubleshoot the same.

1D. Close Background Processes
Several users have confirmed that the update stuck on 0% issue can be resolved by closing all the background tasks running on your PC. To implement the task, follow our guide How to End Task in Windows 10 and proceed as instructed.

Once you have closed all the background processes, check if you were able to fix the discussed error code.
1E. Repair System Files
If there are any missing or damaged files on your Windows 10 PC, you will face battle.net update get stuck. Yet, you are repairing these corrupt files by using inbuilt utilities namely, System File Checker and Deployment Image Servicing and Management .
Read our guide on How to Repair System Files on Windows 10 and follow the steps as instructed to repair all your corrupt files.

1F. Run Full Disk Cleanup
A few users have suggested that clearing some disk space on the PC has helped them sort out the discussed update stuck issue. This will enable your computer to install new files whenever needed which will help you fix the problem.
If there is minimum available space in your computer contributing to the Battle.net update error code, follow our guide 10 Ways to Free Up Hard Disk Space On Windows that helps you clear all unnecessary files in your computer.

1G. Update Windows
You can also eradicate bugs in your computer and game by updating your Operating System. Always ensure that you have updated your Windows Operating System and if there are any updates pending in action, use our guide on How to Download and Install Windows 10 Latest Update .

After updating your Windows Operating System, check whether you can connect to your Battle.net game server without any errors.
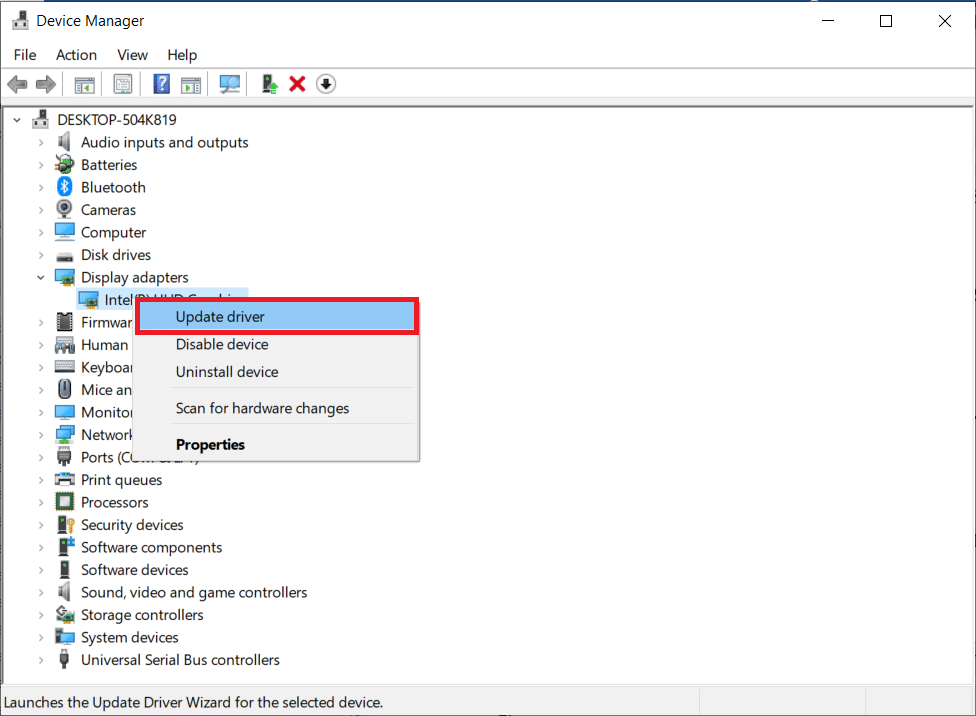
1H. Update Graphics Drivers
World of Warcraft, being a graphically intensive game, your graphics driver is essentially important for your gaming experience. If the drivers are outdated or faulty, make sure you update them. You can search for the newest releases of drivers from its official websites or you can update them manually. Follow our guide 4 Ways to Update Graphics Drivers in Windows 10 to update your driver and check if you have fixed battle.net update get stuck at 0% issue.
1I. Roll Back GPU Driver Updates
Sometimes, the current version of GPU drivers may cause the update stuck on 0% problem, and in this case, you have to restore previous versions of installed drivers. This process is called rollback of drivers and you can easily roll back your computer drivers to their previous state by following our guide How to Rollback Drivers on Windows 10 .

1J. Reinstall Graphics Drivers
If you still face battle.net update get stuck after updating your Graphical drivers, then reinstall device drivers to fix any incompatibility issues. There are several ways to reinstall drivers on your computer. Yet, you can easily reinstall Graphical drivers as instructed in our guide How to Uninstall and Reinstall Drivers on Windows 10 .
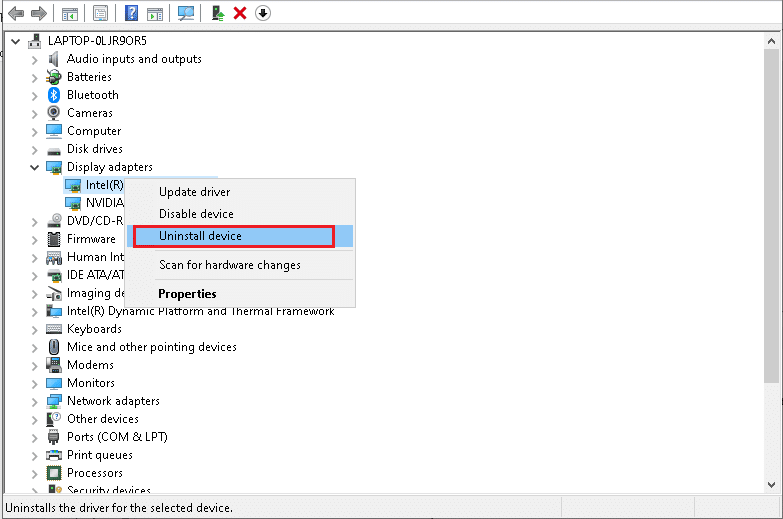
After reinstalling GPU drivers, check if you can access Battle.net games without any errors.
1K. Clear DNS Cache & Data
Few users have suggested that clearing the DNS cache and data on your PC has helped them fix why battle.net updates get stuck issue. Follow as instructed.
- Hit the Windows key and type cmd , then click on Open .

- Now, type the following commands one by one and hit the Enter key after each command.
ipconfig/flushdns

ipconfig/registerdns

ipconfig/release

ipconfig/renew

netsh winsock reset

- Wait for the commands to be executed and restart your PC .
1L. Reset Network Settings
Several users have declared that resetting network settings will resolve strange network connection issues. This method will forget all the network configuration settings, saved credentials, and a lot more security software like VPN and antivirus programs. This will also help you fix the update stuck on 0% issue on your Windows 10 PC. To do so, follow our guide on How to Reset Network Settings on Windows 10

Method 2: Run Battle.net as Administrator
This is one of the most common reasons that cause Battle.net Update stuck at 0% in your Windows 10 PC. Certain permissions and features can only be accessed if you have granted admin rights to the World of Warcraft game. In this scenario, you can fix the discussed issue by following the below-listed instructions.
Right-click on the Battle.net app.
Select the Run as administrator option.

Method 3: Run Blizzard Repair Tool
If you still couldn’t fix battle.net update get stuck at 0% issue, there may be some chances that your PC has some damaged gaming files in it. Damaged files may fill your computer due to an overprotective antivirus suite or due to an update failure. Fortunately, you can resolve all these corrupt gaming files automatically with the help of a built-in tool of Blizzard. Here are a few instructions to run the Battle.net Repair tool.
Launch the Battle.net app as administrator .
Now, switch to the Games tab at the top corner of the window and then select any one of the games (e.g. World of Warcraft ) from the list.
Then, click on Options followed by Scan & Repair from the drop-down list.
In the next prompt, click on Begin scan and wait until the process gets completed.

- Finally, restart your game and check if you can fix the update stuck on 0% issue on Battle.net.
Method 4: Modify Windows Defender Firewall Setting
You will also face Battle.net Update stuck at 0% issue, due to an over-reactive or over-protective antivirus suite in your Windows 10 computer. This prevents the connection link between the game launcher and the server. So, to fix this problem, you can whitelist Battle.net in your Firewall settings or disable the problem temporarily.
Option I: Whitelist Battle.net
To allow Battle.net in your Windows Defender Firewall, follow our guide Allow or Block Apps through the Windows Firewall and implement the steps as instructed.

Option II: Disable Firewall (Not Recommended)
If you do not know how to disable Windows Defender Firewall, our guide How to Disable Windows 10 Firewall will help you do so.

Option III: Create New Rule in Firewall
- Hit the Windows key and type Windows Defender Firewall with Advanced Security , and click on Run as administrator .

- Now, in the left pane, click on Inbound Rules as depicted.

- Then, in the right pane, click on New rule… as shown.

- Now, make sure you select the Program option under What type of rule would you like to create? menu and click on Next> as shown.

- Then, click on the Browse… button corresponding to This program path: as shown.

Then, navigate to the C:\Program Files (x86)\ Battle.net path and double-click on the setup file. Then, click on the Open button.
Then, click on Next > in the New Inbound Rule Wizard window as shown.

- Now, select the radio button next to Allow the connection and click on Next > as depicted.

- Make sure Domain, Private, and Public boxes are selected and click on Next > as shown.

- Finally, add a name to your new rule and click on Finish .
All done! Check if you have fixed battle.net update get stuck issue or not.
Method 5: Disable Antivirus Temporarily (If Applicable)
Some incompatible antivirus programs installed in your computer will cause trigger the question, why battle.net updates get stuck. To avoid conflicts, you must ensure the security settings of your Windows 10 computer and check if they are stable or not. To find whether the antivirus suite is the reason for the update stuck on 0% issue, disable it once and try connecting to a network.
Read our guide on How to Disable Antivirus Temporarily on Windows 10 and follow the instructions to disable your Antivirus program temporarily on your PC.

If you have a fix for your problem after disabling the antivirus program on your computer, you are advised to uninstall the program completely from your PC.
Read our guide on force uninstall Programs which won’t uninstall In Windows 10 to uninstall your antivirus program on your computer.
Method 6: Create New User Profile
Creating a new user account can fix any profile-related errors and glitches. This helps you fix Battle.net Update stuck at 0% issue. You can create a new user profile by following the steps discussed in our guide, How to Create a Local User Account on Windows 10

After creating a new user profile, check if you have fixed the discussed issue or not.
Method 7: Reinstall Battle.net
Any misconfigured files in Battle.net will lead to the discussed issue even if you have followed all the above-discussed methods and updated all the pending actions. So, in this case, you have no other option than to reinstall the game. Here is how you do it.
- Hit the Windows key , type Control Panel , then click on Open .

- Set View by > Category , then click on Uninstall a program .

- Right-click on Battle.net program and click Uninstall/Change .

- Click Yes, Uninstall option to confirm the uninstallation process.

After uninstalling the app, go to the official Battle.net webpage to download its latest version.
Click on Download for Windows . It will download the file named Battle.net-setup.exe .

- Run Battle.net-setup.exe . Select the preferred language and click on Continue .

- Click on Change if you want to alter the Install location . Click on Continue .

- Wait for the installation process to complete.

- Once installed, fill out Battle.net credentials to log in.

- Finally, relaunch the game and now you would have fixed the battle.net update get stuck issue.
Recommended:
- Fix Printer Installation Issues in Windows 10
- Fix Daemon Tools Unable to Access Image File MDF
- Fix WOW51900309 Error in Windows 10
- Fix Blizzard Another Installation in Progress in Windows 10
Microsoft frequently rolls out updates for Windows 10 to improve the operating system on various functionalities such as system efficiency, security, stability, etc. Although each bug brings a host of improvements to the operating system, it also brings new bugs that plague many users. One of these is the Windows update released in March 2021, update KB500080. This update caused many issues with the printer drivers already installed in the system. Users reported errors like Windows update for printer drivers not working. These printer installation issues were so prominent and serious that some users even reported receiving BSOD (Blue Screen of Death – the screen displayed after a system crash due to Windows failure) while printing. This made printing impossible. If you are wondering how to solve this Windows update can’t get list of devices issue, you are at the right article. Here, we discuss the possible causes and some potential solutions so we can tackle this error. Let’s get started!

- How to Fix Printer Installation Issues in Windows 10
- Method 1: Discharge Printer
- Method 2: Run Printer Troubleshooter
- Method 3: Update Device Drivers
- Method 4: Manually Install Generic Drivers
- Method 5: Restart Print Spooler Service
- Method 6: Install Drivers from Windows Update Catalog
- Method 7: Reinstall Printer
How to Fix Printer Installation Issues in Windows 10
Before getting onto the fixes, let us see some causes for this issue:
- Printer is old and has no latest software support
- Windows update bug
- Issues with printer service
- Issues with printer drivers and software
- Printer is incorrectly connected
Method 1: Discharge Printer
You can try discharging the printer of all electricity by removing it from the main switch, removing it from the computer for 2–5 minutes, and connecting it back again. Make sure to properly connect the printer to the main switch and the computer before turning it off, and check if the issue is fixed.
Method 2: Run Printer Troubleshooter
There is an in-built Windows troubleshooter for printer issues. You can access it easily by accessing settings. Running printer troubleshooter will resolve Windows update for printer drivers not working issue.
Press Windows + I keys simultaneously to launch Settings .
Click on the Update & Security tile, as shown.

Go to Troubleshoot menu in the left pane.
Select Printer troubleshooter and click on Run the troubleshooter button shown highlighted below.

- Wait for the troubleshooter to detect and fix the problem. Once the process is complete, click Apply this fix and restart your PC .
Windows will automatically search for any problems and attempt to fix them automatically. Also, you can run Hardware and Devices Troubleshooter on Windows 10 to resolve the issue.

Method 3: Update Device Drivers
As Windows users reported errors after the Windows update, there could be problems with the printer driver. Updating printer drivers could be a potential fix. Various methods to update the printer drivers are highlighted below if one of them does not work for you.
Read our guide on How to Update Device Drivers on Windows 10 and implement the different methods given in this link for printer devices.

Note : If your printer came with an installation disc, it could be a driver installation disc. Insert it into your DVD/CD driver and follow the onscreen instructions to install the driver.
Method 4: Manually Install Generic Drivers
If you have an old printer or your manufacturer has not yet released a driver for Windows 10, printer installation issues can occur. This can be an ongoing issue since the printer will be unusable without proper usable driver software. In this scenario, Windows will automatically install Generic drivers suitable for your printer. If not, then you can install them manually.
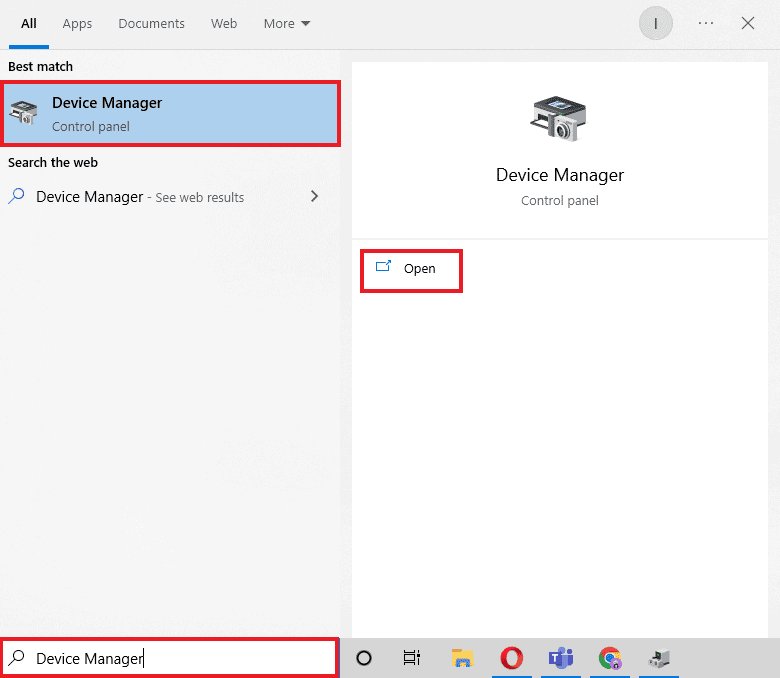
- Press the Windows key , type Device Manager , and click on Open .
- Under the Print queues section, right-click on Microsoft XPS writer and select the Update driver option.

- Click on the Browse my computer for driver software option.

- Next, click on Let me pick from a list of available drivers on my computer .

- Finally, choose Generic software device and click on Next .

This will install the required driver and fix the printer installation issue.
Method 5: Restart Print Spooler Service
When a Windows user sends print requests to the printer, the print spooler is the software that manages these requests sent by the user. Resetting it can be a potential solution. Follow the below steps:
Hit the Windows + R keys together to open the Run dialog box.
Type services.msc and click on OK to launch the Services window.

- Right-click on Print Spooler and click on Stop to stop the service.

Now, navigate to the Run dialog box again by simultaneously pressing Windows + R keys .
Enter the below command and click on OK .
%WINDIR%\system32\spool\printers

Select all the files in the folder by holding Ctrl + A keys simultaneously.
Now, press Shift + Delete to delete all the files present in that folder permanently.
Go back to the Services window and double-click on the Print Spooler service.

Make sure the Startup type drop-down is set to Automatic .
Finally, click on Start under the Service status section.

- Click on Apply > OK to confirm.
Check if Windows Update can’t get list of devices issue gets resolved or not.
Method 6: Install Drivers from Windows Update Catalog
Sometimes, using a generic driver does not help and might still throw up printer installation issues. If you face issues with the printer and you have an old printer, then you can try an official Microsoft Windows Update Catalog. Here, the updates are archived so year-old drivers can easily download and use them. Let us see how to use it.
Go to the Microsoft Catalog website in a browser.
Type the model of your printer (e.g. HP LaserJet 4000 ) and click on Search to search drivers for your hardware.
If you find the driver for your hardware, click on Download .

- Here, click on the cab link to download the driver.

Right-click on the downloaded file and choose Extract .
Update your printer driver manually by locating the folder where you extracted the drivers.
Method 7: Reinstall Printer
You can reinstall the printer completely from the start to see if that works. This involves removing the printer and device driver with all powers and connecting them back.
- Hit the Windows key , type Control Panel , then click on Open .
- Set View by > Category , then click on View devices and printers .

Under the Printers section, right-click on your printer .
Choose the Remove device option.

Click on Yes in the UAC prompt to remove the device.
Now, reboot the PC and reconnect your printer.
Go to Devices and Printers and right click on the printer and select Set as default printer .

This will solve printer installation issues.
Recommended:
- Fix Daemon Tools Unable to Access Image File MDF
- Fix Epson Scanner Cannot Communicate in Windows 10
- Fix Error Printing in Windows 10
- Where is the WPS Button on Canon Printer?
We hope that this article was helpful, and you were able to resolve printer installation issues in Windows 10. If you have any doubts or suggestions, comment below. Also, let us know what you want to learn next.
