Sometimes, when you run a program, which was previously running smoothly, provides an error related to the .dll extension. An error message occurs which says DLL file not found or DLL file is missing. It creates a lot of problems for users as most people are not aware of what DLL file is, what it does and most importantly, how to handle this error. And they are unable to do anything because they panic as soon as they see the error message.
But don’t worry as after going through this article all your doubts regarding DLL files will be cleared, and you will also be able to fix DLL not found or missing error on Windows 10 without any issue.

DLL : DLL stands for Dynamic-Link Library . It is Microsoft implementation of the shared library concept in the Microsoft Windows Operating Systems. These libraries have file extension .dll. These files are a core part of Windows and allow programs to run different functions without writing the whole program from scratch every time. Also, the code and data contained by these files can be used by more than one program at a time, making the working of the computer more efficient and reducing disk space as there is no need to keep duplicate files for each program.
- How DLL Files Works?
- Fix DLL Not Found or Missing on your Windows Computer
- Method 1: Check For Updates
- Method 2: Restart Your Computer
- Method 3: Restore the deleted DLL from Recycle Bin
- Method 4: Run a Virus Or Malware Scan
- Method 5: Use System Restore
- Method 6: Use System File Checker
- Method 7: Update System Drivers
- Method 8: Clean Installation of Windows
How DLL Files Works?
Most of the applications are not complete in themselves, and they store their code in different files so that those files can also be used by some other applications. When the said application runs, the related file is loaded into the memory and used by the program. If the Operating System or Software does not find the related DLL file or if the related DLL file is corrupted, you will face the missing or not found error message.

Since DLL files are an important part of all the programs and are very common, they are often the source of errors. Troubleshooting of DLL files and its error is difficult to understand because one DLL file is associated with many programs. Therefore, you will need to follow each & every method to find the root cause of the error and fix its problem.
Fix DLL Not Found or Missing on your Windows Computer
Make sure to create a restore point just in case something goes wrong.
Note: If you’re unable to access Windows normally due to DLL error, you may Enter Safe Mode to follow any of the below-listed methods.
Several ways are using which you can solve the problem of DLL missing or not found. Fixing a DLL error could take as long as one hour, depending on the problem’s error and cause. It takes a long time to solve the problem, but it is pretty easy to do so.
Below are the given ways by which you can solve the problem of DLL not found or missing. You can fix them, repair them, update them without downloading them from the Internet.
Method 1: Check For Updates
Sometimes a program does not run or shows such error because maybe your computer is missing a very crucial update. Sometimes, this problem can easily solve by just updating your software. To check if there are any updates available, follow the below steps:
- Press Windows key or click on the Start button then click on the gear icon to open Settings.
- Click on Update & Security from the Settings window.
- Now click on Check for Updates.

- Below screen will appear with updates available begin to download.
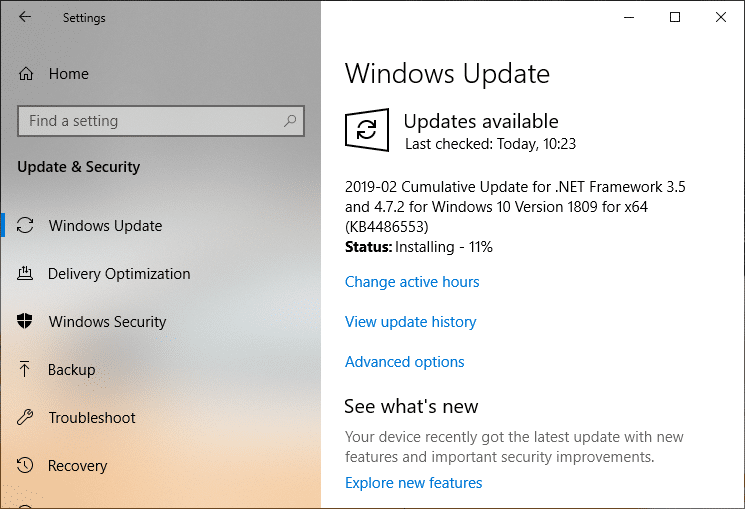
After the downloading is complete, Install them, and your computer will become up-to-date. See if you’re able to Fix DLL Not Found or Missing Error, if not then continue with the next method.
Method 2: Restart Your Computer
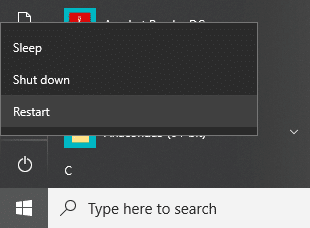
It is possible that DLL error that is occurring is due to some files and temporarily and restarting of the computer may solve the problem without going any deep to resolve the problem. To restart the computer follow the below steps:
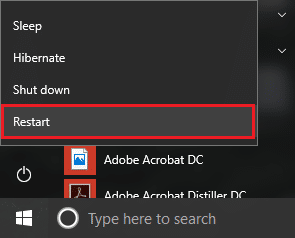
- Click on the Start Menu and then click on the Power button available at bottom left corner.
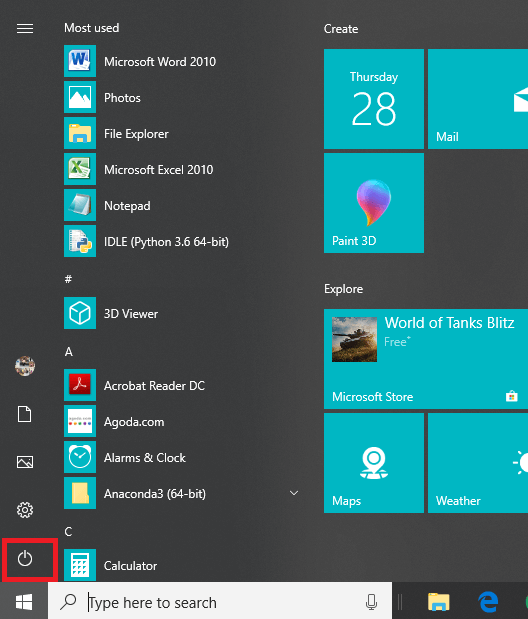
- Now click on Restart and your computer will restart itself.
Method 3: Restore the deleted DLL from Recycle Bin
You may have accidentally deleted any DLL considering it as of no use as it is deleted and not available, so it is showing a missing error. So, simply restoring it from recycle bin can fix DLL Not Found or Missing Error. To restore deleted DLL file from recycle bin follow below steps:
- Open the Recycle bin by clicking on the recycling bin icon present on the desktop or searching it using the search bar.
- Look for the DLL file you have deleted by mistake and right-click on it and select Restore.

- Your file will be restored at the same location from where you have deleted it.
Method 4: Run a Virus Or Malware Scan
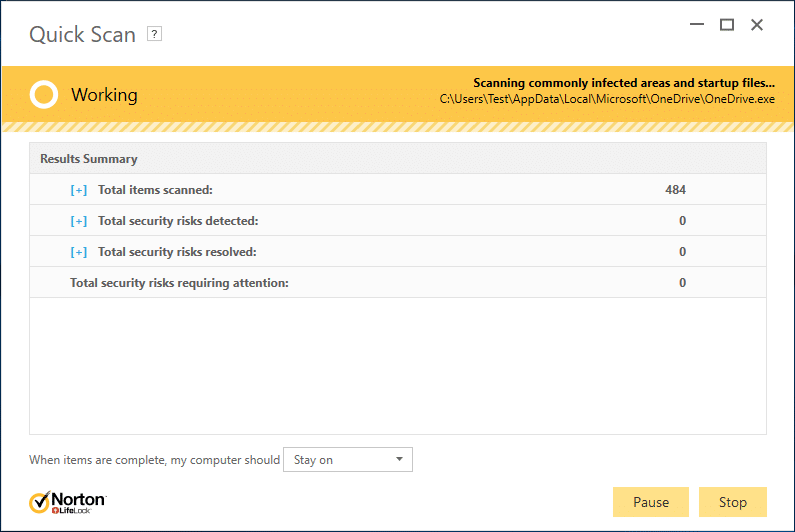
Sometimes, some virus or malware may attack your computer, and your DLL file is damaged by it. So, by running a virus or malware scan of your whole system, you will get to know about the virus causing the problem to DLL file, and you can remove it easily. Therefore, you should scan your anti-virus software system and get rid of any unwanted malware or virus immediately .
Method 5: Use System Restore
DLL error can also occur due to any change made in the registry or other system configuration. Therefore, by restoring the changes, you have just made can help to resolve the DLL error. To Restore the current changes you have made, follow the below steps:
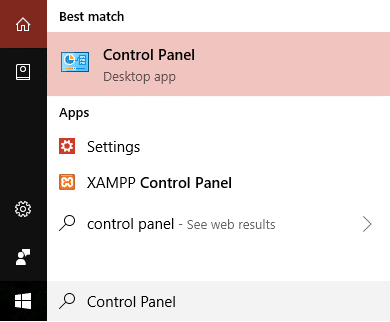
- Type control in Windows Search then clicks on the “ Control Panel ” shortcut from the search result.
- Switch the ‘ View by ’ mode to ‘ Small icons ’.
Click on ‘ Recovery ’.
Click on ‘ Open System Restore ’ to undo recent system changes. Follow all the steps needed.

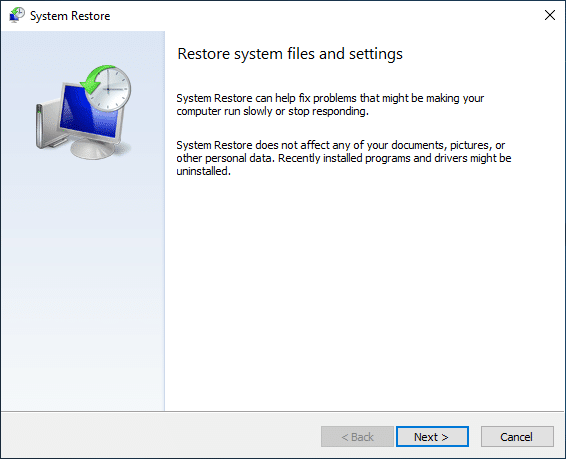
- Now, from the Restore system files and settings window click on Next.
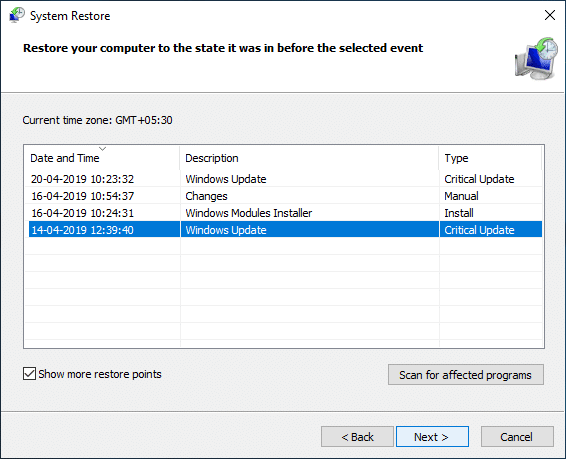
- Select the restore point and make sure this restored point is created before facing the DLL Not Found or Missing Error.

- If you can’t find old restore points then checkmark “ Show more restore points ” and then select the restore point.
Click Next and then review all the settings you configured.
Finally, click Finish to start the restore process.

Method 6: Use System File Checker
System File Checker is the utility that identifies and restores corrupted files. It is the most potential solution. It involves the usage of the command prompt. To use System File Checker to solve the problem of DLL files follows the below steps:
- Press Windows Key + X then select Command Prompt (Admin).

- Enter the below command in command prompt and hit the enter button:
sfc /scannow

- Once the operation has completed, again enter the below command and hit the enter button.
DISM.exe /Online /Cleanup-image /Restorehealth

This may take some time. But once the above steps are completed, again run your program and this time most probably your DLL problem will be resolved.
If you’re still facing the issue, then you may also need to run Check Disk Scan . See if you’re able to fix DLL not found or missing error on your Windows Computer.
Method 7: Update System Drivers
If you’re still facing DLL errors, then the problem may be related to a particular piece of hardware, and you should update the appropriate drivers. For example, you see the error every time you plug in USB Mouse or Webcam then updating the Mouse or Webcam drivers may fix the issue. A high chance that the DLL error has been caused by faulty hardware or driver in your system. Updating and repairing the drivers for your hardware can help in fixing DLL Not Found or Missing Error.
Method 8: Clean Installation of Windows
Performing a clean installation of Windows can also solve this problem as a clean installation will remove everything from the hard drive and install a fresh copy of windows. For Windows 10, clean installation of Windows can be performed by resetting your PC. To Reset the PC follow below steps:
Note: This will delete all files & folders from your PC, so make sure you understand that.
- Restart your PC by clicking on the power button then select Restart and at the same time press shift button.
- Now from the Choose an option window, click on Troubleshoot.

- Next click on Reset your PC under Troubleshooter screen.

- You will be asked to choose an option from below files, select Remove everything.

- Click on Reset to reset the PC.

Your PC will start to reset. Once it resets completely, rerun your program, and your DLL error will be resolved.
Recommended:
- How to Remove Malware from your PC in Windows 10
- Windows 10 Clock Time Wrong? Here is how to fix it!
- Difference Between Google Chrome And Chromium?
- 6 Ways to Delete a Stuck Print Job in Windows 10
I hope this article was helpful, and you can now easily Fix DLL Not Found or Missing on your Windows Computer, but if you still have any questions regarding this guide then feel free to ask them in the comment’s section.
Cancel or Delete a Stuck Print Job in Windows 10: Printing job in windows 10 can be really demanding. Printers can turn out to be really frustrating as sometimes the printing queue gets stuck in between and there is no way either to cancel or delete the print job from the queue. To get the printing queue working and start printing your documents again the methods explained below can be really helpful in Windows 10.

- 6 Ways to Delete a Stuck Print Job in Windows 10
- Method 1: Manually Clear Print Queue
- Method 2: Cancel the stuck print job using the Command prompt (CMD)
- Method 3: Delete the stuck print job using services.msc
- Method 4: Delete the Stuck Print job using Devices & Printers
- Method 5: Remove the stuck print job by updating the Printer’s driver
- Method 6: Reinstall your Printer Drivers
6 Ways to Delete a Stuck Print Job in Windows 10
Make sure to create a restore point just in case something goes wrong.
Method 1:Manually Clear Print Queue
Command prompt can be used to stop and start the print spooler which can remove the stuck print job. To perform the process following steps should be followed:
1.Click the Start button or press the Windows key.
2.Type Command Prompt in the Search.
3.Right-click on Command Prompt and select Run as Administrator .

4.A new window of Command Prompt will open, type net stop spooler and then press Enter on the keyboard.

5.Open File Explorer on your system from the start menu, desktop or toolbar, alternatively you can press Windows key + E .
6.Locate the address bar in the file explorer window, and type C:\Windows\System32\Spool\Printers and press enter on the keyboard.

7.A new folder will open, select all the files in that folder by pressing Ctrl and A then pressing the delete key on the keyboard.

8.Close the folder and return to Command Prompt then type net start spooler and press Enter on the keyboard.

9.This is how you can make the stuck print job to work properly.
Method 2: Cancel the stuck print job using the Command prompt (CMD)
Command prompt can be used to delete the content of the Printers folder which can remove the stuck print job. This is one of the quickest ways to remove the stuck print job. To perform the process following steps should be followed.
1.Press Windows Key + X then select Command Prompt (Admin).
2.Type the following command into cmd and hit Enter:
net stop spooler

del %systemroot%\System32\spool\printers\* /Q /F /S

net start spooler

3.This will successfully Cancel or Delete a Stuck Print Job in Windows 10.
Method 3: Delete the stuck print job using services.msc
1.Press Windows Key + R to open Run dialog box then type services.msc and hit Enter.

2.In the services window, right-click on Print Spooler service and select “ Stop ”. In order to perform this, you have to be logged in as Administrator-mode.

3.Open File Explorer on your system from the start menu, desktop or toolbar, you can also press Windows key + E .
4.Locate the address bar in the file explorer window, and type C:\Windows\System32\Spool\Printers and press enter on the keyboard.
5.A new folder will open, select all the files in that folder by pressing Ctrl and A then pressing the delete key on the keyboard.
6.Close the folder return to the services window and again select the Print Spooler service, right click on it and select Start .

This method will successfully Cancel or Delete a Stuck Print Job in Windows 10 , but if you still stuck then follow the next method.
Method 4: Delete the Stuck Print job using Devices & Printers
If clearing the spooler and restarting it again is not working and you are still stuck with your print job then you can identify the document which is stuck and get it clear. Sometimes, a single document creates the whole problem. One document which is not able to be print will block the whole queue. Also, sometimes you might need to cancel all the printing documents and then forward them to printing again. To cancel or restart the printing process of a document you can follow these steps.
1.Press Windows Key to bring up search then type Control an click on Control Panel.
2.Click on Hardware and Sound then click on Devices and Printers .

3.In the new window, you can see all the printers which are connected to your computer.
4.Right click on the printer which is stuck and select See what’s printing .

5.In the new window, a list of all documents which are present in the queue will be present.
6.Select the first document in the list then right-click on it and select Restart from the list.

7.If the printer makes noise and starts to work then you are done here.
8.If the printer is still stuck then again right-click on the document and select Cancel.
9.If the problem still persists then in the printer window click on Printer and select Cancel All Documents .

After this, all documents in the print queue should disappear and you can give a command to the printer again and it should work fine.
Method 5: Remove the stuck print job by updating the Printer’s driver
If clearing the spooler and canceling or restarting the document from the printing queue does not works then you can try to update the printer’s driver to delete a stuck Print job in Windows 10. To update the driver follow these steps.
1.Press Windows key + X then select Device Manager.

2.Expand Print queues then select the printer for which you want to update the drivers.
3.Right-click on the selected Printer and select Update driver.

4.Select Search automatically for updated driver software.

5.Windows will automatically install the latest drivers available for your printer.

Manually Install the Latest Printer Drivers
1.Press Windows Key + R then type “ services.msc ” and hit enter.
2.Find Print Spooler service then right click on it and select Stop.
3.Again press Windows Key + R then type printui.exe /s /t2 and hit enter.
4.In the Printer Server Properties window search for the printer which is causing this issue.
5.Next, remove the printer and when asked for confirmation to remove the driver as well, select yes.

6.Now again go to services.msc and right-click on Print Spooler and select Start.

7.Next, navigate to your printers manufacturer website, download and install the latest printer drivers from the website.
For example , in case you have an HP printer then you need to visit HP Software and Drivers Downloads page . Where you can easily download the latest drivers for your HP printer.
8.If you’re still not able to cancel or remove a stuck print job in Windows 10 then you can use the printer software that came with your printer. Usually, these utilities can detect the printer on the network and fix any issues that are causing the printer to appear offline.
For example, you can use HP Print and Scan Doctor to fix any issues regarding HP Printer.
Method 6: Reinstall your Printer Drivers
1.Press Windows Key + R then type control printers and hit Enter to open Devices and Printers.

- Right-click on your printer and select “ Remove device ” from the context menu.

3.When the confirm dialog box appears , click Yes.

4.After the device is successfully removed, download the latest drivers from your printer manufacturer website .
5.Then reboot your PC and once the system restarts, press Windows Key + R then type control printers and hit Enter.
Note: Make sure your printer is connected to the PC via USB, ethernet or wirelessly.
6.Click on the “ Add a printer ” button under Device and Printers window.

7.Windows will automatically detect the printer, select your printer and click Next.

- Set your printer as default and click Finish.

This is how you can update the driver and after this, you can try to print the documents once again.
Recommended:
- How to Remove Malware from your PC in Windows 10
- Set Daily Bing Image As Wallpaper On Windows 10
- Restore Old Desktop Icons in Windows 10
- Fix Spacebar Not Working on Windows 10
I hope this article was helpful and you can now easily Cancel or Delete a Stuck Print Job in Windows 10 , but if you still have any questions regarding this guide then feel free to ask them in the comment’s section.
