The Print Spooler Service stores printing instructions in the Windows operating system that it gives to the printer to complete a print job. It generally holds all printing documents in the list and thereafter transfers them one by one to the printer. The FIFO or First-In-First-Out strategy is used for printing the remaining documents in the queue. Sometimes, a printer may get stuck or stop functioning. If you are also dealing with the same problem, read our guide to fix Local Print Spooler Service is not running error in Windows 10.

- Fix Local Print Spooler Service is not running in Windows 10
- Method 1: Start or Restart Print Spooler Service
- Method 2: Start or Restart Print Spooler Dependencies
- Method 3: Clear Spooled Files
- Method 4: Run Printer troubleshooter
- Method 5: Reinstall Printer Drivers
Fix Local Print Spooler Service is not running in Windows 10
What is Print Spooler Service? – Local Print Spooler Service is based on two essential files, namely, spoolss.dll and spoolsv.exe . Since it is not stand-alone software, it depends on these two services: Dcom and RPC . The Print Spooler Service will stop operating if any of the said dependency services fail.
Why Print Spooler Service is not working? – If the print spooler service is not running on Windows 10 in the background, your printer will no longer receive the request and thus, the print operation will be unsuccessful. Reasons for this are:
- Third-party applications blocking this service.
- Print Spooler dependent services stopped working.
- Printer driver might be corrupt or outdated.
Method 1: Start or Restart Print Spooler Service
Most print spooler errors are prompted by an inactive or malfunctioning Print Spooler service. So, simply restarting the service and all its dependencies should theoretically solve the issue. To fix Local Print Spooler Service is not running error in Windows, you have to first ensure that:
- Print Spooler Service is in an active state.
- Its dependencies are also active and running.
Step I: Launch Services Window
Launch the Run dialog box by holding Windows + R keys together.
Type services.msc and click OK to launch Services window.

Case I: If Print Spooler is Inactive,
- Right-click on Print Spooler service then select Properties as shown.

- Print Spooler Properties (Local Computer) window will appear. Set the Startup type to Automatic as depicted below.

- Click the Start button and wait for the service status to show Running .

- Click Apply > OK to save these modifications and close the window.
Case II: If Print Spooler is Active,
- Right-click on Print Spooler service and click on Restart as illustrated below.

- The Print Spooler will restart now. Click OK to exit the window.
Method 2: Start or Restart Print Spooler Dependencies
The Print Spooler Service will stop operating if any of the said dependency services fail. Hence, ensuring that these are running is equally important.
Step I: Launch Services Window
Launch the Run dialog box by holding Windows + R keys together.
Type services.msc and click OK to launch Services window.
Step II: Check Print Spooler Activity Status
- Right-click on Print Spooler and select Properties as shown.

Now, Print Spooler Properties (Local Computer) window will appear. Here, switch to the Dependencies tab.
Click on the Remote Procedure Call (RPC) icon. Two options will be expanded:
- DCOM Server Process Launcher
- RPC Endpoint Mapper
Make a note of these names and Exit the window.

Step III: Start DCOM Server Process Launcher Service
- Navigate to the Services window again and search for DCOM Server Process Launcher.

Right-click on DCOM Server Process Launcher and click on Properties.
In DCOM Server Process Launcher Properties (Local Computer) window, set the Startup type to Automatic as depicted below.

Here, click on Apply and then click on the Start button.
Now, wait for some time and click on OK to exit the Properties window.
Step IV: Start RPC Endpoint Mapper Service
Navigate to the Services window again and search for RPC Endpoint Mapper.
Right-click on RPC Endpoint Mapper and select Properties.

In RPC Endpoint Mapper Properties (Local Computer) window, set the Startup type to Automatic as earlier.
Click Apply followed by OK to exit the Properties window.
Method 3: Clear Spooled Files
If you hit Ctrl + P on a document with several pages, chances are, the print spooler service will have a tough time managing the print jobs and end up glitching . Luckily, you can clear the print queue (spool files) manually and then restart the service to pull things back to normal.
Note: Before we clear these files, we will stop the print spooler service and then, start it thereafter.
- Open Services window, locate Print Spooler and right-click on it then click Stop as illustrated below.

Press Windows key + E to open File Explorer .
Navigate to C:\Windows\System32\spool\PRINTERS as shown.

- Delete the files in PRINTERS folder by pressing Ctrl + A keys and then, Delete key .

Now, Disconnect the printer from your Windows PC
Implement steps in Method 1 to start Print Spooler service.
- Reconnect your printer back to your PC and check if your printer works fine without any errors.
Method 4: Run Printer troubleshooter
Printer issues on Windows 10 are so abundant that Microsoft decided to include a troubleshooter for the same within the Operating system itself. The tool runs a bunch of pre-defined troubleshooting steps, for example, checking for spooler service errors, print queues, etc., and resolves them automatically.
Press Windows + I keys to launch Settings
Click the Update & Security tile as shown.

- Go to the Troubleshoot tab on the left pane.

- Click Additional Troubleshooters on the right pane.

- Under the Get up and running section, choose Printer troubleshooter, then click Run the troubleshooter button shown highlighted.

- This will launch the troubleshooter to begin Detecting problems as shown.

- Choose the printer you want to troubleshoot and click Next.

- Apply the fix as recommended by the troubleshooter and resume printing.
Method 5: Reinstall Printer Drivers
If your error message is regarding Print Spooler Service not running, simply replacing the current printer drivers, which are presumably corrupt or just outdated, with the latest set of driver files should settle any connection issue between the PC and the printer. Here’s how to do so:
- Press Windows + X keys . Click Device Manager from the given menu.

- Open the Print Queues category. Right-click on the connected Printer and click Uninstall device as illustrated below.

Now, disconnect the printer cable and restart the PC .
Once the PC has booted back on, ensure the internet connection is working perfectly and plug in the printer cable .
Windows will detect the connected hardware and automatically download & install the required driver files from the internet.
Q1. Why is my printer spooler service not running?
Ans. Your printer spooler service may not be running if it is being blocked by a third-party application, one or both of its dependent services are not running or the service failed to automatically get going on startup.
Q2. How do I start Print Spooler service in Windows 10?
Ans. To manually start the service, open the Services application and locate the Print Spooler service. Select it and click on the Start option that appears over the service description.
Recommended: How to Get Your Printer Back Online in Windows 10
Fix Printer Spooler Errors on Windows 10: Isn’t frustrating that you give your printer command to print some important documents and it got stuck? Yes, it is a problem. If your printer is denying to print something, most probably it is printer spooler error. Most of the times when the printer resists printing on Windows 10, it is print spooler service error. Many of us may be not aware of this term. So let’s start with understanding what exactly printer spooler is all about.

Print spooler is a Windows service that manages and handles all printer interactions that you send to your printer. Problems in this service is that it will stop printing operation on your device. If you have tried restarting your device and printer but the problem still persists, you do not have to worry because we have the solutions to fix printer spooler errors on Windows 10.
- Fix Printer Spooler Errors on Windows 10
- Method 1 – Restart the Print Pooler service
- Method 2 – Ensure Print Spooler service is set to Automatic start
- Method 3 – Change the Recovery options for Print Spooler
- Method 4 – Delete Print Spooler Files
- Method 5 – Update Printer Driver
Fix Printer Spooler Errors on Windows 10
Make sure to create a restore point just in case something goes wrong.
Method 1 – Restart the Print Pooler service
Let’s start with restarting the printer spooler service to fix this problem.
1.Press Windows +R and type services.msc and hit Enter or Press OK button.

2.Once the services window open, you need to locate Print Spooler and restart it. To do so, right-click on Print Spooler service and select Restart from the context menu.

Now give the print command to your printer again and check if you’re able to F ix Printer Spooler Errors on Windows 10. Your printer will start working again. If the problem still persists, move to the next method.
Method 2 – Ensure Print Spooler service is set to Automatic start
If print spooler service is not set to automatic, then it would not automatically start when Windows boots up. It means your printer will not work. This could be one of the causes of printer spooler error on your device. You have to manually set it to automatic if it is not already set.
1.Press Windows Key + R then type services.msc and hit Enter.
2.Locate Print Spooler service then right-click on it and choose Properties.

3.From Startup type drop-down select Automatic and then click Apply followed by OK.

Now check if your printer is started working or not. If not then continue with the next method.
Method 3 – Change the Recovery options for Print Spooler
Any incorrect recovery settings configuration of the print spooler service may also cause the issue with your device. Therefore, you need to make sure that recovery settings are correct otherwise Printer spooler will not start automatically.
1.Press Windows + R and type services.msc and hit Enter.
2.Locate Print Spooler then right-click on it and select Properties.
3.Switch to the Recovery tab and ensure that three failure tabs are set to Restart the Service.

- Click Apply followed by OK to save the settings.
Now see if you’re able to Fix Printer Spooler Errors on Windows 10.
Method 4 – Delete Print Spooler Files
If there are several pending printing jobs then this may cause trouble for your printer to run printing command. Thus, deleting print spooler files may solve the error.
1.Press Windows + R and type services.msc and hit Enter.
2.Right-click on the Print Spooler service then select Properties.

3.Click on Stop in order to stop the Print Spooler service then minimize this window.

4.Press Windows + E to open Windows File Explorer.

5.Navigate to the following location under the address bar:
C:\Windows\System32\spool\PRINTERS:
If Windows prompts you Permission, you need to click on Continue.
6.You need to delete all files in the PRINTER folder. Next, check if this folder is completely empty or not.
7.Now open Control Panel on your device. Press Windows + R and type Control and hit Enter.

8.Locate the View Devices and Printers.
9.Right-click on the Printer and select Remove Printer option to remove the printer from your device.

10.Now open the Services window again from the taskbar.
11.Right-click on the Print Spooler service and choose Start.

12.Return back t o Device and Printer section inside the control panel.
13.Right-click on the blank area under the above window and select Add a Printer option.

- Now follow the on-screen instructions carefully to add a printer on your device.
Now you can check if your printer has started working again or not. Hopefully, this will Fix Printer Spooler Errors on Windows 10.
Method 5 – Update Printer Driver
One of the most common and forgetful areas of this cause is an obsolete or older version of the printer driver. Most of the people forget to update the Printer driver. To do this, you need to open Device manager on your device
1.Press Windows + R and Type devmgmt.msc to open device manager window.

2.Here you need to locate the printers section and right-click on it to select Update Driver option.

Windows will automatically find the downloadable files for the driver and update the driver.
Recommended:
- Google Chrome Not Responding? Here Are 8 Ways To Fix It!
- Disable the User Account Control (UAC) in Windows 10
- Fix Cannot Create HomeGroup On Windows 10
- How To Delete Temporary Files In Windows 10
Hopefully, above mentioned all methods will Fix Printer Spooler Errors on Windows 10 . If you still experience any trouble regarding this guide then feel free to ask any questions in the comment’s section.
Fix Windows could not start the Print Spooler service on local computer: If you are unable to print and receives the above error message then you are at the right place as today we are going to discuss on how to resolve this error message. The error clearly states that the Print Spooler service cannot be started, so what does this print spooler do? Well, all the printing related jobs are managed by a Windows service called Print Spooler. The print spooler helps your Windows to interact with the printer, and orders the print jobs in your queue. If the Print Spooler service fails to start you will receive the following error message:
Windows could not start the Print Spooler service on Local Computer. Error 1068: The dependency service or group failed to start.

The above error message is only displayed when you try to start Print Spooler services in services.msc window. So without wasting any time let’s see how to actually Fix Windows could not start the Print Spooler service on local computer error with the help of below-listed troubleshooting guide.
- Fix Windows could not start the Print Spooler service on local computer
- Method 1: Run Printer Troubleshooter
- Method 2: Registry Fix
- Method 3: Start Print Spooler Services
- Method 4: Run CCleaner and Malwarebytes
- Method 5: Delete all the files in PRINTERS folder
- Method 6: Run System File Checker (SFC) and Check Disk (CHKDSK)
- Method 7: Uncheck Allow service to interact with desktop
Fix Windows could not start the Print Spooler service on local computer
Make sure to create a restore point just in case something goes wrong.
Method 1: Run Printer Troubleshooter
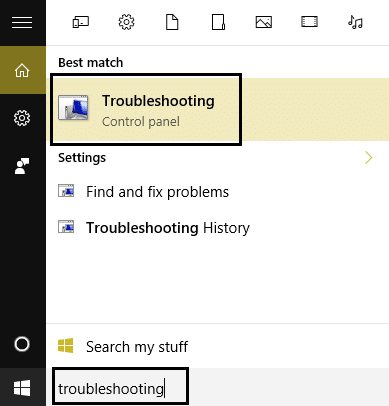
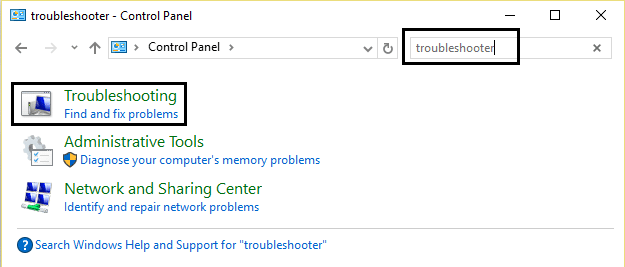
1.type “troubleshooting” in Windows Search bar and click on Troubleshooting.
6.Next, from the left window pane select View all.
7.Then from the Troubleshoot computer problems list select Printer.

8.Follow on-screen instruction and let the Printer Troubleshooter run.
9.Restart your PC and you may be able to Fix Windows could not start the Print Spooler service on local computer.
Method 2: Registry Fix
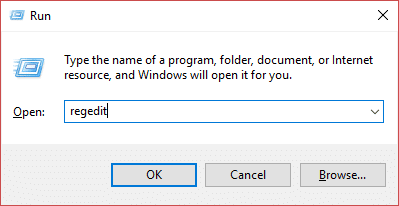
1.Press Windows Key + R then type regedit and hit Enter to open Registry Editor.

2.Navigate to the following registry key:
HKEY_LOCAL_MACHINE\SYSTEM\CurrentControlSet\Services\Spooler
3.Make sure to highlight Spooler key in the left window pane and then in the right window pane find the string called DependOnService.

4.Double click on the DependOnService string and change its value by deleting HTTP part and just leaving the RPCSS part.

5.Click OK to save changes and close Registry Editor.
6.Reboot your PC and see if the error is resolved or not.
Method 3: Start Print Spooler Services
1.Press Windows Key + R then type services.msc and hit Enter.

2.Find Print Spooler service in the list and double-click on it.
3.Make sure the Startup type is set to Automatic and the service is running, then click on Stop and then again click on start in order to restart the service.
4.Click Apply followed by OK.
5.After that, again try to add the printer and see if you’re able to Fix Windows could not start the Print Spooler service on local computer.
Method 4: Run CCleaner and Malwarebytes
1.Download and install CCleaner & Malwarebytes.
- Run Malwarebytes and let it scan your system for harmful files.
3.If malware is found it will automatically remove them.
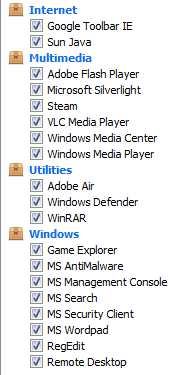
4.Now run CCleaner and in the “Cleaner” section, under the Windows tab, we suggest checking the following selections to be cleaned:
5.Once you’ve made certain the proper points are checked, simply click Run Cleaner, and let CCleaner run its course.
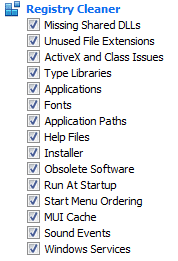
6.To clean your system further select the Registry tab and ensure the following are checked:
7.Select Scan for Issue and allow CCleaner to scan, then click Fix Selected Issues.
8.When CCleaner asks “ Do you want backup changes to the registry? ” select Yes.
9.Once your backup has completed, select Fix All Selected Issues.
10.Restart your PC to save changes. This would Fix Windows could not start the Print Spooler service on local computer error but if it didn’t, then run Adwcleaner and HitmanPro.
Method 5: Delete all the files in PRINTERS folder
1.Press Windows Key + R then type services.msc and hit Enter.
2.Find Print Spooler service then right-click on it and select Stop.
3.Now in the File Explorer navigate to the following folder:
C:\Windows\system32\spool\PRINTERS
Note: It will ask to continue then click on it.
- Delete all the files in PRINTERS folder (Not the folder itself) and then close everything.
5.Again go to services.msc window and s tart Print Spooler service.
6.Reboot your PC and see if you are able to Fix Windows could not start the Print Spooler service on local computer.
Method 6:Run System File Checker (SFC) and Check Disk (CHKDSK)
1.Press Windows Key + X then click on Command Prompt(Admin).

2.Now type the following in the cmd and hit enter:
Sfc /scannow

sfc /scannow /offbootdir=c:\ /offwindir=c:\windows

3.Wait for the above process to finish and once done restart your PC.
4.Next, run CHKDSK from here Fix File System Errors with Check Disk Utility(CHKDSK) .
5.Let the above process complete and again reboot your PC to save changes.
Method 7: Uncheck Allow service to interact with desktop
1.Press Windows Key + R then type services.msc and hit Enter.
2.Find Print Spooler service in the list then right-click on it and select Properties.
3.Switch to Log On tab and uncheck “ Allow service to interact with desktop. “

4.Click Apply and then go back to the General tab and start the service.
4.Again click Apply followed by OK.
5.Reboot your PC to save changes.
- Fix Brightness issues after Windows 10 Creators Update
- Fix Windows 10 Mail Error 0x80040154 or 0x80c8043e
- How To Fix Print Spooler Error 0x800706b9
- Fix Windows 10 Creator Update fails to install
That’s it you have successfully Fix Windows could not start the Print Spooler service on local computer but if you still have any queries regarding this post feel free to ask them in the comment’s section.
If you’re facing the error message “ The print spooler service is not running ” when you try to print a document or any file then don’t worry as we are going to see how to fix print spooler keeps stopping on Windows 10 issue . After facing this error, you may try to start the print spooler service but you will notice that it is automatically stopped after a few seconds. It seems like the print spooler service keeps crashing on Windows 10. But before going to fix the issue lets us see what this Print spooler actually is?

What is Print Spooler?
Print spooler is a utility program that comes with the Windows operating system which helps in managing all the print jobs users sent to their printer. The print spooler helps your Windows to interact with the printer, and orders the print jobs in your queue. If the print spooler service isn’t running, your printer won’t work.
Now you might be wondering what is the cause behind this error? Well, there can be many reasons why you’re facing this issue but the main cause seems to be the outdated, incompatible printer drivers. Normally if the print spooler service stops working, it will not pop-up or show any error or warning message. But in this case, you will receive an error message pop-up, so without wasting any time let’s see How to Fix Print Spooler Keeps Stopping Automatically with the help of the below-listed troubleshooting guide.
- Fix Print Spooler Keeps Stopping on Windows 10
- Method 1: Delete content from the Spool folder
- Method 2: Restart your Print Spooler service
- Method 3: Set Print Spooler Service to Automatic
- Method 4: Change the Print Spooler Recovery Options
- Method 5: Update your Printer driver
- Method 6: Take Ownership of spoolsv.exe
- Method 7: Delete unnecessary key from Registry
- Method 8: Reinstall your Printer Drivers
- Method 9: Scan your PC with Anti-Malware
Fix Print Spooler Keeps Stopping on Windows 10
Make sure to create a restore point just in case something goes wrong.
Method 1: Delete content from the Spool folder
Using this approach, you have to delete all the content inside the PRINTERS and drivers folder. This method works for all Windows OS right from Windows 10 till Windows XP. To solve using this approach, the steps are:
1.Open the File Explorer then navigate to the following path: C:\Windows\System32\spool
2.Double-click on “ drivers ” folder then delete all files & folders under it.

3.Similarly, you have to delete all contents from the PRINTERS folder and then restart the “ Print Spooler ” service.
4.Then reboot your system to save changes.
Method 2: Restart your Print Spooler service
In this approach, you have to restart your Print Spooler Services. To do this the steps are –
1.Press Windows Key + R then type “ services.msc ” (without quotes) and hit Enter to open the Services window.
2.Scroll down & look for Print Spooler service and then select it.

3.Right-click on Print Spooler service then select Restart.
4.Now check whether the printer is working or not. If your printer is working then this means you were able to Fix Print Spooler Keeps Stopping on Windows 10 issue.
Method 3: Set Print Spooler Service to Automatic
1.Use the keyboard shortcut key combination Windows key + R to open the Run application.
2.Type “ services.msc ” and hit Enter to open the Services window.

- Right-click Print Spooler & choose the Properties.

4.Change the “ Startup type ” to ‘ Automatic ’ from the drop-down list & then click Apply > OK.

See if you’re able to Fix Print Spooler Keeps Stopping on Windows 10 issue, if not then continue to the next method.
Method 4: Change the Print Spooler Recovery Options
In case the Print Spooler recovery settings are not configured properly, then in case of any failure, the print spooler will not restart automatically. To recover that the steps are –
1.Press Windows Key + R then type service.msc and hit Enter.
2.Right-click Print Spooler & select Properties.
3.Switch to the Recovery tab then make sure the First failure, Second failure, & Subsequent failures are set to “ Restart the Service ” from their respective drop-downs.

4.Then, click Apply followed by OK.
Method 5: Update your Printer driver
1.Press Windows Key + R then type “ services.msc ” and hit enter.
2.Find Print Spooler service then right-click on it and select Stop.

3.Again press Windows Key + R then type printui.exe /s /t2 and hit enter.
4.In the Printer Server Properties window search for the printer which is causing this issue.
5.Next, remove the printer, and when asked for confirmation to remove the driver as well, select yes.

6.Now again go to services.msc and right-click on Print Spooler and select Start.
7.Next, navigate to your printer manufacturer website, download and install the latest printer drivers from the website.
For example , in case you have an HP printer then you need to visit HP Software and Drivers Downloads page . Where you can easily download the latest drivers for your HP printer.
8.If you’re still not able to fix Print Spooler Keeps Stopping issue then you can use the printer software that came with your printer. Usually, these utilities can detect the printer on the network and fix any issues that are causing the printer to appear offline.
For example, you can use HP Print and Scan Doctor to fix any issues regarding HP Printer.
Method 6: Take Ownership of spoolsv.exe
1.Open the File Explorer then navigate to this path: C:\Windows\System32
2.Next, find ‘ spoolsv.exe ’ then right-click on it and select Properties.

3.Switch to the “ Security ” tab.
4.Now under Group and user names choose your user account & then click on the “ Advanced ” button.

5.Now click on “ Change ” next to the current Owner .

6.Now from the “ Select User or Group ” window click on the Advanced button at the bottom.

7.Next, click on Find Now then select your user account then click OK.

8.Again click OK on the next window.

9.You will be again on the Advanced Security Settings window of spoolsv.exe , just click Apply followed by OK.

10.Now under spoolsv.exe Properties window , select your user account (which you selected in step 7) then click on the Edit button.

11.Checkmark “ Full control ” then click Apply followed by OK.

- Restart Print Spooler service (Run > services.msc > Print Spooler).
13.Reboot your system to apply changes and see if you’re able to Fix Print Spooler Keeps Stopping on Windows 10 issue .
Method 7: Delete unnecessary key from Registry
Note: Make sure to back up your Registry just in case something goes wrong then you can easily restore the registry using this backup.
1.Press Windows Key + R then type regedit and hit Enter to open Registry Editor.
2.Now navigate to the following registry key:
HKEY_LOCAL_MACHINE\SYSTEM\CurrentControlSet\Control\Print\Providers
3.Under Providers you will find two default sub-keys which are LanMan Print Services and Internet Print Provider.

4.Above two sub-keys are the default and should not be deleted.
5.Now apart from the above sub-keys delete any other key present under Providers.
6.In our case, there is an additional subkey which is Printing Services.
7.Right-click on Printing Services then select Delete.

8.Close Registry Editor & Restart Print Spooler service.
Method 8: Reinstall your Printer Drivers
1.Press Windows Key + R then type control printers and hit Enter to open Devices and Printers.

- Right-click on your printer and select “ Remove device ” from the context menu.

3.When the confirm dialog box appears , click Yes.

4.After the device is successfully removed, download the latest drivers from your printer manufacturer’s website .
5.Then reboot your PC and once the system restarts, press Windows Key + R then type control printers and hit Enter.
Note: Make sure your printer is connected to the PC via USB, Ethernet, or wirelessly.
6.Click on the “ Add a printer ” button under the Device and Printers window.

7.Windows will automatically detect the printer, select your printer and click Next.

- Set your printer as default and click Finish.

Method 9: Scan your PC with Anti-Malware
Malware can cause tremendous trouble in printing services. It can corrupt system files or may change any values in the registry. The possibilities of creating issues by malware are endless. So, it is recommended to download and install applications like Malwarebytes or other anti-malware applications to scan for malware in your system. Scanning your PC for malware may fix the Print Spooler stopping issue.
1.Download and install CCleaner & Malwarebytes.
- Run Malwarebytes and let it scan your system for harmful files.

3.If malware is found it will automatically remove them.
4.Now run CCleaner and in the “Cleaner” section, under the Windows tab, we suggest checking the following selections to be cleaned:
5.Once you’ve made certain the proper points are checked, simply click Run Cleaner, and let CCleaner run its course.
6.To clean your system further select the Registry tab and ensure the following are checked:
7.Select Scan for Issue and allow CCleaner to scan, then click Fix Selected Issues.
8.When CCleaner asks “ Do you want backup changes to the registry? ” select Yes.
9.Once your backup has completed, select Fix All Selected Issues.
10.Restart your PC to save changes.
Recommended:
- Kill Resource Intensive Processes with Windows Task Manager (GUIDE)
- Clear Clipboard using Command Prompt or Shortcut
- What is a VPN and how it works?
- Install Group Policy Editor (gpedit.msc) on Windows 10 Home
I hope this article was helpful and now you can easily Fix Print Spooler Keeps Stopping on Windows 10 , but if you still have any questions regarding this tutorial then feel free to ask them in the comment section.
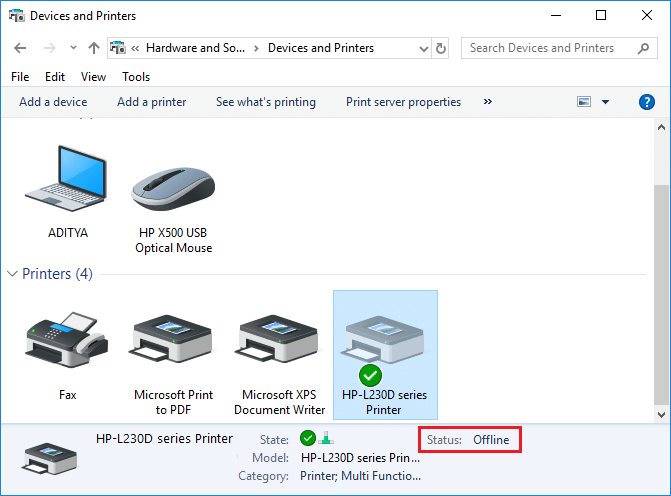
How to Get Your Printer Back Online: There may be situations where you need to print any file for an urgent meeting and you need to submit those files in 30 minutes. So what you usually do is open the file and go to print option to print the document. But suddenly you noticed that in the bottom right corner of your system the status of your printer is showing as offline. This is a usual problem for users because even when your Printer is clearly ON and ready to print, the status is showing offline.
This is caused by the communication error viz The Active Directory Domain Services is Currently Unavailable error of the printer with your system. There is no particular cause for this error but the issue could be caused because of outdated or incompatible drivers, conflict of printer spooler services, a problem with physical or hardware connection of the printer to PC, etc. So without wasting any time let’s see How to Get Your Printer Back Online in Windows 10 with the help of the below-listed tutorial.
- How to Get Your Printer Back Online in Windows 10
- Method 1: Check Your Printer Connection
- Method 2: Update Printer Driver
- Method 3: Change the Printer Status
- Method 4: Restart Print Spooler Service
- Method 5: Use a Second Printer
- Method 6: Reinstall your Printer Drivers
How to Get Your Printer Back Online in Windows 10
Make sure to create a restore point just in case something goes wrong.
Method 1: Check Your Printer Connection
When there is an error showing your status of the printer as offline, the system wants to tell users that there is something wrong with the communication established between the printer and the system through the USB cable or network connection. To solve this issue the steps are:
- To restart your printer, off the power supply of the printer & then switch it ON again.
- Now again check the connection of your printer.
- If the connection of your system with the printer is made using a USB cable, make sure your cable is working properly and the connections to the ports are fitted tight. You could also switch the USB port to see if this resolves the problem.
- If the connection of your system with the printer is made through wired networks, check whether the connection to your cable is properly done or not. Also, you can check whether the signal to your printer is flashing or not.
- If the connection of your system with the printer is made through a wireless network, make sure your printer is connected to your computer network & the wireless icon will lit-up to show that you are connected.
If nothing works then you should try to run Printer Troubleshooter:
1.Type “troubleshooting” in Control Panel then click on Troubleshooting from the search result.
2.Next, from the left window pane select View all.
3.Then from the Troubleshoot computer problems list select Printer.
4.Follow on-screen instruction and let the Printer Troubleshooter run.
5.Restart your PC and you may be able to Get Your Printer Back Online in Windows 10, if not then continue with the next method.
Method 2: Update Printer Driver
1.Press Windows Key + R then type “ services.msc ” and hit enter.
2.Find Print Spooler service then right click on it and select Stop.
3.Again press Windows Key + R then type printui.exe /s /t2 and hit enter.
4.In the Printer Server Properties window search for the printer which is causing this issue.
5.Next, remove the printer and when asked for confirmation to remove the driver as well, select yes.
6.Now again go to services.msc and right-click on Print Spooler and select Start.
7.Next, navigate to your printers manufacturer website, download and install the latest printer drivers from the website.
For example , in case you have an HP printer then you need to visit HP Software and Drivers Downloads page . Where you can easily download the latest drivers for your HP printer.
8.If you’re still not able to fix Printer Offline Status then you can use the printer software that came with your printer. Usually, these utilities can detect the printer on the network and fix any issues that are causing the printer to appear offline.
For example, you can use HP Print and Scan Doctor to fix any issues regarding HP Printer.
Method 3: Change the Printer Status
1.Turn off your Printer and then again turn it back ON.
2.Now press the key combination Windows Key + I to open Settings.
3.Now click on “ Devices ” then from the left-hand side menu select “ Bluetooth & other devices ” option.

4.Under Related settings click on “ Devices and printers “.

5.Then, you have to right-click on the printer icon with a green check-mark and choose “ See what’s printing ”.

Note: If there is no default printer set, then right-click on your printer and select “ Set as default printer “.

6.You will see the printer queue, see if there are any unfinished tasks and make sure to remove them from the list.

7.Now from the printer queue window, select your Printer and uncheck the “Use Printer Offline” & “ Pause Printer ” option.

Method 4: Restart Print Spooler Service
1.Use the shortcut key combination Windows Key + R to open the Run application.
2.Now type in there “ services.msc ” and hit Enter or click OK.
3.Scroll down to look for “ Print Spooler ” from the service utility window an check whether the status is running or not.
4.If you cannot see the status, you can right-click on Print Spooler and choose “ Start ”.
5.Or else, double-click on Print Spooler service & make sure the Startup type is set to Automatic and the service is running, then click on Stop and then again click on start in order to restart the service.
6.Click Apply followed by OK.
7.After that, again try to add the printer and see if you’re able to Get Your Printer Back Online in Windows 10.
Method 5: Use a Second Printer
This approach of solving the issue will work only when the printer is connected via a network to the PC (instead of the USB cable). Otherwise, you can manually set your IP address for your printer.
1.Press Windows Key + I to open Settings then click on Devices.
2.From the left-hand menu click on “ Bluetooth & other devices “.
3.Now from the right window pane click on “ Devices and printers “.
4.Right-click on your printer and select Printer properties from the context menu.

5.Switch to Ports tab then click on the “ Add Port… ” button.

6.Choose “ Standard TCP/IP Port ” under Available port types and then click on the New Port button.

7.On the Add Standard TCP/IP Printer Port Wizard click on Next .

8.Now type in the Printers IP Address and Port name then click Next.

Note: You could easily find the IP address of your printer on the device itself. Or you could find these details on the manual that came with the printer.
9.Once you successfully added the Standard TCP/IP Printer, click Finish.

See if you’re able to Get Your Printer Back Online in Windows 10 , if not then you need to reinstall your printer drivers.
Method 6: Reinstall your Printer Drivers
1.Press Windows Key + R then type control printers and hit Enter to open Devices and Printers.
- Right-click on your printer and select “ Remove device ” from the context menu.
3.When the confirm dialog box appears , click Yes.
4.After the device is successfully removed, download the latest drivers from your printer manufacturer website .
5.Then reboot your PC and once the system restarts, press Windows Key + R then type control printers and hit Enter.
Note: Make sure your printer is connected to the PC via USB, ethernet or wirelessly.
6.Click on the “ Add a printer ” button under Device and Printers window.
7.Windows will automatically detect the printer, select your printer and click Next.
- Set your printer as default and click Finish.
Recommended:
- How to Change Default System Font in Windows 10
- What is an MKV file and how to open it?
- Fix Destination Path Too Long Error
- How to Find My Router’s IP Address?
I hope this article was helpful and now you can easily Get Your Printer Back Online in Windows 10 , but if you still have any questions regarding this guide then feel free to ask them in the comment’s section.
The Print Spooler Service stores printing instructions in the Windows operating system that it gives to the printer to complete a print job. It generally holds all printing documents in the list and thereafter transfers them one by one to the printer. The FIFO or First-In-First-Out strategy is used for printing the remaining documents in the queue. Sometimes, a printer may get stuck or stop functioning. If you are also dealing with the same problem, read our guide to fix Local Print Spooler Service is not running error in Windows 10.
- Fix Local Print Spooler Service is not running in Windows 10
- Method 1: Start or Restart Print Spooler Service
- Method 2: Start or Restart Print Spooler Dependencies
- Method 3: Clear Spooled Files
- Method 4: Run Printer troubleshooter
- Method 5: Reinstall Printer Drivers
Fix Local Print Spooler Service is not running in Windows 10
What is Print Spooler Service? – Local Print Spooler Service is based on two essential files, namely, spoolss.dll and spoolsv.exe . Since it is not stand-alone software, it depends on these two services: Dcom and RPC . The Print Spooler Service will stop operating if any of the said dependency services fail.
Why Print Spooler Service is not working? – If the print spooler service is not running on Windows 10 in the background, your printer will no longer receive the request and thus, the print operation will be unsuccessful. Reasons for this are:
- Third-party applications blocking this service.
- Print Spooler dependent services stopped working.
- Printer driver might be corrupt or outdated.
Method 1: Start or Restart Print Spooler Service
Most print spooler errors are prompted by an inactive or malfunctioning Print Spooler service. So, simply restarting the service and all its dependencies should theoretically solve the issue. To fix Local Print Spooler Service is not running error in Windows, you have to first ensure that:
- Print Spooler Service is in an active state.
- Its dependencies are also active and running.
Step I: Launch Services Window
Launch the Run dialog box by holding Windows + R keys together.
Type services.msc and click OK to launch Services window.
Case I: If Print Spooler is Inactive,
- Right-click on Print Spooler service then select Properties as shown.
- Print Spooler Properties (Local Computer) window will appear. Set the Startup type to Automatic as depicted below.
- Click the Start button and wait for the service status to show Running .
- Click Apply > OK to save these modifications and close the window.
Case II: If Print Spooler is Active,
- Right-click on Print Spooler service and click on Restart as illustrated below.
- The Print Spooler will restart now. Click OK to exit the window.
Method 2: Start or Restart Print Spooler Dependencies
The Print Spooler Service will stop operating if any of the said dependency services fail. Hence, ensuring that these are running is equally important.
Step I: Launch Services Window
Launch the Run dialog box by holding Windows + R keys together.
Type services.msc and click OK to launch Services window.
Step II: Check Print Spooler Activity Status
- Right-click on Print Spooler and select Properties as shown.
Now, Print Spooler Properties (Local Computer) window will appear. Here, switch to the Dependencies tab.
Click on the Remote Procedure Call (RPC) icon. Two options will be expanded:
- DCOM Server Process Launcher
- RPC Endpoint Mapper
Make a note of these names and Exit the window.
Step III: Start DCOM Server Process Launcher Service
- Navigate to the Services window again and search for DCOM Server Process Launcher.
Right-click on DCOM Server Process Launcher and click on Properties.
In DCOM Server Process Launcher Properties (Local Computer) window, set the Startup type to Automatic as depicted below.
Here, click on Apply and then click on the Start button.
Now, wait for some time and click on OK to exit the Properties window.
Step IV: Start RPC Endpoint Mapper Service
Navigate to the Services window again and search for RPC Endpoint Mapper.
Right-click on RPC Endpoint Mapper and select Properties.
In RPC Endpoint Mapper Properties (Local Computer) window, set the Startup type to Automatic as earlier.
Click Apply followed by OK to exit the Properties window.
Method 3: Clear Spooled Files
If you hit Ctrl + P on a document with several pages, chances are, the print spooler service will have a tough time managing the print jobs and end up glitching . Luckily, you can clear the print queue (spool files) manually and then restart the service to pull things back to normal.
Note: Before we clear these files, we will stop the print spooler service and then, start it thereafter.
- Open Services window, locate Print Spooler and right-click on it then click Stop as illustrated below.
Press Windows key + E to open File Explorer .
Navigate to C:\Windows\System32\spool\PRINTERS as shown.
- Delete the files in PRINTERS folder by pressing Ctrl + A keys and then, Delete key .
Now, Disconnect the printer from your Windows PC
Implement steps in Method 1 to start Print Spooler service.
- Reconnect your printer back to your PC and check if your printer works fine without any errors.
Method 4: Run Printer troubleshooter
Printer issues on Windows 10 are so abundant that Microsoft decided to include a troubleshooter for the same within the Operating system itself. The tool runs a bunch of pre-defined troubleshooting steps, for example, checking for spooler service errors, print queues, etc., and resolves them automatically.
Press Windows + I keys to launch Settings
Click the Update & Security tile as shown.
- Go to the Troubleshoot tab on the left pane.
- Click Additional Troubleshooters on the right pane.
- Under the Get up and running section, choose Printer troubleshooter, then click Run the troubleshooter button shown highlighted.
- This will launch the troubleshooter to begin Detecting problems as shown.
- Choose the printer you want to troubleshoot and click Next.
- Apply the fix as recommended by the troubleshooter and resume printing.
Method 5: Reinstall Printer Drivers
If your error message is regarding Print Spooler Service not running, simply replacing the current printer drivers, which are presumably corrupt or just outdated, with the latest set of driver files should settle any connection issue between the PC and the printer. Here’s how to do so:
- Press Windows + X keys . Click Device Manager from the given menu.
- Open the Print Queues category. Right-click on the connected Printer and click Uninstall device as illustrated below.
Now, disconnect the printer cable and restart the PC .
Once the PC has booted back on, ensure the internet connection is working perfectly and plug in the printer cable .
Windows will detect the connected hardware and automatically download & install the required driver files from the internet.
Q1. Why is my printer spooler service not running?
Ans. Your printer spooler service may not be running if it is being blocked by a third-party application, one or both of its dependent services are not running or the service failed to automatically get going on startup.
Q2. How do I start Print Spooler service in Windows 10?
Ans. To manually start the service, open the Services application and locate the Print Spooler service. Select it and click on the Start option that appears over the service description.
Recommended: How to Get Your Printer Back Online in Windows 10
