Encountering the “Active Directory Domain Services is Currently Unavailable” error can be a frustrating roadblock for those navigating the intricacies of network and directory management. If you find yourself facing this issue, you’re not alone. In this guide, we’ll explore the steps to troubleshoot and fix the “Active Directory Domain Services is Currently Unavailable” error.

- How to Fix The Active Directory Domain Services is Currently Unavailable
- Basic Troubleshooting Tips
- Method 1: Restart Print Spooler
- Method 2: Run the Windows Printer Troubleshooter
- Method 3: Repair System Files
- Method 4: Enable File & Printer Sharing
- Method 5: Run Antivirus Scan
- Method 6: Update Windows
- Method 7: Update Drivers
- Method 8: Reinstall Printer Drivers
- Method 9: Add Printer Manually
- Method 10: Recognize Printer using Other Applications
- Method 11: Change Permissions via Registry Editor
- Method 12: Install Network Protocols
- Method 13: Modify Trust Center Settings (Application Specific)
How to Fix The Active Directory Domain Services is Currently Unavailable
In this section, we have compiled a list of methods to resolve this error in your PC. The methods are arranged from basic to advanced levels to help you achieve the fix effectively and quickly.
Basic Troubleshooting Tips
Before trying the advanced troubleshooting methods, try these two basic tips to resolve this issue:
- Restart your PC.
- Ensure that the cables are correctly connected.
Method 1: Restart Print Spooler
Print Spooler is a software that helps Windows users to manage print jobs. Restarting the Print Spooler will resolve all the temporary glitches associated with the software. You can restart the Print Spooler from Services as discussed below:
Option I: Restart Directly
Launch the Run dialog box by pressing Windows + R keys simultaneously.
Type services.msc as follows and click OK .

Now, in the Services window, scroll down and search for Print Spooler, and right-click on it.
Select the Restart option as depicted.

- Wait until your screen gets refreshed after restarting the service.

Option II: Stop the Service and Start Again
Launch Run dialog box as done earlier.
Type services.msc as follows and click OK .

Now, in the Services window, scroll down and search for Print Spooler , and right-click on it.
Select the Stop option as depicted.

Now, press Windows + E keys together to open File Explorer .
Navigate to C:\Windows\System32\spool\PRINTERS
Note: You need admin rights to access this folder .

- Select all the files and delete them.

Again, navigate to the Services window and right-click on Print Spooler as you did earlier.
Now, select the Start option as shown.

- Finally, restart your PC and check if you have fixed the Active Directory Domain Services Windows 10 issue.
Method 2: Run the Windows Printer Troubleshooter
Running the Windows Printer Troubleshooter is the simplest way to resolve the Active Directory Domain Services is currently unavailable error message in your PC. All the corrupt and damaged files in your computer will be eliminated when you proceed with this process. Here are a few simple steps to run the Windows Printer Troubleshooter.
- Hit the Windows key . Type Troubleshoot settings in the search bar and open it.

- Now, click on Additional troubleshooters as depicted below.

- Select Printer, which is displayed under the Get up and running section as shown.

- Click Run the troubleshooter .

- If any issue is found in your system, click on Apply this fix and follow the instructions given in the successive prompts.

- Finally, restart your PC .
Method 3: Repair System Files
Windows 10 users can automatically scan and repair their system files by running System File Checker . In addition, it is a built-in tool that lets the user delete files and fix the Active Directory Domain Services is currently unavailable error message. Then, follow the below-mentioned steps to implement the same.
- Type Command Prompt in the Windows search bar and click Run as administrator .

Click Yes in the User Account Control prompt.
Now, type the chkdsk C: /f /r /x command and hit Enter key .

Note: If you are prompted with a message, Chkdsk cannot run…the volume is… in use process , press Y key and reboot your system.
- Again, type the sfc /scannow command and hit Enter key to SFC scan.
Note: The System File Checker will scan all the programs and repair them automatically in the background. You can continue your activities until the scan is complete.

- After completing the scan, it will show either of the messages:
- Windows Resource Protection did not find any integrity violations.
- Windows Resource Protection could not perform the requested operation.
- Windows Resource Protection found corrupt files and successfully repaired them.
- Windows Resource Protection found corrupt files but was unable to fix some of them.
Restart your PC and open Command Prompt as done earlier.
Type the following commands one by one and hit Enter key .
DISM.exe /Online /cleanup-image /scanhealth

DISM.exe /Online /cleanup-image /restorehealth

DISM /Online /cleanup-Image /startcomponentcleanup
Note: You have to be connected to a network to run DISM properly.

- Finally, wait for the process to run successfully and close the window .
Method 4: Enable File & Printer Sharing
The File and Printer Sharing feature is not enabled by default for all computers. Few public networks restrict these sharing accesses. You can enable file and printer sharing options if that concerns you.
Note: You may get several sharing options depending upon the version of Windows you use. Follow the steps according to the type of File & Printer Sharing options you have.
- Hit the Windows key . Type Control Panel and open it as shown below.

- Set View by as Category . Click on Network and Internet as depicted.

- Here, click on Network and Sharing Center as depicted.

- Here, click on Change advanced sharing settings as follows.

- Select the option Turn on file and printer sharing under File and Printer sharing and click Save changes .
Note: You need admin rights to save this change.

- In the Advanced sharing settings window, expand All Networks .

- Select Turn on sharing so anyone with network access can read and write files in the Public folders option.

- Finally, click on Save changes and restart your PC .
Method 5: Run Antivirus Scan
To avoid this error message, run an antivirus scan in your system and check if the problem is solved. Then, follow the below-mentioned steps to do so.
Press Windows + I keys together to open System Settings .
Here, click on Update & Security , as shown.

Click on Windows Security in the left pane.
Next, select the Virus & threat protection option under Protection areas .

- Click on Scan Options , as shown.

- You can choose Quick scan, Full scan, Custom scan, or Microsoft Defender Offline scan according to your need and click on Scan Now as highlighted.

7A. If there are any threats, click on Start Actions under Current threats .

7B. If your computer does not have any threats, the No current threats prompt will pop up as highlighted below.

Method 6: Update Windows
If you did not obtain any fix by the above methods, then there are few chances that you might have bugs in your system. If you use an outdated Windows version, the files in the system will not be compatible with the PC files leading to the Active Directory Domain Services is currently unavailable error message. Follow the below-mentioned steps to update your Windows OS.
Press the Windows + I keys together to open Settings in your system.
Now, select Update & Security .

- Now, select Check for Updates from the right panel.

4A. If a new update is available, click Install now to download and install the latest version.

4B. If your system is already up-to-date, then it will show You’re up to date message.

Method 7: Update Drivers
If you haven’t fixed the Active Directory Domain Services is currently unavailable error, try to add the printer again. A few printers are automatically added to your PC when installing the corresponding drivers. Now, you can try updating all your drivers as instructed below.
- Type Device Manager in the Windows 10 search menu and open it.

Double-click Print queues to expand it.
Now, right-click on the driver and click Update driver .

- Now, click on Search automatically for drivers .

5A. If the driver is outdated, the drivers will be updated to the latest version.
5B. If they are already in an updated stage, the screen displays the following message, The best drivers for your device are already installed . Click Close .

Method 8: Reinstall Printer Drivers
If updating drivers does not give you a fix, you can uninstall the drivers and install them again. Then, follow the below-mentioned steps to implement the same.
Launch the Device Manager using the steps mentioned above and expand Print queues by double-clicking on it.
Now, right-click on the driver and select Uninstall device .

- Confirm the prompt by clicking Uninstall .

- Visit the manufacturer’s website e.g. Intel .

Find & Download the drivers corresponding to the Windows version on your PC.
Once downloaded, double-click on the downloaded file and follow the given instructions to install it.
Method 9: Add Printer Manually
If you face this error after updating the driver, you can try reinstalling any particular printer where you face the Active Directory Domain Services is currently unavailable error.
Note: Microsoft Print to PDF is taken as an example below.
- Launch Control Panel by searching it as shown.

- Set the View by option to Large icons and select Devices and Printers as shown.
- Then, right-click on the printer and select Remove device option as depicted below.

- Click Yes in the User Account Control prompt to Remove Device .

- Later, click on Add a printer shown highlighted.

- Select The printer that I want isn’t listed option as shown highlighted below.

- Then, click on Add a local printer or network printer with manual settings as shown and click on Next .

- In the next window, click on PORTPROMPT: (Local Port) in the drop-down menu of Use an existing port and click on Next .

- Now, choose the Manufacturer and Printers and click on Next as highlighted.

- Rename the printer if needed and click on Next .

- Finally, wait for Windows to install the Printer.
Method 10: Recognize Printer using Other Applications
Another simplest method to fix this Active Directory Domain Services is currently unavailable issue is recognizing the printer using other applications.
Note: Here, Text Document is chosen as an example.
Right-click on an empty area of the Desktop .
Select New and then Text Document as depicted below.

- Open the document. Select File in the menu bar.

- Select Print .

- Click Find Printer in the Print window.

Method 11: Change Permissions via Registry Editor
If your PC does not have essential keys like PrinterPorts , you will probably face this Active Directory Domain Services is currently unavailable error message. You could correct them by tweaking the permission in the Registry editor as instructed below:
Press and hold Windows + R keys together to open Run dialog box.
Type regedit and hit Enter key to open Registry Editor .

Click Yes in the User Account Control prompt.
Now, navigate to the following path .
Computer\HKEY_CURRENT_USER\SOFTWARE\Microsoft\Windows NT\CurrentVersion

- Right-click on Devices in the left pane and select the Permissions option.

- Now, choose your account and select the box next to Full Control under Allow section.
Note: Make sure you have no items checked under Deny section.
- Click Apply and then OK .

- Repeat the same steps for PrinterPorts and Windows keys.

- Finally, update or reinstall the printers to implement the changes. Check if you have fixed the errors concerning Active Directory Domain Services Windows 10.
Method 12: Install Network Protocols
If your PC does not have all the necessary protocols for printing the document, you will face the Active Directory Domain Services is currently unavailable error message. You can manually install protocols on your PC by following the below-mentioned steps.
Hit Windows + I keys together to open Settings .
Select the Network & Internet option as shown.

Select Wi-Fi in the left pane.
Scroll down and click on Change adapter options as illustrated below.

- Right-click on the network and select the Properties option as shown.

- Here, click on the Install… option shown highlighted.

- Here, select the Protocol option and click on Add…

- Select all the protocols listed in the Network Protocol window and click OK .

- Follow the on-screen instructions to install. Finally, restart your PC .
Method 13: Modify Trust Center Settings (Application Specific)
If you face this Active Directory Domain Services is currently unavailable error message in Windows 10 for any particular Office applications like Word, Excel, etc., you could alter a few settings as instructed below:
- In your Office application , navigate to File from the menu bar followed by Options .

Then, click on Trust Center in the left pane.
Select the Trust Center Settings… button from the right pane.

Next, click on the Trusted Locations option in the left pane.
Check the box titled Allow Trusted Locations on my network (not recommended) and click OK.

- Restart the app and check if you can print the document now.
Recommended:
- Fix win32kfull.sys BSOD in Windows 10
- How to Perform Windows Defender Definition Update
- How to Install Software Without Admin Rights
- Fix Microsoft Setup Bootstrapper Has Stopped Working
If you have issues with your Printer, then it must be because of Windows 10 unable to communicate with Print Spooler. The Print Spooler is a Windows program responsible for managing all the print jobs associated with your Printer. Only with the help of print spooler, you can initiate prints, scans, etc. from your Printer. Now users are unable to use their printers and when they go to services.msc window to start Print Spooler services they face the following error message:
Windows could not start the Print Spooler service on Local Computer.
Error 0x800706b9: Not enough resources are available to complete this operation.

Now you know all about the error, it’s time we should see how to fix this annoying issue. So without wasting any time let’s see how to Fix Print Spooler Error 0x800706b9 with the help of below-listed troubleshooting guide.
- Fix Print Spooler Error 0x800706b9
- Method 1: Run Printer Troubleshooter
- Method 2: Start Print Spooler Services
- Method 3: Run CCleaner and Malwarebytes
- Method 4: Registry Fix
- Method 5: Delete all the files in PRINTERS folder
- Method 6: Create a New User Account
Fix Print Spooler Error 0x800706b9
Make sure to create a restore point just in case something goes wrong.
Method 1: Run Printer Troubleshooter
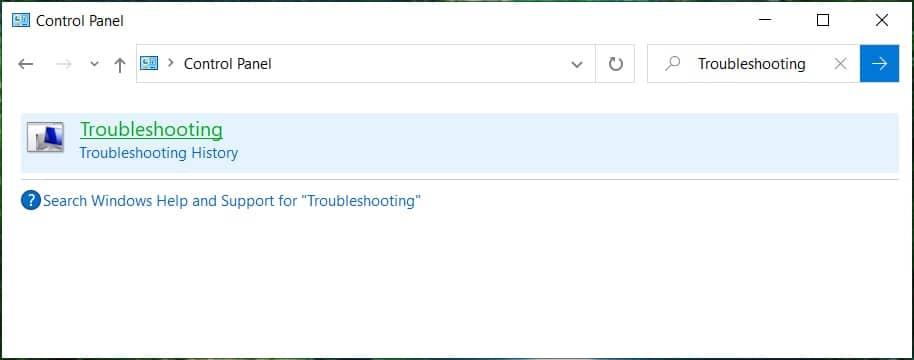
- Open Control Panel and search Troubleshooting in the Search Bar on the top right side and click on Troubleshooting.
Next, from the left window, pane select View all.
Then, from the Troubleshoot computer problems list select Printer.

Follow on-screen instruction and let the Printer Troubleshooter run.
Restart your PC, and you may be able to Fix Print Spooler Error 0x800706b9.
Method 2: Start Print Spooler Services
- Press Windows Key + R then type services.msc and hit Enter.

Find Print Spooler service in the list and double-click on it.
Make sure the Startup type is set to Automatic, and the service is running, then click on Stop and then again click on start to restart the service.

Click Apply, followed by OK.
After that, again try to add the printer and see if you’re able to Fix Print Spooler Error 0x800706b9.
Method 3: Run CCleaner and Malwarebytes
Download and install CCleaner & Malwarebytes.
Run Malwarebytes and let it scan your system for harmful files. If malware is found, it will automatically remove them.

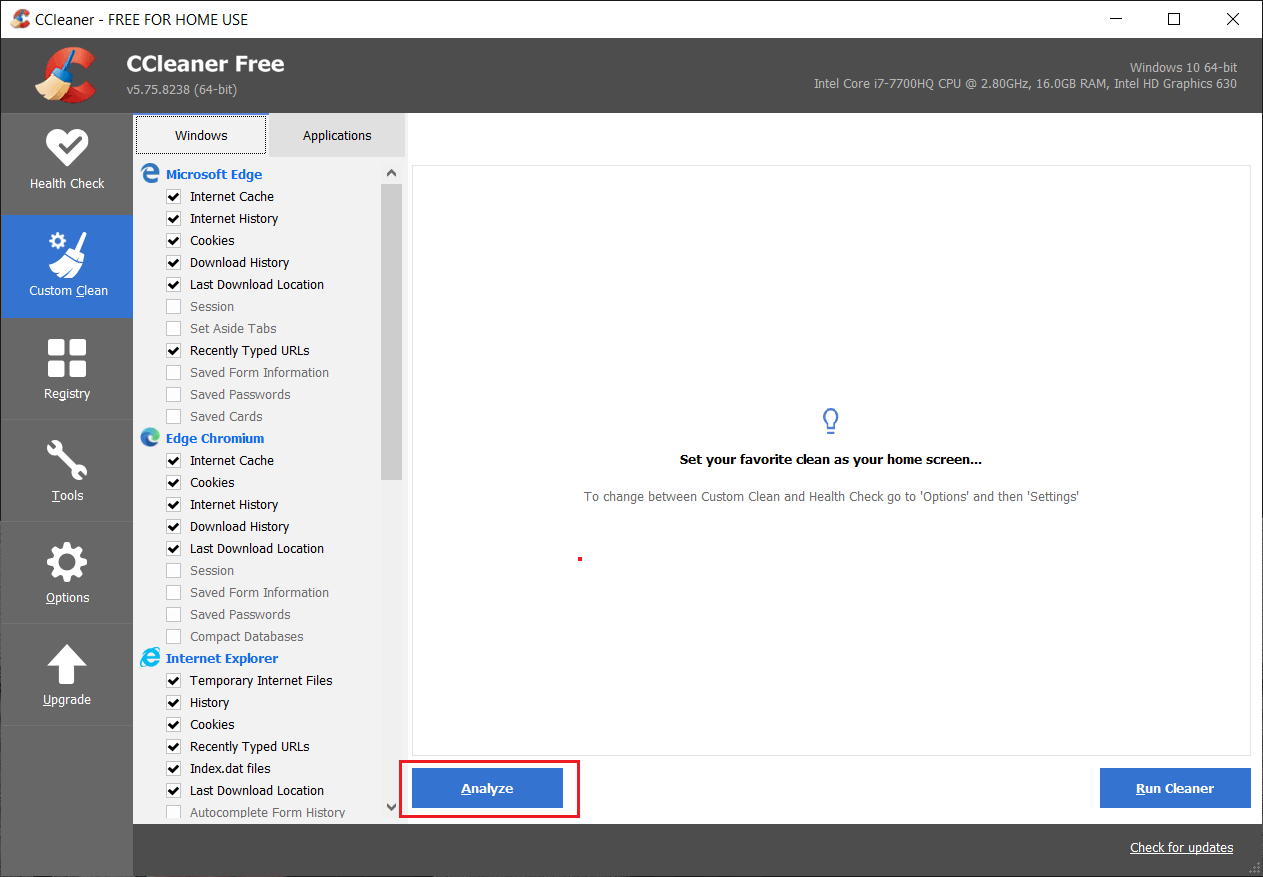
Now run CCleaner and select Custom Clean .
Under Custom Clean, select the Windows tab then make sure to checkmark defaults and click Analyze .
- Once Analyze is complete, make sure you’re certain to remove the files to be deleted.
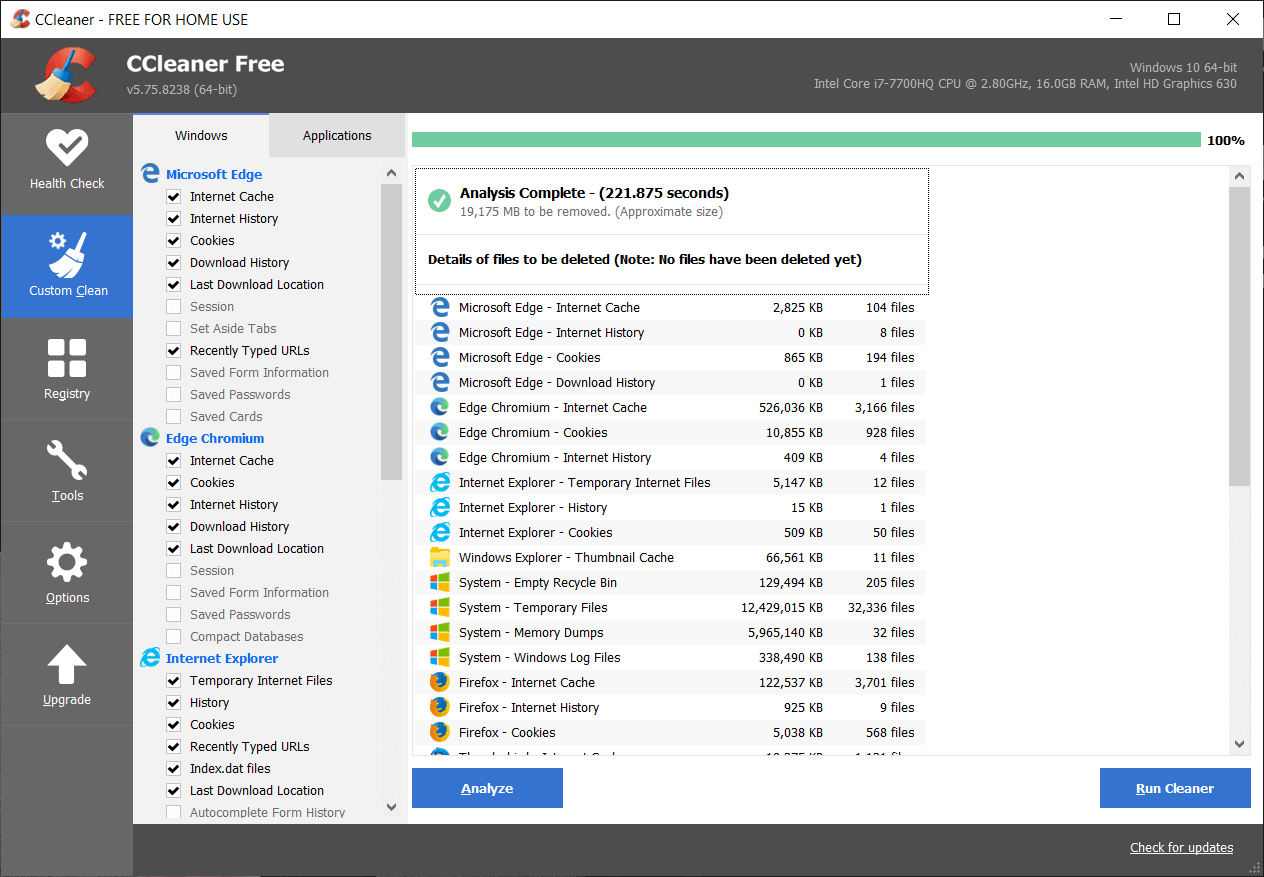
Finally, click on the Run Cleaner button and let CCleaner run its course.
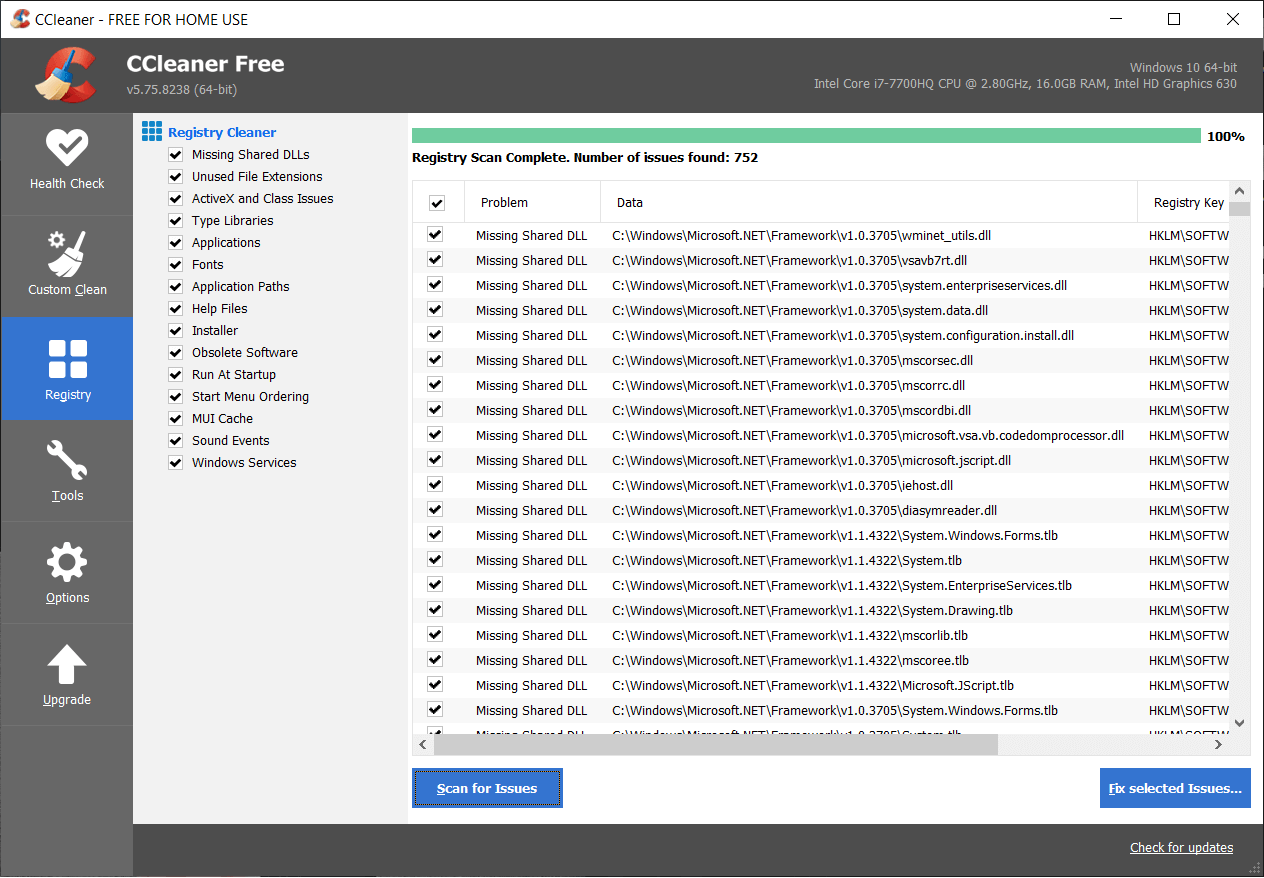
To further clean your system, select the Registry tab , and ensure the following are checked:
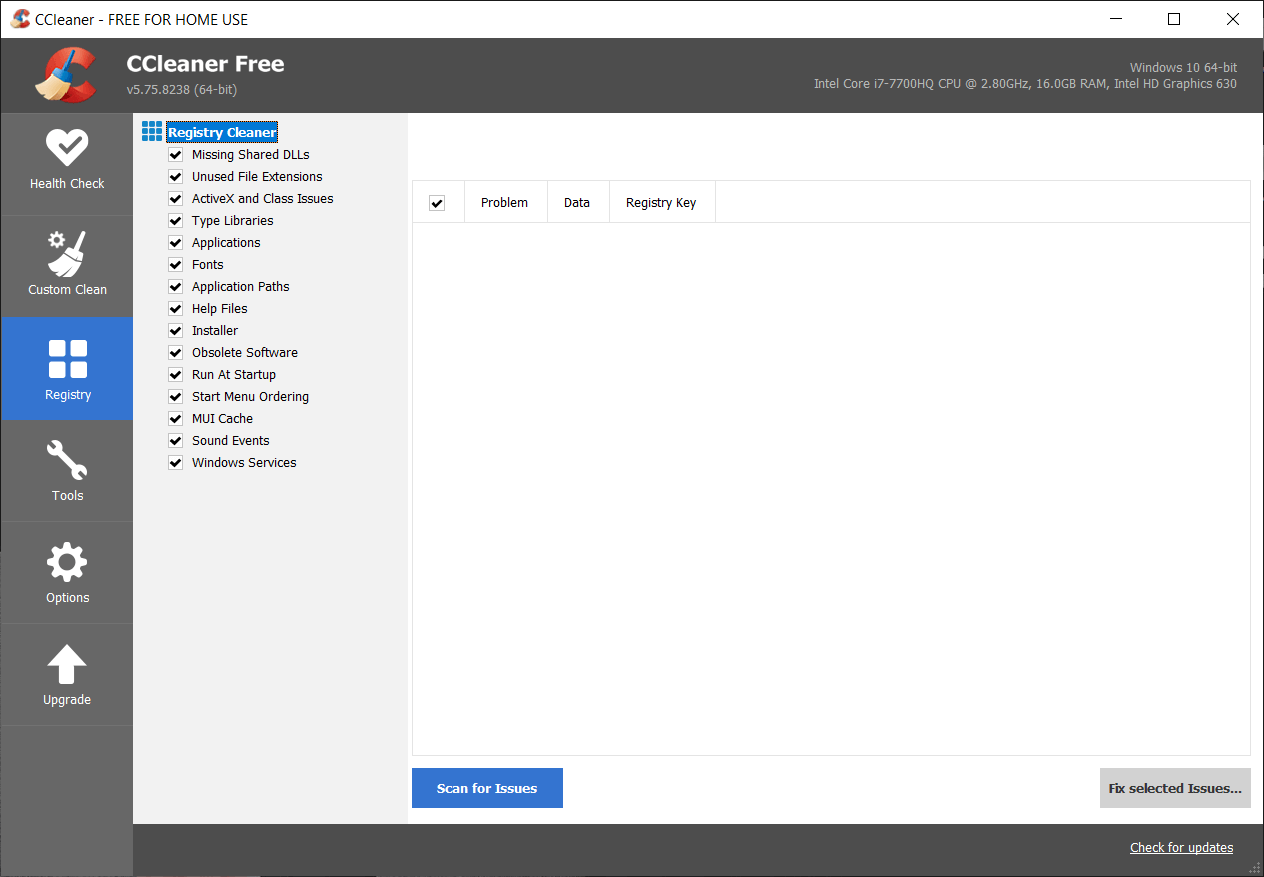
- Click on the Scan for Issues button and allow CCleaner to scan, then click on the Fix Selected Issues button.
When CCleaner asks “ Do you want backup changes to the registry? ” select Yes .
Once your backup has completed, click on the Fix All Selected Issues button.
Restart your PC to save changes.
Method 4: Registry Fix
- Press Windows Key + R then type regedit and hit Enter to open Registry Editor.

- Navigate to the following registry key:
HKEY_LOCAL_MACHINE\SYSTEM\CurrentControlSet\Services\Spooler
- Make sure to highlight Spooler key in the left window pane and then in the right window pane find the string called DependOnService.

- Double click on the DependOnService string and change its value by deleting the HTTP part and leaving the RPCSS part.

Click OK to save changes and close Registry Editor.
Reboot your PC and see if the error is resolved or not.
Method 5: Delete all the files in PRINTERS folder
- Press Windows Key + R then type services.msc and hit Enter.
- Find Print Spooler service then right-click on it and select Stop.
- Now in the File Explorer navigate to the following folder:
C:\Windows\system32\spool\PRINTERS
Note: It will ask to continue then click on it.
Delete all the files in PRINTERS folder (Not the folder itself) and then close everything.
Again go to services.msc window and s tart Print Spooler service.

- Reboot your PC and see if you can Fix Print Spooler Error 0x800706b9.
Method 6: Create a New User Account
- Press Windows Key + I to open Settings and then click Accounts.

2.Click on Family & other people tab in the left-hand menu and click Add someone else to this PC under Other people.

- Click, I don’t have this person’s sign-in information in the bottom.

- Select Add a user without a Microsoft account in the bottom.

- Now type the username and password for the new account and click Next.

Sign in to this new user account and see if the Printer is working or not. If you are successfully able to Fix Print Spooler Error 0x800706b9 in this new user account, then the problem was with your old user account which might have got corrupted, anyway transfer your files to this account and delete the old account to complete the transition to this new account.
Recommended:
- Fix Can’t turn on Windows Firewall Error code 0x80070422
- How To Fix Windows 10 Mail Error 0x80040154 or 0x80c8043e
- Fix Something Went Wrong While Syncing Mail App In Windows 10
- Fix There was a Problem Sending the Command to the Program
That’s it you have successfully Fix Print Spooler Error 0x800706b9 but if you still have any questions regarding this post feel free to ask them in the comment’s section.
Does your printer fail to respond when you give the print command? If yes, there is no need to panic as you are not alone. Numerous people have encountered this problem while attempting to print documents from Windows 10 computer. A corrupt, obsolete, or damaged printer driver is the primary cause of this vexing Printer not responding error . The good news is that you can quickly resolve this issue by implementing the step-by-step methods listed in this guide.
Why is my device showing Printer driver is unavailable?
There are several reasons for the printer to become unresponsive and you can begin by testing the following:
- Check if the printer cables are properly attached to the computer
- Check if the printer is connected to Wi-Fi
- Make sure that the ink cartridges are not empty
- Check your system for alert lights or error messages
- If you just upgraded your computer from Windows 7 or 8 to Windows 10 and started facing printer issues, the update may have corrupted the printer driver
- It is possible that the original printer driver is incompatible with the latest version of Windows OS
Microsoft had stated that when Windows 10 was released, there would be no built-in backward compatibility with some apps and applications. However, numerous printer manufacturers were unable to update their drivers in time, which complicated the situation further.

What is the use of a printer driver?
Prior to understanding how to resolve the Printer not responding issue , it is imperative to learn about the printer drivers. It is a simple application that is mounted on the Windows 10 computer that allows interaction between the PC and the printer.
It performs two critical roles:
- The first function is to act as a link between the printer and your device. It allows your computer to recognize the printer hardware, its features, and specifics.
- Secondly, the driver is accountable for converting the print job data to signals which can be understood & implemented by the printer.
Each printer comes with its own special driver that is tailored to different operating system profiles such as Windows 7, Windows 8, or Windows 10. If your printer is not programmed correctly or mounts the wrong system driver, the computer would be unable to find it & process a print job.
Certain printers, on the other hand, can utilize generic drivers offered by Windows 10. This enables you to print without the need to install external vendor drivers.
- Fix Printer Not Responding Error in Windows 10
- Method 1: Run Windows Update
- Method 2: Update Your Printer Drivers
- Method 3: Reinstall Printer Driver
- Special Mention: Only for Plug–and–Play Printers
Fix Printer Not Responding Error in Windows 10
If you’re unable to print any internal document or a file that you downloaded from the internet then you may be facing the Printer driver is unavailable error. To resolve the printer not responding error, you can follow the below-listed troubleshooting steps.
Method 1: Run Windows Update
One possible reason for your Windows 10 computer to display the ‘Printer Driver is Unavailable’ error is because you are running an out-of-date operating system. To update your Windows OS, follow the below steps:
- Click the Start button and navigate to the Settings icon.
- Select Update & Security .

- Windows will check for updates and, if found, will automatically download and install them.

- Now, Restart your computer once the update process is complete.
You can now check if you’re able to fix printer is not responding error.
Method 2: Update Your Printer Drivers
To update your printer drivers, you can download the latest drivers from the manufacturer’s website. Drivers can also be downloaded from the manufacturer’s support site. To install the printer drivers downloaded from the manufacturer’s website, follow these steps:
- Search for Control Panel in the Windows search bar then click on the Control Panel from the search results.

- Make sure to select ‘ Large Icons ‘ from the ‘ View by: ‘ dropdown. Now look for Device Manager and click on it.

- Under the Device Manager window, locate the printer for which you want to install drivers for.

- Right-click the name of the printer and select Update Driver Software from the accompanying pop-up menu.

A new window will appear. If you’ve already downloaded drivers from the manufacturer’s website, choose the Browse my computer for driver software option.
Next, click on the Browse button and navigate to the place where you have downloaded the printer drivers from the manufacturer’s website.

Follow the on-screen instructions to install the drivers manually.
If you don’t have the downloaded drivers then select the option labeled Search automatically for updated driver software.

- Follow on-screen instructions to install the latest printer drivers.
Restart your PC and see if you’re able to fix the printer not responding issue.
Method 3: Reinstall Printer Driver
If you cannot print your document because of the error message ‘printer driver is unavailable,’ the best course of action would be to reinstall the printer driver. Follow these steps to fix printer is not responding error:
- Press Windows Key +R then type devmgmt.msc and click on OK.

- The Device Manager window will open. Expand Print queues and find your printer device.

Right-click on your printer device (with which you are facing the issue) and select Uninstall device option.
Remove the device from printer queues and restart your PC to finish the uninstallation.
After restarting your device, re-open Device Manager and click on Action .

- From the Action menu select Scan for hardware changes .

Windows will now reinstall the appropriate printer driver on your computer. Finally, restart the device and see if your printer is responding and you’re able to print your documents.
Special Mention: Only for Plug–and–Play Printers
After you reinstall the printer drivers, Windows will automatically detect your Printer. If it recognizes the printer, proceed with the on-screen instructions .
Unplug the printer from your computer. Also, remove any cords and wires that are connected between them.
Reconnect all and follow the Setup Wizard process.
If the Wizard is unavailable, navigate to Start > Settings > Devices > Printers & Scanners > Add a Printer or Scanner.

Q1. What should I do if my Printer Driver is not Installing?
If nothing happens when you double-click the installation file, try the following:
Click on Start , then navigate to Settings > Devices > Printers & scanners.
Select Print Server Properties under Related Settings.
Verify that your printer is specified under the Drivers tab.
If your printer is not visible, click Add under the Welcome to the Add Printer Driver Wizard then click on Next.
Pick the Device Architecture in the Processor Selection dialogue box. Once done, click Next.
Pick your Printer Manufacturer from the left pane. Then choose your Printer Driver from the right pane.
Finally, click on Finish and follow the on-screen instructions to add your driver.
Q2. How do I download the driver from the manufacture’s website?
Consult the service website for your printer manufacturer. To do so, conduct an internet search for the manufacturer of your printer followed by the term support, e.g., HP support .
Driver updates are available and accessible from a printer manufacturer’s website under the Drivers category. Certain support websites enable you to check specifically as per printer model code. Find and download the most recent driver for your printer and install it according to manufacturer installation directions.
A vast majority of drivers are executable files that you can simply install by double-clicking on them. After you have downloaded the file, begin the installation. Then, proceed with these steps to re-install the printer drivers:
Click on Start, then navigate to Settings > Devices > Printers & scanners.
Locate the printer under Printers & scanners. Select it, and then click on Remove device.
After deleting your printer, reinstall it using the Add a printer or scanner option.
Q3. What is the meaning of Printer Driver Unavailable?
The error printer driver is unavailable indicates that the driver mounted on your computer is incompatible with your printer or is outdated. If the machine is unable to identify the drivers, you will be unable to activate or print from your printer .
Recommended:
- How to Get Your Printer Back Online in Windows 10
- How to Print When You Don’t Have a Printer
- Fix Volume Automatically Goes Down or Up in Windows 10
- How to Link Facebook to Twitter
Are you in dire need of printing a document but can’t do so because of a stuck print job in Windows 10? Here are some ways to clear the print queue in Windows 10 easily.
Printers may appear easy to use but can be very flimsy at times. Handling print Queue when you urgently want to use a printer can be quite frustrating. The print queue not only prevents the present document but all future documents from printing. The problem is not hard to detect either. If the message ‘Printing’ remains indefinitely even though the paper is not stuck and the ink is right, then certainly there is a Print queue issue. There are certain ways that can be used to clear the print queue in Windows 10 .

- Why does a print job gets stuck in Windows 10?
- How To Clear Print Queue In Windows 10?
- Method 1: Manually Clearing and Restarting the Print Spooler
- Method 2: Clear Print Queue using a Batch File for the Print Spooler
- Method 3: Clear Print Queue Using Command Prompt
- Method 4: Use the Management Console
Why does a print job gets stuck in Windows 10?
The answer lies in the fact that the printing document isn’t directly sent for printing. The document is first received at the spooler , i.e., a program used to manage and queue the print jobs. This spooler is particularly helpful while rearranging the order of print jobs or deleting them entirely. A stuck print job prevents the documents in the queue from printing, which affects all the documents further down the queue.
Often you can solve the error by deleting the print job from the queue. To delete a stuck print job in Windows 10, go to ‘Printers’ in the setting and click on ‘ Open Queue .’ Cancel the print job causing a problem, and you are good to go. If you can’t delete a particular print job, then try deleting the entire print queue. If this doesn’t work either, then try restarting all your devices. Unplug all your connections and plug them to reboot your device completely. This is the first approach that you should have for a stuck print job. If these traditional methods don’t work, then here are some other detailed methods for clearing a print job in Windows 10.
How To Clear Print Queue In Windows 10?
There are a few methods that can be employed to clear a print job in Windows 10. Clearing and restarting the Print Spooler is one of the best methods to use for fixing the stuck print job. It doesn’t delete your documents but creates an illusion that the documents are being sent for the first time to the printer. The process is done by stopping the Print Spooler until you clear the entire temporary cache used by the spooler and then starting it again. This can be accomplished by using a manual method or by making a batch file.
Method 1: Manually Clearing and Restarting the Print Spooler
- Type ‘ Services .’ in the Windows search bar and open the ‘ Services ’ app.

- Find ‘ Print Spooler ’ in the menu and double-click to open the Properties .

- Click on ‘ Stop ’ in the Properties tab and minimize the window to use it again later.

- Open ‘ File Explorer ’ and go to the below address location:
C:\Windows\System 32\spool\PRINTERS

You may be asked for permission to access the location. Click on ‘ Continue ’ to move forward.
Once you reach the destination, select all the files and press Delete on your keyboard.
Now go back to the Spooler properties window and click on ‘ Start .’

Click on ‘ Ok ’ and close the ‘ Services ’ app.
This will restart the spooler, and all the documents would be sent to the printer for printing.
Method 2: Clear Print Queue using a Batch File for the Print Spooler
Creating a batch file is a viable option if your print jobs frequently get stuck. Using the Services app every now and then can be a hassle that can be solved by a batch file.
Open a text editor like Notepad on your computer.
Paste the commands below as separate lines.
Net stop spooler

Del/Q/F/S “%windir%\System32\spool\PRINTERS\*.*”

Net start spooler

- Click on ‘ File ’ and choose ‘ Save as .’ Name the file with the extension ‘ .bat ’ at the end and choose ‘ All files (.) ’ in the ‘ Save as type ’ menu. Click on Save , and you are good to go.

- Simply double-click on the batch file, and the work will be done . You can place it at the most accessible place on your desktop for easy access.
Method 3: Clear Print Queue Using Command Prompt
You can delete a stuck print job in Windows 10 by using Command Prompt as well. Using the method will stop and start the print spooler again.
- Type ‘ cmd ’ in the search bar. Right-click on the ‘ Command Prompt ’ app and choose the run as administrator option.

- Type the command ‘net stop spooler ’, which will stop the spooler.

- Again type the following command and hit Enter:
Del %systemroot%\system32\spool\printers\*/Q
This will do the same task as the methods above.
Start the spooler again by typing the command ‘ net start spooler ’ and press enter .
Method 4: Use the Management Console
You can use the service.msc, shortcut in the management console to clear the print queue in Windows 10. This method will stop the spooler and clear it to delete a stuck print job:
Press the Windows Key + R key together to open the run window.
Type ‘ Services.msc ’ and hit Enter .
Note: You can also access the ‘ Services ’ window via Windows Management. Right-click the Windows icon and choose Computer Management. Choose Services and Application then double-click on Services.

- In the Services window, right-click on Print Spooler and select Properties.

- Click on the ‘ Stop ’ button to stop the Print Spooler service.
Minimize the window and open file explorer. Type the address ‘C:\ Windows\ System32\ Spool\ Printers’ or navigate to the address manually.
Select all the files in the folder and delete them. They were the files that were in the print queue at the instance.
Go back to the Services window and click on the ‘ Start ’ button.

Recommended:
- Fix Common Printer Problems in Windows 10
- Fix Printer Driver is unavailable on Windows 10
- How To Lock Or Unlock Cells In Excel?
- How to Fix Whatsapp Images Not Showing In Gallery
We hope the above guide was helpful and you were able to successfully clear the print queue in Windows 10. If you’re still stuck, then there may be compatibility issues with the printer and the data to be printed. Outdated printer drivers can also be an issue. You can also run the Windows Printer Troubleshooter to identify the correct problem. It will help you fix the errors in the print jobs . Follow the methods above to delete a stuck print job and clear the print queue in Windows 10, and you shouldn’t have any problems.
