Windows always ensure the security of the computers and their users. Regular updates are released frequently to keep your PC away from threats and bugs. Thus, your device is maintained up to date when you follow the prompts to update it. Yet, sometimes several updates are not installed completely, leading to errors. One of the common errors is unable to install printer the handle is invalid. In this article, you will know what is the handle is invalid error, and troubleshooting methods to resolve the handle is invalid Windows 10 issue.

- How to Fix The Handle is Invalid Error in Windows 10
- Method 1: Reboot PC
- Method 2: Run Printer Troubleshooter
- Method 3: Download HP Universal Print Driver ( For HP Systems)
- Method 4: Modify Local Security Policy
- Method 5: Update or Roll Back Drivers
- Method 6: Update Windows
- Method 7: Reinstall Printer
- Method 8: Repair System Files
- Method 9: Run Malware Scan
- Method 10: Run Startup Repair
- Method 11: Uninstall Corrupt Updates in Safe Mode
- Method 12: Perform System Restore
How to Fix The Handle is Invalid Error in Windows 10
INVALID_HANDLE error occurs on the login or sign-up screen, and this error does not let you print a job or run any script. This error occurs due to incompatible Windows update files or any misconfigured system files in your PC. You may face the error under several circumstances, but being unable to install a printer prevents you from adding any printers or using an existing printer. You may face this install printer the handle is invalid error in all older versions of Windows, and you cannot proceed with any pending updates or software updates. Other reasons are listed below.
- Malware or virus attack
- Problematic registry file
- Incorrect log in credentials
- Windows unable to duplicate non-pseudo handles from PEB32 processes
In this section, we have compiled a list of methods that will help you fix this INVALID_HANDLE error. The methods are arranged according to the severity and effectiveness so that you can solve the problem at the earliest. Follow them in the same order to attain perfect results.
Method 1: Reboot PC
A simple restart will help you resolve any temporary errors, and thus you can easily fix this error. So, try to reboot your PC by following the below-mentioned steps and check if you face the problem again. Alternatively, you can fully shut down the system using the Power options and turn it on again.
Navigate to the Desktop by pressing Windows + D keys simultaneously.
Now, press Alt + F4 keys simultaneously. You will see a pop-up window as shown below.

- Now, click on the drop-down box and select the Restart option.

- Finally, hit Enter to reboot your system.
Check if this error is resolved now.
Method 2: Run Printer Troubleshooter
Running the Windows Printer Troubleshooter is the simplest way to resolve this error in your PC. All the corrupt and damaged files in your computer will be eliminated when you proceed with this process. Here are a few simple steps to run the Windows Printer Troubleshooter.
Press Windows + I keys simultaneously to open Settings .
Click pn Update & Security .

- Click Troubleshoot . Then, select Printer and click on Run the troubleshooter .

- Your system will undergo a screening process. Wait for the process to be complete, and if any issue is found in your system, click Apply this fix and follow the instructions given in the successive prompts.

- Finally, restart your PC once all the issues are applied and fixed in your system.
Method 3: Download HP Universal Print Driver ( For HP Systems)
Many users have reported that downloading HP Universal Print Driver has fixed this issue as it will automatically detect and configure both HP and non-HP drivers. You can also try downloading the HP Universal Print Driver from the HP website .

Method 4: Modify Local Security Policy
Many users have reported that modifying Network security policies has helped them resolve this error. There are certain parameters when changed, and they could be a great hand when you face such errors. Here are a few instructions to tweak Local Security Policies.
Note: You can access Local Security Policy only if you use Windows 10 Pro, Enterprise , and Education editions.
Launch the Run dialog box by pressing the Windows + R keys together.
Now, type secpol.msc in the box and hit Enter key .
Note: You can also type Local Security Policy in the Search box to open the window.

- Then, click on Local Policies in the left pane, followed by Security Options as shown.

- Now, in the right pane, double-click on Network security: LAN Manager authentication level to open it.

- Now, in the Local Security Setting tab, select the Send LM & NTLM – use NTLMv2 session security if negotiated option from the drop-down menu as shown.

Now, click on Apply > OK to save the changes and return to the Local Security Policy window.
Then, double-click on Network Security: Minimum session security for NTLM SSP based (including secure RPC) clients to open it.
Now, uncheck the Require 128-bit encryption option as shown below.

- Finally, click on Apply > OK to save the changes and reboot your PC .
Check if the issue is resolved now.
Method 5: Update or Roll Back Drivers
Follow these steps to update driver or rollback printer driver updates to fix unable to install printer the handle is invalid error.
Option I: Update Drivers
If the current drivers in your system are incompatible or outdated with the program files, then you will face the handle is invalid issue, especially with printers . Therefore, you are advised to update the printer drivers to prevent the said problem.
- Type Device Manager in the Windows 10 search menu.

- Double-click on Print queues to expand it.

- Right-click the name of the printer and select Update driver .
Note: Here the Microsoft XPS Document Writer is shown as example.

- Next, click on Search automatically for drivers to automatically download and install the best available driver.

5A. Now, the drivers will update and install to the latest version, if they are not updated.
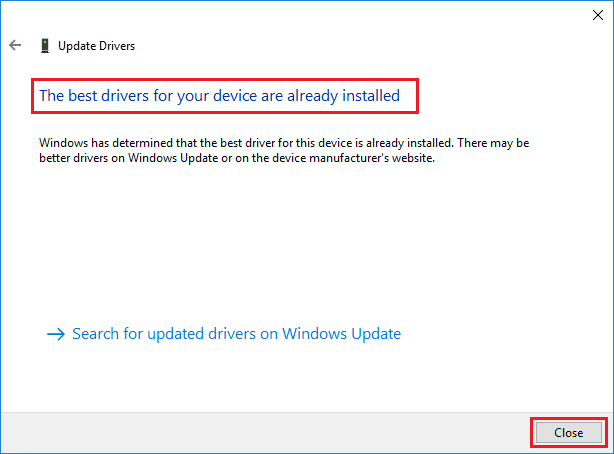
5B. If they are already in an updated stage, the message saying The best drivers for your device are already installed will be shown.
Restart the computer, and check if you have fixed this issue in your system.
Option II: Roll back Driver Updates
If your system had been working correctly and began to malfunction after an update, rolling back the drivers might help. The rollback of the driver will delete the current driver installed in the system and replace it with its previous version. This process should eliminate any bugs in the drivers and potentially fix the said problem.
Type Device Manager in the Windows search bar and open it from the search results.
Double-click on the Printers from the panel on the left and expand it.
- Right-click on the printer driver and click on Properties , as depicted.

- Switch to the Driver tab and select Roll Back Driver , as shown highlighted.

- Provide your reason for Why are you rolling back? in Driver Package rollback . Then, click on Yes , as illustrated below.

- Then, click on OK to apply this change. Finally, restart your PC .
Method 6: Update Windows
Ensure that you use an updated version of Windows. Otherwise, the files in the system will not be compatible with the program files leading to the handle being an invalid issue . Follow the below-mentioned steps to update your Windows OS.
Press Windows + I keys simultaneously to launch Settings .
Click on the Update & Security tile, as shown.

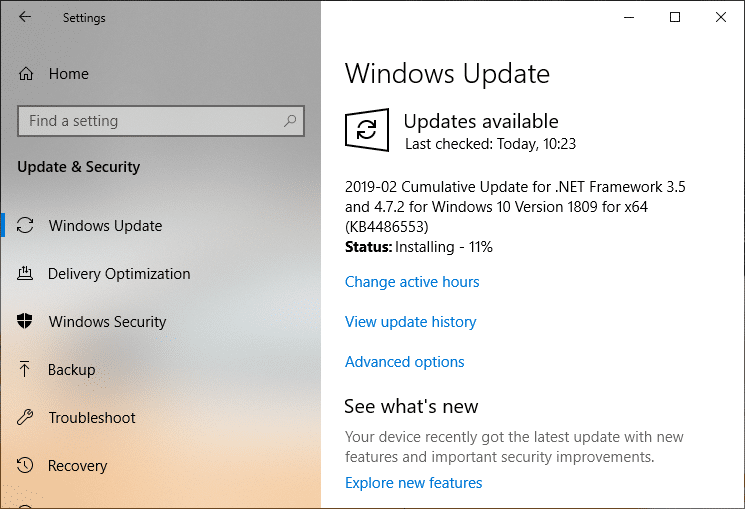
- In the Windows Update tab, click on Check for updates button.

4A. If a new update is available, then click Install Now and follow the instructions to update.

4B. Otherwise, if the Windows is up-to-date, then it will show You’re up to date message.

Method 7: Reinstall Printer
Suppose you face this error after running the Printer troubleshooter. In that case, you can try reinstalling any particular printers where you face the error as instructed below.
Note: Here, the Microsoft Print to PDF device is taken as an example
- Open Control Panel and click on Devices and Printers as shown.

- Then, right-click on the printer and select the Remove device option as shown below.

- Click Yes in the Remove Decice prompt.

- Later, click on Add a printer as shown below.

- Now, select The printer that I want isn’t listed option as highlighted below.

- Then, click on Add a local printer or network printer with manual settings as shown and click on Next .

- In the next window, click on PORTPROMPT: (Local Port) in the drop-down menu of Use an existing port and click on Next .

- Now, choose the Manufacturer and Printers as shown below and click on Next as highlighted.

- Rename the printer if needed and click on Next .

- Finally, wait for Windows to install the Printer and check if you face this error again.
Method 8: Repair System Files
You can automatically scan and repair system files by running System File Checker (SFC) and DISM scans. Follow the below-mentioned steps to implement the same.
- Hit the Windows key , type Command Prompt and click on Run as administrator .

Click on Yes in the User Account Control prompt.
Type chkdsk C: /f /r /x command and hit Enter key .

If you are prompted with a message, Chkdsk cannot run…the volume is… in use process , then, type Y and hit the Enter key .
Again, type the command: sfc /scannow and press Enter key to run the System File Checker scan.

Note: A system scan will be initiated and it will take a couple of minutes to finish. Meanwhile, you can continue performing other activities but be mindful of not accidentally closing the window.
After completing the scan, it will show either of these messages:
- Windows Resource Protection did not find any integrity violations.
- Windows Resource Protection could not perform the requested operation.
- Windows Resource Protection found corrupt files and successfully repaired them.
- Windows Resource Protection found corrupt files but was unable to fix some of them.
Once the scan is finished, restart your PC .
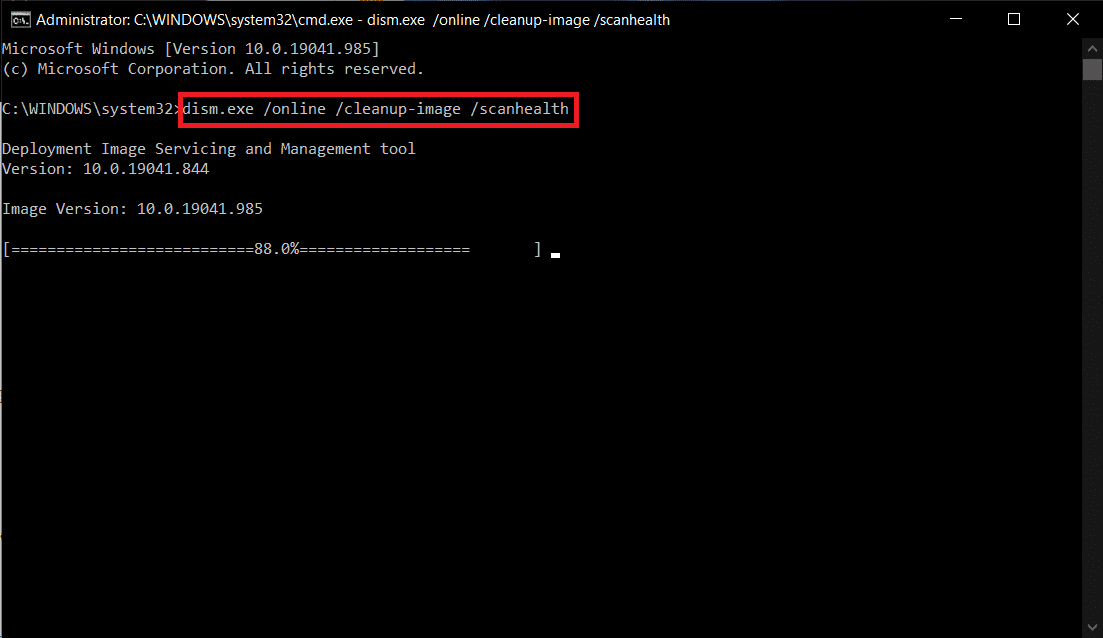
Again, launch Command Prompt as administrator and execute the given commands one after the other:
dism.exe /Online /cleanup-image /scanhealth

dism.exe /Online /cleanup-image /restorehealth

dism.exe /Online /cleanup-image /startcomponentcleanup
Note: You must have a working internet connection to execute DISM commands properly.
Method 9: Run Malware Scan
Follow these steps to run a malware scan and fix unable to install printer the handle is invalid error.
Hit Windows + I keys simultaneously to launch Settings .
Here, click on Update & Security settings as shown.
- Go to Windows Security in the left pane.
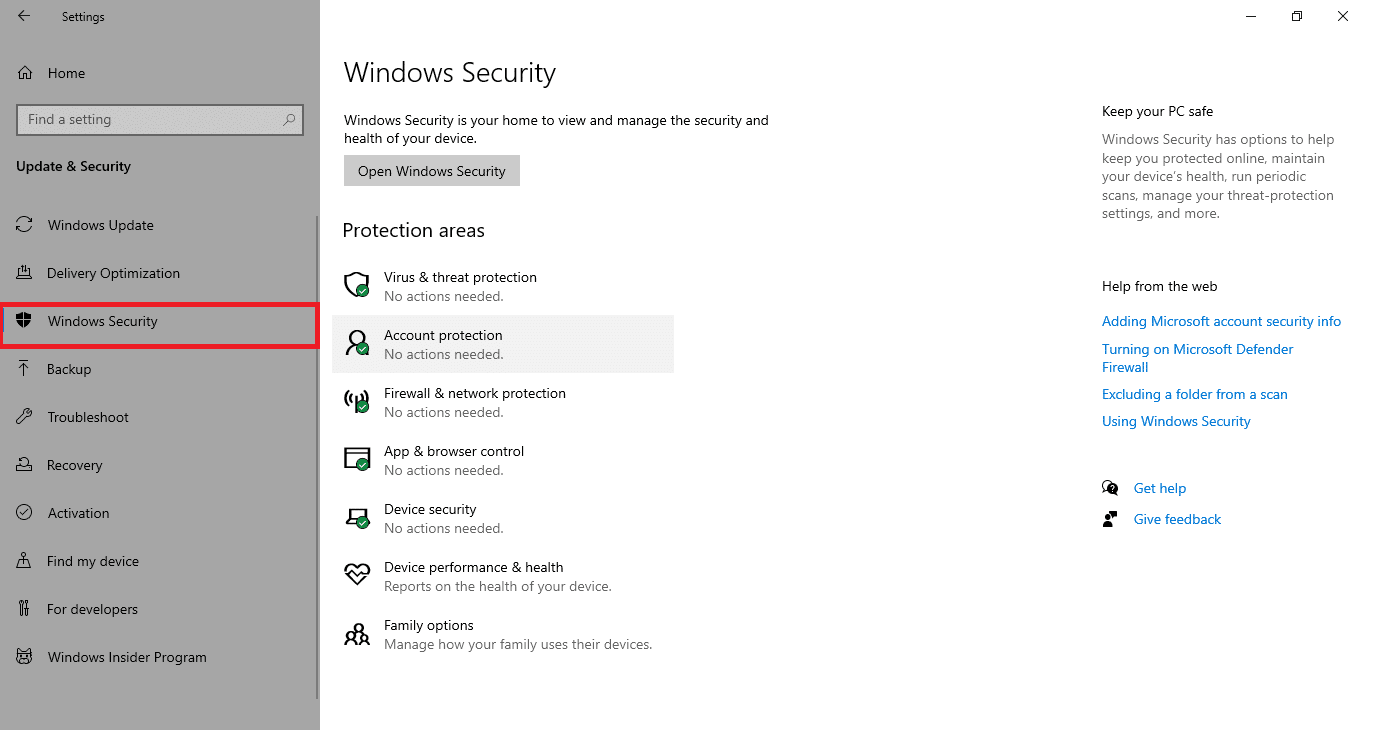
- Click on the Virus & threat protection option in the right pane.

- Click on the Quick Scan button to search for malware.
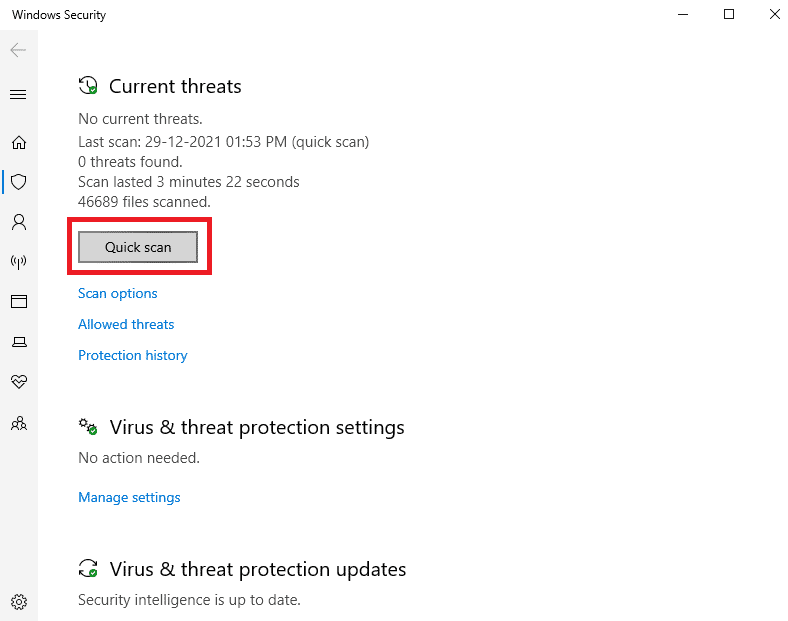
6A. Once the scan is done, all the threats will be displayed. Click on Start Actions under Current threats .
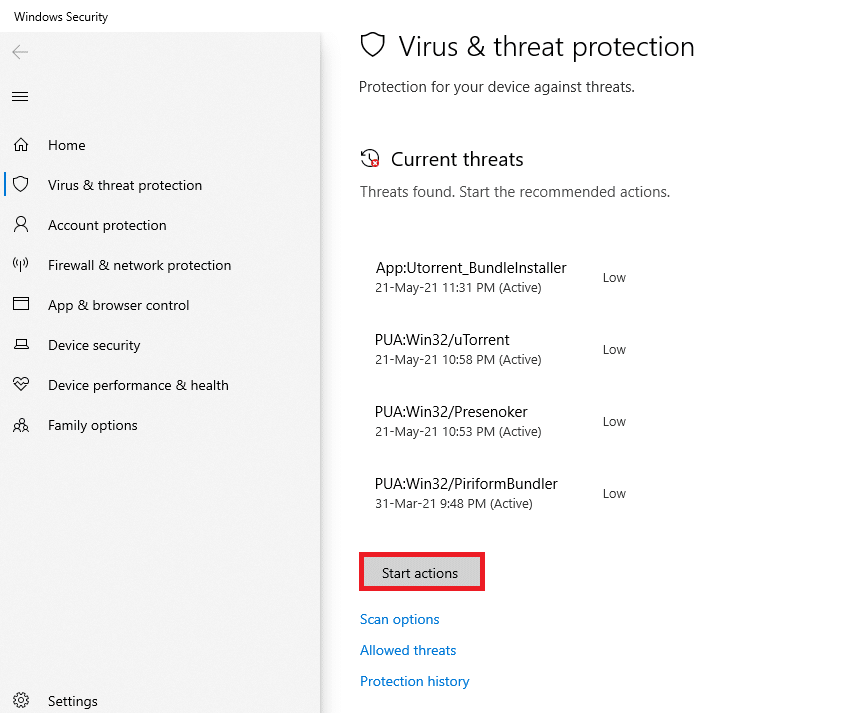
6B. If there is no threat in your device, the device will show the No current threats alert.

Method 10: Run Startup Repair
Running Startup repair will help you to fix unable to install printer the handle is invalid error. Follow the below-mentioned instructions to implement the same.
Navigate to the Start menu .
Now, select the Power icon and click on Restart while holding the Shift key .
- Here, click on Troubleshoot . Refer to the Pic.

- Now, click on Advanced options followed by Startup Repair .

- Now, click on Continue to proceed. If your account is password-protected, choose your account and type the password to proceed.
Now, the Startup repair tool will scan your PC and fix the issue.
Method 11: Uninstall Corrupt Updates in Safe Mode
Some other users facing unable to install printer the handle is an invalid error have managed to resolve it in safe mode. Boot your PC in safe mode and try uninstalling the recent update causing the error. Here are a few instructions to install the update in Safe Mode.
Note: To boot your PC in safe mode, you may be prompted with a screen to enter your BitLocker key (if you have an encrypted device).
To boot PC in safe mode, you have to enter into Windows Recovery Environment, which can be done by turning your device off and on repeatedly.
Press Windows + I keys together to open Settings in your system.
Now, select Update & Security .
- Now, click on Recovery in the left pane and select the Restart now option under Advanced startup .

Now, allow your PC to restart completely this time. You will enter into Windows Recovery Environment now.
Here, click on Troubleshoot .

- Now, click on Advanced options as shown.

- Now, select Advanced options followed by Startup Settings.

Click on Restart and wait for the Startup Settings screen to appear.
Press the (number) 4 key to enter Safe Mode .
Note: To enable Safe Mode with network access, hit number 5 .

Now, you will be able to follow and fix this by manually uninstalling the recent updates after booting the PC in safe mode.
- Press the Windows key. Type Control Panel and launch it.

- Set View by as Large icons and select Programs and Features .
- Now, click on View installed updates in the left pane as shown here.

- Now, select the most recent update and click on the Uninstall option, as shown below.

- Then, confirm the prompt, if any, and reboot your PC .
Check if you have fixed the problem.
Note: If you face any errors in Safe Mode, uninstall or reinstall problematic applications causing this error.
Method 12: Perform System Restore
More often, you could face unable to install printer the handle is an invalid error after a Windows update. If you encounter this issue, then you could restore the system to its previous version.
Note: It is recommended to Boot Windows 10 PC into Safe Mode before proceeding with System Restore.
- Hit the Windows key , type Command Prompt and click on Run as administrator .
- Type rstrui.exe command and press the Enter key .

- Now, click on Next in the System Restore window, as shown.

- Finally, confirm the restore point by clicking on the Finish button.

Now, the system will be restored to its previous state, and now check if the issue is resolved.
Recommended:
- Fix Service Error 1053 on Windows 10
- 28 Best File Copy Software for Windows
- Fix The Feature You Are Trying to Use is on a Network Resource That is Unavailable
- Fix Zoom is Unable to Detect a Camera
Does your printer fail to respond when you give the print command? If yes, there is no need to panic as you are not alone. Numerous people have encountered this problem while attempting to print documents from Windows 10 computer. A corrupt, obsolete, or damaged printer driver is the primary cause of this vexing Printer not responding error . The good news is that you can quickly resolve this issue by implementing the step-by-step methods listed in this guide.
Why is my device showing Printer driver is unavailable?
There are several reasons for the printer to become unresponsive and you can begin by testing the following:
- Check if the printer cables are properly attached to the computer
- Check if the printer is connected to Wi-Fi
- Make sure that the ink cartridges are not empty
- Check your system for alert lights or error messages
- If you just upgraded your computer from Windows 7 or 8 to Windows 10 and started facing printer issues, the update may have corrupted the printer driver
- It is possible that the original printer driver is incompatible with the latest version of Windows OS
Microsoft had stated that when Windows 10 was released, there would be no built-in backward compatibility with some apps and applications. However, numerous printer manufacturers were unable to update their drivers in time, which complicated the situation further.

What is the use of a printer driver?
Prior to understanding how to resolve the Printer not responding issue , it is imperative to learn about the printer drivers. It is a simple application that is mounted on the Windows 10 computer that allows interaction between the PC and the printer.
It performs two critical roles:
- The first function is to act as a link between the printer and your device. It allows your computer to recognize the printer hardware, its features, and specifics.
- Secondly, the driver is accountable for converting the print job data to signals which can be understood & implemented by the printer.
Each printer comes with its own special driver that is tailored to different operating system profiles such as Windows 7, Windows 8, or Windows 10. If your printer is not programmed correctly or mounts the wrong system driver, the computer would be unable to find it & process a print job.
Certain printers, on the other hand, can utilize generic drivers offered by Windows 10. This enables you to print without the need to install external vendor drivers.
- Fix Printer Not Responding Error in Windows 10
- Method 1: Run Windows Update
- Method 2: Update Your Printer Drivers
- Method 3: Reinstall Printer Driver
- Special Mention: Only for Plug–and–Play Printers
Fix Printer Not Responding Error in Windows 10
If you’re unable to print any internal document or a file that you downloaded from the internet then you may be facing the Printer driver is unavailable error. To resolve the printer not responding error, you can follow the below-listed troubleshooting steps.
Method 1: Run Windows Update
One possible reason for your Windows 10 computer to display the ‘Printer Driver is Unavailable’ error is because you are running an out-of-date operating system. To update your Windows OS, follow the below steps:
- Click the Start button and navigate to the Settings icon.
- Select Update & Security .

- Windows will check for updates and, if found, will automatically download and install them.

- Now, Restart your computer once the update process is complete.
You can now check if you’re able to fix printer is not responding error.
Method 2: Update Your Printer Drivers
To update your printer drivers, you can download the latest drivers from the manufacturer’s website. Drivers can also be downloaded from the manufacturer’s support site. To install the printer drivers downloaded from the manufacturer’s website, follow these steps:
- Search for Control Panel in the Windows search bar then click on the Control Panel from the search results.

- Make sure to select ‘ Large Icons ‘ from the ‘ View by: ‘ dropdown. Now look for Device Manager and click on it.

- Under the Device Manager window, locate the printer for which you want to install drivers for.
- Right-click the name of the printer and select Update Driver Software from the accompanying pop-up menu.
A new window will appear. If you’ve already downloaded drivers from the manufacturer’s website, choose the Browse my computer for driver software option.
Next, click on the Browse button and navigate to the place where you have downloaded the printer drivers from the manufacturer’s website.

Follow the on-screen instructions to install the drivers manually.
If you don’t have the downloaded drivers then select the option labeled Search automatically for updated driver software.

- Follow on-screen instructions to install the latest printer drivers.
Restart your PC and see if you’re able to fix the printer not responding issue.
Method 3: Reinstall Printer Driver
If you cannot print your document because of the error message ‘printer driver is unavailable,’ the best course of action would be to reinstall the printer driver. Follow these steps to fix printer is not responding error:
- Press Windows Key +R then type devmgmt.msc and click on OK.

- The Device Manager window will open. Expand Print queues and find your printer device.

Right-click on your printer device (with which you are facing the issue) and select Uninstall device option.
Remove the device from printer queues and restart your PC to finish the uninstallation.
After restarting your device, re-open Device Manager and click on Action .

- From the Action menu select Scan for hardware changes .

Windows will now reinstall the appropriate printer driver on your computer. Finally, restart the device and see if your printer is responding and you’re able to print your documents.
Special Mention: Only for Plug–and–Play Printers
After you reinstall the printer drivers, Windows will automatically detect your Printer. If it recognizes the printer, proceed with the on-screen instructions .
Unplug the printer from your computer. Also, remove any cords and wires that are connected between them.
Reconnect all and follow the Setup Wizard process.
If the Wizard is unavailable, navigate to Start > Settings > Devices > Printers & Scanners > Add a Printer or Scanner.

Q1. What should I do if my Printer Driver is not Installing?
If nothing happens when you double-click the installation file, try the following:
Click on Start , then navigate to Settings > Devices > Printers & scanners.
Select Print Server Properties under Related Settings.
Verify that your printer is specified under the Drivers tab.
If your printer is not visible, click Add under the Welcome to the Add Printer Driver Wizard then click on Next.
Pick the Device Architecture in the Processor Selection dialogue box. Once done, click Next.
Pick your Printer Manufacturer from the left pane. Then choose your Printer Driver from the right pane.
Finally, click on Finish and follow the on-screen instructions to add your driver.
Q2. How do I download the driver from the manufacture’s website?
Consult the service website for your printer manufacturer. To do so, conduct an internet search for the manufacturer of your printer followed by the term support, e.g., HP support .
Driver updates are available and accessible from a printer manufacturer’s website under the Drivers category. Certain support websites enable you to check specifically as per printer model code. Find and download the most recent driver for your printer and install it according to manufacturer installation directions.
A vast majority of drivers are executable files that you can simply install by double-clicking on them. After you have downloaded the file, begin the installation. Then, proceed with these steps to re-install the printer drivers:
Click on Start, then navigate to Settings > Devices > Printers & scanners.
Locate the printer under Printers & scanners. Select it, and then click on Remove device.
After deleting your printer, reinstall it using the Add a printer or scanner option.
Q3. What is the meaning of Printer Driver Unavailable?
The error printer driver is unavailable indicates that the driver mounted on your computer is incompatible with your printer or is outdated. If the machine is unable to identify the drivers, you will be unable to activate or print from your printer .
Recommended:
- How to Get Your Printer Back Online in Windows 10
- How to Print When You Don’t Have a Printer
- Fix Volume Automatically Goes Down or Up in Windows 10
- How to Link Facebook to Twitter
Fix Windows Cannot Connect to the Printer: If you are connected to a local network which shares a printer, it may be possible you may receive the error message “ Windows cannot connect to the printer. Operation failed with error 0x000000XX ” while trying to add the shared printer to your computer using Add Printer feature. This issue occurs because, after the printer is installed, Windows 10 or Windows 7 incorrectly looks for the Mscms.dll file in a subfolder different than the windows\system32 subfolder.

Now there is alreadya Microsoft hotfix for this issue but it doesn’t seem to work for many users. So without wasting any time let’s see how to actually Fix Windows Cannot Connect to the Printer on Windows 10 with the below-listed troubleshooting guide.
Note: You could try the Microsoft hotfix first, just in case if this work for you then you will save a lot of time.
- Windows Cannot Connect to the Printer [SOLVED]
- Method 1: Copy the mscms.dll
- Method 2: Create A New Local Port
- Method 3: Restart Print Spooler Service
- Method 4: Delete Incompatible Printer Drivers
- Method 5: Registry Fix
Windows Cannot Connect to the Printer [SOLVED]
Make sure to create a restore point just in case something goes wrong.
Method 1: Copy the mscms.dll
1.Navigate to the following folder: C:\Windows\system32\
2.Find the mscms.dll in the above directory and right-click then select copy.

3.Now paste the above file in the following location according to your PC architecture:
C:\windows\system32\spool\drivers\x64\3\ (For 64-bit) C:\windows\system32\spool\drivers\w32x86\3\ (For 32-bit)
4.Reboot your PC to save changes and again try to connect to the remote printer again.
This should help you Fix Windows Cannot Connect to the Printer issue, if not then continue.
Method 2: Create A New Local Port
1.Press Windows Key + X then select Control Panel.

2.Now click Hardware and Sound then click on Devices and Printers.

3.Click Add a printer from the top menu.

4.If you don’t see you printer listed click the link which says “ The printer that I want isn’t listed. “

5.From the next screen select “ Add a local printer or network printer with manual settings ” and click Next.

6.Select Create a new port and then from type of port drop-down select Local Port and then click Next.

7.Type the printer’s address in Printers port name field in the following format:
\IP address or the Computer Name\Printers Name
For example \192.168.1.120\HP LaserJet Pro M1136

8.Now click OK and then click Next.
9.Follow on-screen instructions to finish the process.
Method 3: Restart Print Spooler Service
1.Press Windows Key + R then type services.msc and hit Enter.

2.Find Print Spooler service in the list and double-click on it.
3.Make sure the Startup type is set to Automatic and the service is running, then click on Stop and then again click on start in order to restart the service.

4.Click Apply followed by OK.
5.After that, again try to add the printer and see if the you’re able to Fix Windows Cannot Connect to the Printer issue.
Method 4: Delete Incompatible Printer Drivers
1.Press Windows key + R then type printmanagement.msc and hit Enter.
2.From the left pane, click All Drivers.

3.Now in the right window pane, right-click on the printer driver and click Delete.
4.If you see more than one printer driver names, repeat the above steps.
- Again try to add the printer and install its drivers. See if you are able to Fix Windows Cannot Connect to the Printer issue, if not then continue with the next method.
Method 5: Registry Fix
1.First, you need to stop Printer Spooler service (Refer to method 3).
2.Press Windows Key + R then type regedit and hit Enter to open Registry Editor.

3.Navigate to the following registry key:
HKEY_LOCAL_MACHINE\SOFTWARE\Microsoft\Windows NT\CurrentVersion\Print\Providers\Client Side Rendering Print Provider
4.Now right-click on Client Side Rendering Print Provider and select Delete.

5.Now again start Printer Spooler service and reboot your PC to save changes.
- Fix Windows 10 Update Error 0x8007042c
- Fix Windows Update Error 0x80010108
- How To Fix Error 0X80010108 In Windows 10
- Fix Windows Update Error 0x800706d9
That’s it you have successfully Fix Windows Cannot Connect to the Printer issue but if you still have any questions regarding this article then feel free to ask them in comment’s section.
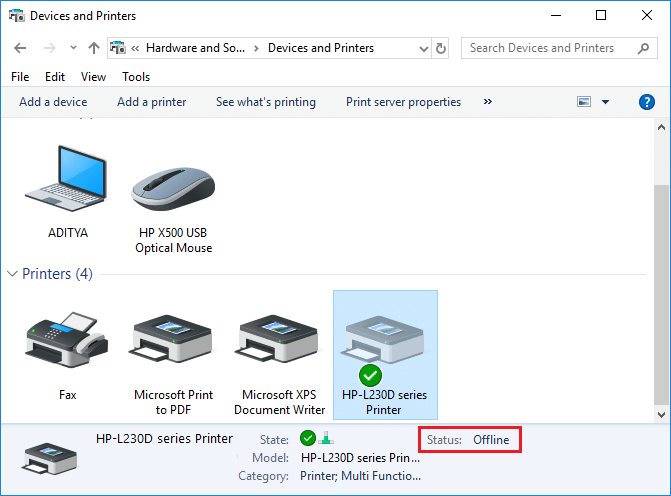
Fix Printer Driver is unavailable on Windows 10: If you’re not able to use your Printer and you face the error message that says “Driver is unavailable” then this means that the driver installed for your Printer is not compatible, outdated or corrupted. In any case, until you resolve this error you won’t be able to access your Printer. To view this message you need to head over to Devices and Printers then select your Printer and under Status, you will see “Driver is unavailable”.

This error message can be annoying, especially is you need to use the printer urgently. But don’t worry there are few easy fixes which can resolve this error and in no time you will be able to use your printer. So without wasting any time let’s see How to Fix Printer Driver is unavailable on Windows 10 with the help of the below-listed troubleshooting guide.
- Fix Printer Driver is unavailable on Windows 10
- Method 1: Uninstall the Printer Drivers
- Method 2: Make sure Windows is up to date
- Method 3: Verify the Admin Account
- Method 4: Install the Printer Drivers in Compatibility mode
- Method 5: Reinstall your Printer Drivers
- Method 6: Reset your PC
Fix Printer Driver is unavailable on Windows 10
Make sure to create a restore point just in case something goes wrong.
Method 1: Uninstall the Printer Drivers
1.Type control in Windows Search then click on the search result which says Control Panel.

2.From the Control Panel click on Hardware and Sound.

3.Next, click on Device and Printers.
4.Right-click on the printer device which shows the error “ Driver is unavailable ” and select Remove device.

5.Press Windows Key + R then type devmgmt.msc and hit Enter to open Device Manager.

6.Expand Print queues then right-click on your Printer device and select Uninstall.

Note: If you don’t have your device listed then don’t worry as it may already be removed when you remove the printer device from Devices and Printers.
7.Again click on Uninstall to confirm your actions and this will successfully remove the printer drivers from your PC.
8.Now press Windows Key + R then type appwiz.cpl and hit Enter.

9.From the Programs and Features window, uninstall any application related to your printer.

10.Disconnect your Printer from the PC, shut down your PC and router, power off your printer.
11.Wait for a few minutes then plug everything the back as it was earlier, make sure to connect your Printer to the PC using a USB cable and see if you’re able to Fix Printer Driver is unavailable on Windows 10.
Method 2: Make sure Windows is up to date
1.Press Windows Key + I to open Settings then click on Update & Security.
2.From the left-hand side, menu click on Windows Update.
3.Now click on the “ Check for updates ” button to check for any available updates.

4.If any updates are pending then click on Download & Install updates.
Once the updates are downloaded, install them and your Windows will become up-to-date.
Method 3: Verify the Admin Account
1.Press Windows Key + R then type control and hit Enter to open Control Panel.
2.Click on User Accounts then again click on User Accounts.

3.Now click on the “ Make changes to my account in PC settings ” link.

4.Click on the verify link and follow the on-screen instructions to verify your admin account.

5.Once finished, reboot your PC and again install the printer without any issues.
Method 4: Install the Printer Drivers in Compatibility mode
1.Press Windows Key + R then type devmgmt.msc and hit Enter to open Device Manager.
2.Expand Print queues then right-click on your Printer device and select Uninstall.
3.If you’re prompted to confirm then again click on the Uninstall button.
4.Now go to your printers manufacturer’s website and download the latest drivers for your printer.
5.Right-click on the setup file and select Properties.

Note: If the drivers are in a zip file make sure to unzip it then right-click on the .exe file.
6.Switch to the Compatibility Tab and checkmark “ Run this program in Compatibility mode “.
7.From the drop-down select Windows 7 or 8 and then checkmark “ Run this program as an administrator “.

8.Finally, double-click on the setup file and let the drivers install.
9.Once finished, reboot your PC and see if you’re able to fix the issue.
Method 5: Reinstall your Printer Drivers
1.Press Windows Key + R then type control printers and hit Enter to open Devices and Printers.

- Right-click on your printer and select “ Remove device ” from the context menu.
3.When the confirm dialog box appears , click Yes.

4.After the device is successfully removed, download the latest drivers from your printer manufacturer website .
5.Then reboot your PC and once the system restarts, press Windows Key + R then type control printers and hit Enter.
Note: Make sure your printer is connected to the PC via USB, Ethernet or wirelessly.
6.Click on the “ Add a printer ” button under Device and Printers window.

7.Windows will automatically detect the printer, select your printer and click Next.

- Set your printer as default and click Finish.

Method 6: Reset your PC
Recommended:
- Mouse Lags or Freezes on Windows 10? 10 Effective ways to fix it!
- 4 Ways to Clear Clipboard History in Windows 10
- How to Fix Computer Shuts Down Randomly
- Fix Logitech Wireless Mouse Not Working
That’s if you have successfully Fix Printer Driver is unavailable on Windows 10 but if you still have any questions regarding this article then please feel free to ask them in the comment section.
How to Get Your Printer Back Online: There may be situations where you need to print any file for an urgent meeting and you need to submit those files in 30 minutes. So what you usually do is open the file and go to print option to print the document. But suddenly you noticed that in the bottom right corner of your system the status of your printer is showing as offline. This is a usual problem for users because even when your Printer is clearly ON and ready to print, the status is showing offline.
This is caused by the communication error viz The Active Directory Domain Services is Currently Unavailable error of the printer with your system. There is no particular cause for this error but the issue could be caused because of outdated or incompatible drivers, conflict of printer spooler services, a problem with physical or hardware connection of the printer to PC, etc. So without wasting any time let’s see How to Get Your Printer Back Online in Windows 10 with the help of the below-listed tutorial.
- How to Get Your Printer Back Online in Windows 10
- Method 1: Check Your Printer Connection
- Method 2: Update Printer Driver
- Method 3: Change the Printer Status
- Method 4: Restart Print Spooler Service
- Method 5: Use a Second Printer
- Method 6: Reinstall your Printer Drivers
How to Get Your Printer Back Online in Windows 10
Make sure to create a restore point just in case something goes wrong.
Method 1: Check Your Printer Connection
When there is an error showing your status of the printer as offline, the system wants to tell users that there is something wrong with the communication established between the printer and the system through the USB cable or network connection. To solve this issue the steps are:
- To restart your printer, off the power supply of the printer & then switch it ON again.
- Now again check the connection of your printer.
- If the connection of your system with the printer is made using a USB cable, make sure your cable is working properly and the connections to the ports are fitted tight. You could also switch the USB port to see if this resolves the problem.
- If the connection of your system with the printer is made through wired networks, check whether the connection to your cable is properly done or not. Also, you can check whether the signal to your printer is flashing or not.
- If the connection of your system with the printer is made through a wireless network, make sure your printer is connected to your computer network & the wireless icon will lit-up to show that you are connected.
If nothing works then you should try to run Printer Troubleshooter:
1.Type “troubleshooting” in Control Panel then click on Troubleshooting from the search result.
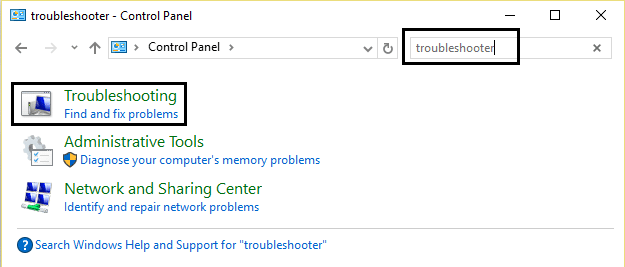
2.Next, from the left window pane select View all.
3.Then from the Troubleshoot computer problems list select Printer.

4.Follow on-screen instruction and let the Printer Troubleshooter run.
5.Restart your PC and you may be able to Get Your Printer Back Online in Windows 10, if not then continue with the next method.
Method 2: Update Printer Driver
1.Press Windows Key + R then type “ services.msc ” and hit enter.
2.Find Print Spooler service then right click on it and select Stop.

3.Again press Windows Key + R then type printui.exe /s /t2 and hit enter.
4.In the Printer Server Properties window search for the printer which is causing this issue.
5.Next, remove the printer and when asked for confirmation to remove the driver as well, select yes.

6.Now again go to services.msc and right-click on Print Spooler and select Start.

7.Next, navigate to your printers manufacturer website, download and install the latest printer drivers from the website.
For example , in case you have an HP printer then you need to visit HP Software and Drivers Downloads page . Where you can easily download the latest drivers for your HP printer.
8.If you’re still not able to fix Printer Offline Status then you can use the printer software that came with your printer. Usually, these utilities can detect the printer on the network and fix any issues that are causing the printer to appear offline.
For example, you can use HP Print and Scan Doctor to fix any issues regarding HP Printer.
Method 3: Change the Printer Status
1.Turn off your Printer and then again turn it back ON.
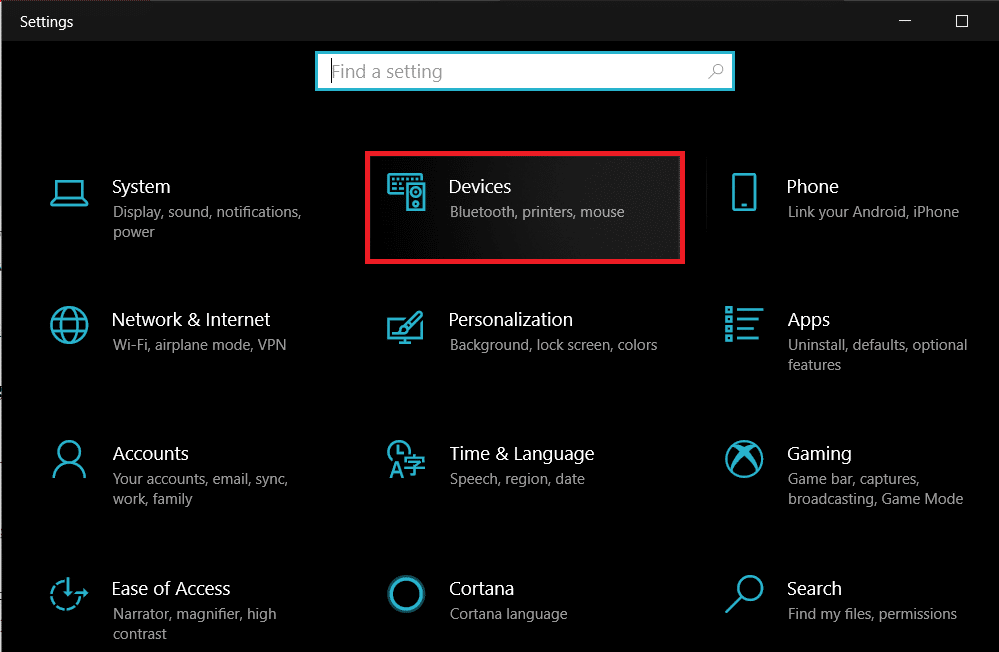
2.Now press the key combination Windows Key + I to open Settings.
3.Now click on “ Devices ” then from the left-hand side menu select “ Bluetooth & other devices ” option.

4.Under Related settings click on “ Devices and printers “.

5.Then, you have to right-click on the printer icon with a green check-mark and choose “ See what’s printing ”.

Note: If there is no default printer set, then right-click on your printer and select “ Set as default printer “.

6.You will see the printer queue, see if there are any unfinished tasks and make sure to remove them from the list.

7.Now from the printer queue window, select your Printer and uncheck the “Use Printer Offline” & “ Pause Printer ” option.

Method 4: Restart Print Spooler Service
1.Use the shortcut key combination Windows Key + R to open the Run application.
2.Now type in there “ services.msc ” and hit Enter or click OK.
3.Scroll down to look for “ Print Spooler ” from the service utility window an check whether the status is running or not.
4.If you cannot see the status, you can right-click on Print Spooler and choose “ Start ”.
5.Or else, double-click on Print Spooler service & make sure the Startup type is set to Automatic and the service is running, then click on Stop and then again click on start in order to restart the service.
6.Click Apply followed by OK.
7.After that, again try to add the printer and see if you’re able to Get Your Printer Back Online in Windows 10.
Method 5: Use a Second Printer
This approach of solving the issue will work only when the printer is connected via a network to the PC (instead of the USB cable). Otherwise, you can manually set your IP address for your printer.
1.Press Windows Key + I to open Settings then click on Devices.
2.From the left-hand menu click on “ Bluetooth & other devices “.
3.Now from the right window pane click on “ Devices and printers “.
4.Right-click on your printer and select Printer properties from the context menu.

5.Switch to Ports tab then click on the “ Add Port… ” button.

6.Choose “ Standard TCP/IP Port ” under Available port types and then click on the New Port button.

7.On the Add Standard TCP/IP Printer Port Wizard click on Next .

8.Now type in the Printers IP Address and Port name then click Next.

Note: You could easily find the IP address of your printer on the device itself. Or you could find these details on the manual that came with the printer.
9.Once you successfully added the Standard TCP/IP Printer, click Finish.

See if you’re able to Get Your Printer Back Online in Windows 10 , if not then you need to reinstall your printer drivers.
Method 6: Reinstall your Printer Drivers
1.Press Windows Key + R then type control printers and hit Enter to open Devices and Printers.
- Right-click on your printer and select “ Remove device ” from the context menu.
3.When the confirm dialog box appears , click Yes.
4.After the device is successfully removed, download the latest drivers from your printer manufacturer website .
5.Then reboot your PC and once the system restarts, press Windows Key + R then type control printers and hit Enter.
Note: Make sure your printer is connected to the PC via USB, ethernet or wirelessly.
6.Click on the “ Add a printer ” button under Device and Printers window.
7.Windows will automatically detect the printer, select your printer and click Next.
- Set your printer as default and click Finish.
Recommended:
- How to Change Default System Font in Windows 10
- What is an MKV file and how to open it?
- Fix Destination Path Too Long Error
- How to Find My Router’s IP Address?
I hope this article was helpful and now you can easily Get Your Printer Back Online in Windows 10 , but if you still have any questions regarding this guide then feel free to ask them in the comment’s section.
The recent surge of online activity has prompted the downfall of the printer. In an era, where everything can be viewed online with ease, the relevance of the gigantic and bulky printer has started to decrease. However, we are yet to reach a stage where we can neglect the printing device altogether. Until then, if you do not possess the heavy Inkjet and want something printed urgently, here’s a guide to help you decipher how to print documents when you don’t have a printer.

- How to Print Documents When You Don’t Have a Printer
- Method 1: Print Documents as PDF files
- Method 2: Print Webpages as PDF files
- Method 3: Search for Wireless Printers Near You
- Method 4: Find Other Printing Services Around Your Location
- Method 5: Use Google Cloud Print
How to Print Documents When You Don’t Have a Printer
Method 1: Print Documents as PDF files
PDF is a universally accepted format that keeps the document exactly the same across different platforms and devices . There is a possibility that the PDF file of the document you need to print will do the trick instead. Even if softcopies are not an option in your situation, the PDF file makes it easy for you to save web pages and transfer them as documents for future printing. Here’s how you can print to PDF on your PC without a printer:
- Open the Word document that you want to print and click on the File option on the top left corner of the screen.

- From the options that appear, click on ‘Print.’ Alternatively, you can press Ctrl + P to open Print Menu

- Click on the ‘Printer’ drop-down menu and select ‘ Microsoft Print to PDF.’

- Once selected, click on ‘Print’ to continue.

- In the window that appears, type in the name of the PDF file and select the destination folder. Then click on ‘Save.’

- The PDF file will be printed without a printer in the destination folder.
Method 2: Print Webpages as PDF files
Browsers today have adapted to the requirements of the modern-day and introduced new features on their application. One such feature gives users the ability to print webpages as PDF documents on their PC. Here’s how you can print web pages as PDFs:
Open your browser and open the webpage you want to print.
Click on the three dots on the top right corner of the screen.

- From the various options, click on ‘Print.’ You can use the shortcut in the browser as well.

In the print window that opens up, click on the drop-down list in front of the ‘Destination’ menu.
Select ‘Save as PDF.’ You can then proceed to select the pages you want to download and the layout of the print.

- Once done, click on ‘Print’ and a window will appear asking you to select the destination folder. Select the folder and rename the file accordingly and then click on ‘Save’ again.

- The page will be printed as a PDF file without a printer.
Method 3: Search for Wireless Printers Near You
Even if you personally don’t own a printer, all hope is not lost. There is a remote possibility that someone in your neighbourhood or building owns a wireless printer. Once you have found a printer, you can ask the owner to let you take a print out. Here’s how you can scan for printers near you and print without owning a printer:
Press Windows Key + I to open the Settings app on your Windows device.
Click on ‘Devices.’
- From the panel on the left, click on the ‘Printers and Scanners’

- Click on ‘ Add a printer or scanner’ and your PC will find any printers that are operating near you.
Method 4: Find Other Printing Services Around Your Location
Some shops and services serve the specific purpose of getting print outs for their customers. You can search for print shops near your location and print documents there. Alternatively, you can head onto your University library or access the printer in your office to take urgent print outs. Printing options are also available in most internet cafes and public libraries. You can also use services such as PrintDog and UPrint that deliver large print outs to your home.
Method 5: Use Google Cloud Print
If you have a wireless printer at your home and are out of town, you can remotely print pages from your home printer. Head onto the Google Cloud Print website and see if your printer is eligible. Sign in to the app with your Google account and add your printer. Thereafter, while printing, click on the ‘Printers’ option and select your wireless printer to print documents remotely.
Q1. Where to print documents when you don’t have a printer?
With most documents beings shared and viewed through the screen, the printed page no longer holds the same value and the printer no longer seems worth the money. Having said that, there are still times where a hard copy of a document is required for a certain task. During instances like these, you can try using public printing services or ask your neighbours if they could give access to their printers for a brief period.
Q2. When you need to print something urgently, but there is no printer?
Such situations have happened to most of us. Try downloading the PDF of the document or webpage you want to print. The PDF should work as an alternative most of the time. If not, mail the PDF to any printing service near you and ask them to keep a print out ready. You will have to physically go and collect the printout but it is the fastest way possible.
Q3. How can I print from my phone without a printer?
You can print web pages and documents as PDF files from your phone and then print them as hard copies later. On the browser, tap on the three dots on the top right corner and select the ‘share’ option. From the various options available, tap on ‘Print’ and the webpage will be saved as a PDF. The same procedure can be used for Word documents.
Q4. Is there a printer that doesn’t need a computer?
Nowadays, wireless printers are the new norm. These printers often do not require physical connections with PCs or other devices and can download images and documents remotely.
Recommended:
- How To Clear Print Queue In Windows 10?
- Fix Common Printer Problems in Windows 10
- Share files and printers without HomeGroup on Windows 10
- How to Sync Google Calendar with Outlook
Fix Printer Installation Error 0x000003eb: If you are trying to install a printer but can’t do so because of the error code 0x000003eb then you are at the right place as today we are going to discuss on how to fix this issue. The error message doesn’t give you much information as it just says unable to install the printer and gives you the error code 0x000003eb.
Unable to install printer. Operation could not be completed (error 0x000003eb)

But if you troubleshoot the issue you must have come to a conclusion that this must be a problem with printer drivers being incompatible or corrupt. And you are right, the printer connectivity or installation error 0x000003eb occurs because the drivers are somehow got corrupted or incompatible. So without wasting any time let’s see how to actually Fix Printer Installation Error 0x000003eb.
- Fix Printer Installation Error 0x000003eb
- Method 1: Make sure Windows Installer Service is Running
- Method 2: Perform Clean Boot
- Method 3: Registry Fix
Fix Printer Installation Error 0x000003eb
Make sure to create a restore point just in case something goes wrong.
Method 1: Make sure Windows Installer Service is Running
1.Press Windows Key + R then type services.msc and hit Enter.
2.Find Windows Installer service in the list and double click on it.
3.Make sure the Startup type is set to Automatic and click Start , if the service is not already running.

4.Click Apply followed by OK.
5.Again try to install the printer.
Method 2: Perform Clean Boot
Note: Make sure to unplug any external devices from your PC and then try to install the printer.
Sometimes 3rd party software can conflict with Windows and therefore cause Error 0x000003eb In Windows 10. In order Fix this issue , you need to perform a clean boot in your PC and diagnose the issue step by step.
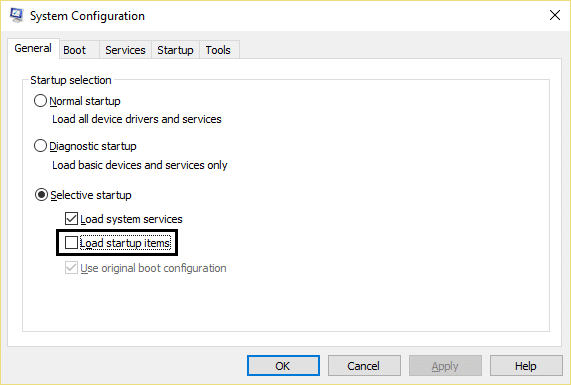
Once you have performed the clean boot, make sure to install Printer and see if you are able to Fix Printer Installation Error 0x000003eb.
Method 3: Registry Fix
Note: Backup your Registry before performing the below-listed steps.
1.Press Windows Key + R then type service.msc and hit Enter.
2.Double click on Print Spooler service and click on Stop , in order to stop Print Spooler service.
3.Click Apply followed by OK.
4.Now press Windows Key + R then type regedit and hit Enter to open Registry Editor.
5.Navigate to the following registry key according to your system architecture:
For 32-bit system: HKEY_LOCAL_MACHINE\SYSTEM\CurrentControlSet\Control\Print\Environments\Windows NT x86\Drivers\Version-3
For 64-bit system: HKEY_LOCAL_MACHINE\SYSTEM\CurrentControlSet\Control\Print\Environments\Windows x64\Drivers\Version-3

6.Delete all the keys listed under version-3 , by right-clicking on them and select Delete.
7.Press Windows Key + R then type the following and hit Enter:
C:\Windows\System32\spool\drivers\W32X86
8.Rename the folder name 3 to 3.old.

9.Again Start the Print Spooler service and try to install your printers.
If you are still not able to install your printer then make sure to first uninstall your printer completely and then again install it with new drivers. Make sure to use the CD wizard which came with the printer rather than the Add Printer option in Windows.
- Fix Background Intelligent Transfer Service Missing from services
- How To Fix NETWORK_FAILED in Chrome
- Fix Google Chrome error He’s Dead, Jim!
- Fix ERR_NETWORK_ACCESS_DENIED in Chrome
That’s it you have successfully Fix Printer Installation Error 0x000003eb but if you still have any queries regarding this guide then feel free to ask them in the comment’s section.
