If you have recently upgraded to Windows 10, then the chances are that your Integrated Webcam might not be working. The main cause of Webcam not working issue is incompatible or outdated drivers. If you are facing this issue, then it’s possible that your webcam or camera app in Windows 10 won’t open and you get an error message saying “ We can’t find or can’t start your camera. ”

If you open Device Manager and expand Other devices, you will see your Integrated Webcam listed there with a yellow exclamation mark, which means it’s a driver issue. This issue is quite common with users who have recently updated Windows 10, but thankfully this problem is quite easily fixable. So without wasting any time let’s see how to actually Fix Webcam not working in Windows 10 issue with the below-listed troubleshooting guide.
- Fix Webcam not working in Windows 10
- Method 1: Make sure Windows is up to Date
- Method 2: Rollback, your webcam driver
- Method 3: Uninstall your webcam driver
- Method 4: Update Drivers Manually
- Method 5: Disable and Re-Enable the Device
- Method 6: Repair Install Windows 10
Fix Webcam not working in Windows 10
Make sure to create a restore point just in case something goes wrong.
Method 1: Make sure Windows is up to Date
- Press Windows Key + I to open Settings then click on Update & Security.
From the left-hand side, menu clicks on Windows Update.
Now click on the “ Check for updates ” button to check for any available updates.

- If any updates are pending, then click on Download & Install updates.
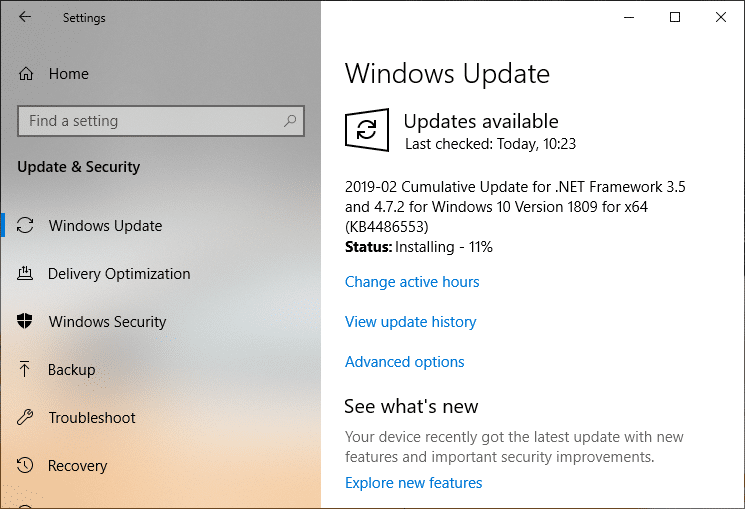
- Once the updates are downloaded, install them, and your Windows will become up-to-date.
Method 2: Rollback, your webcam driver
- Press Windows Key + R then type devmgmt.msc and hit Enter to open Device Manager.

Expand Imaging devices or Sound, video and game controllers.
Right-click on your Webcam and select Properties.

- Switch to Driver tab and click on Roll Back Driver.

Choose Yes/OK to continue with driver rollback.
After the rollback is complete, reboot your PC.
See if you’re able to Fix Webcam not working issue , if not then continue with the next method.
Method 3: Uninstall your webcam driver
- Open Device Manager then right-click on your Webcam and select Uninstall.

- Click Yes/OK to continue with the driver uninstall.

- Once the uninstall is complete click Action from Device Manager menu and select Scan for hardware changes.

- Wait for the process to reinstall the drivers then restart your PC.
Method 4: Update Drivers Manually
Go to your PC manufacturer’s website and download the latest driver for Webcam. Install the drivers and wait for the setup to update the drivers. Reboot your PC and see if you can Fix Webcam not working in Windows 10 issue.
Method 5: Disable and Re-Enable the Device
Press Windows Key + R then type devmgmt.msc and hit Enter to open Device Manager.
Expand Imaging devices, then right-click on your Webcam and select Disable.

- Again right-click on the device and select Enable.

- See if you’re able to fix the issue if not then restart your PC.
Method 6: Repair Install Windows 10
This method is the last resort because if nothing works out, then, this method will surely repair all problems with your PC. Repair Install uses an in-place upgrade to repair issues with the system without deleting user data present on the system. So follow this article to see How to Repair Install Windows 10 Easily.
Recommended:
- Fix Task Scheduler Error One or more of the specified arguments are not valid
- How to Fix Default Printer Keeps Changing Issue
- Your Device Is Offline. Please Sign In With The Last Password Used On This Device
- Fix Superfetch has stopped working
That’s it you have successfully Fix Webcam not working in Windows 10 but if you still have any questions regarding this guide then feel free to ask them in the comment’s section.
Fix Default Printer Keeps Changing Issue: In Microsoft latest operating system which is Windows 10, they have removed the Network Location aware feature for Printers and because of this, you can’t set the default printer of your choice. Now the default printer is set automatically by Windows 10 and is generally the last printer you selected. If you want to change the default printer and don’t want it to automatically change then follow the below-listed troubleshooting guide.

- Default Printer Keeps Changing [SOLVED]
- Method 1: Disable Windows 10 to Automatically Manage your Printer
- Method 2: Manually Set the Default Printer
- Method 3: Registry Fix
Default Printer Keeps Changing [SOLVED]
Make sure to create a restore point just in case something goes wrong.
Method 1: Disable Windows 10 to Automatically Manage your Printer
1.Press Windows Key + I to open Settings then click Devices.

2.Now from the left-hand menu select Printers & scanners.
- Disable the toggle under “ Let Windows manage my default printer. “

4.Close everything and reboot your PC.
Method 2: Manually Set the Default Printer
1.Press Windows Key + X then select Control Panel.
2.Click Hardware and Sound and then select Devices and Printers.

3.Right-click on your printer and select Set as a default printer.

4.Restart your PC to save changes.
Method 3: Registry Fix
1.Press Windows Key + R then type regedit and hit Enter to open Registry Editor.

2.Navigate to the following registry key:
HKEY_CURRENT_USER\SOFTWARE\Microsoft\Windows NT\CurrentVersion\Windows
3.Double click on LegacyDefaultPrinterMode and change its value to 1.

Note: If the value is not present then you have to manually create this key, right-click in an empty area in the right-hand side window in the registry then select New > DWORD (32-bit) Value and name this key as LegacyDefaultPrinterMode.
4.Click OK and close registry editor. Again set your default Printer by following the above method.
5.Reboot your PC to save changes.
6.If this doesn’t fix the issue then again open Registry Editor and navigate to the following path:
HKEY_USERS\USERS_SID\Printers\Connections HKEY_USERS\USERS_SID\Printers\Settings

7.Delete all the entries present inside these keys and then navigate to:
HKEY_USERS\USERS_SID\Printers\Defaults
8.Delete the DWORD DisableDefault in the right-hand side window and again set your default Printer.
9.Reboot your PC to save the above settings.
- Fix Task Scheduler Error One or more of the specified arguments are not valid
- Fix You can’t sign in to your PC right now error
- Your Device Is Offline. Please Sign In With The Last Password Used On This Device
- Fix Superfetch has stopped working
That’s it you have successfully Fix Default Printer Keeps Changing [SOLVED] but if you still have any questions regarding this guide then feel free to ask them in the comment’s section.
