If you’re facing the issue where your Windows 10 PC is not able to connect to the saved WiFi network automatically even though you have properly configured the network to connect automatically then don’t worry as today we are going to see how to fix this issue. The problem is when you start your PC, the WiFi doesn’t connect automatically in Windows 10 and you have to manually look for available networks then select your saved network connection and press Connect. But the WiFi should connect automatically as you have checked the box “Automatically connect”.

Well, there is no particular cause for this issue but this can be caused by a simple system upgrade after which the WiFi Adapter is turned off to save power and you need to alter the settings back to normal to fix the issue. So without wasting any time let’s see How to Fix WiFi doesn’t connect automatically in Windows 10 with the help of the below-listed troubleshooting guide.
- Fix WiFi doesn’t connect automatically in Windows 10
- Method 1: Forget your WiFi Network
- Method 2: Adjust WiFi Adapter Power Management Settings
- Method 3: Roll Back Network Adapter Drivers
- Method 4: Run Network Troubleshooter
- Method 5: Uninstall Network Adapter Driver
- Method 6: Update Network Adapter Drivers
- Method 7: Delete Wlansvc Files
- Method 8: Disable Microsoft Wi-Fi Direct Virtual Adapter
- Method 9: Install Intel PROSet/Wireless Software
- Method 10: Registry Fix
- Method 11: Disable Fast Startup
- Method 12: Run SFC and DISM
Fix WiFi doesn’t connect automatically in Windows 10
Make sure to create a restore point just in case something goes wrong.
Method 1: Forget your WiFi Network
1.Click on the Wireless icon in the system tray and then click Network Settings.

2.Then click on Manage Known networks to get the list of saved networks.

3.Now select the one which Windows 10 won’t remember the password for and click Forget.

4.Again click the wireless icon in the system tray and connect to your network, it will ask for the password, so make sure you have the Wireless password with you.

5.Once you have entered the password you will connect to the network and Windows will save this network for you.
6.Reboot your PC and again try to connect to the same network. This method seems to Fix WiFi doesn’t connect automatically in Windows 10.
Method 2: Adjust WiFi Adapter Power Management Settings
1.Press Windows Key + R then type devmgmt.msc and hit Enter.

2.Expand Network adapters then right-click on your installed network adapter and select Properties.

3.Switch to Power Management Tab and make sure to uncheck “ Allow the computer to turn off this device to save power. ”

4.Click Ok and close the Device Manager.
5.Now press Windows Key + I to open Settings then Click System > Power & Sleep.

6.On the bottom click Additional power settings.
7.Now click “ Change plan settings ” next to the power plan which you use.

8.At the bottom click on “ Change advanced power settings. ”

9.Expand Wireless Adapter Settings , then again expand Power Saving Mode.
10.Next, you will see two modes, ‘On battery’ and ‘Plugged in.’ Change both of them to Maximum Performance.

11.Click Apply followed by Ok. Reboot your PC to save changes.
Method 3: Roll Back Network Adapter Drivers
1.Press Windows Key + R then type devmgmt.msc and hit Enter to open Device Manager.
2.Expand Network Adapter and then right-click on your Wireless Adapter and select Properties.
3.Switch to the Driver tab and click on Roll Back Driver.

4.Choose Yes/OK to continue with driver rollback.
5.After the rollback is complete, reboot your PC.
See if you’re able to Fix WiFi doesn’t connect automatically in Windows 10 , if not then continue with the next method.
Method 4: Run Network Troubleshooter
1.Right-click on the network icon and select Troubleshoot problems.
2.Follow the on-screen instructions.
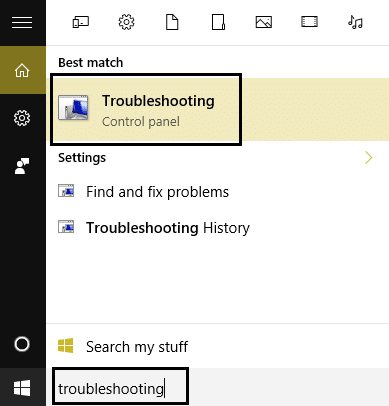
3.Now press Windows key + W and type Troubleshooting hit enter.
4.From there select “ Network and Internet. ”

5.In the next screen click on Network Adapter.

6.Follow the on-screen instruction to Fix WiFi doesn’t connect automatically in Windows 10.
Method 5: Uninstall Network Adapter Driver
1.Press Windows Key + R then type “ devmgmt.msc ” and hit Enter to open Device Manager.
2.Expand Network Adapters and find your network adapter name.
3.Make sure you note down the adapter name just in case something goes wrong.
4.Right-click on your network adapter and uninstall it.

5.If ask for confirmation select Yes.
6.Restart your PC and try to reconnect to your network.
7.If you’re not able to connect to your network then it means the driver software isn’t automatically installed.
8.Now you need to visit your manufacturer’s website and download the driver from there.

9.Install the driver and reboot your PC.
By reinstalling the network adapter, you can Fix WiFi doesn’t connect automatically in Windows 10.
Method 6: Update Network Adapter Drivers
1.Press Windows key + R and type “ devmgmt.msc ” in the Run dialogue box to open device manager.
2.Expand Network adapters , then right-click on your Wi-Fi controller (for example Broadcom or Intel) and select Update Drivers.

3.In the Update Driver Software Windows, select “ Browse my computer for driver software. ”

4.Now select “ Let me pick from a list of device drivers on my computer. ”

5.Try to update drivers from the listed versions.
6.If the above didn’t work then go to the manufacturer’s website to update drivers: https://downloadcenter.intel.com/
7.Reboot to apply changes.
Method 7: Delete Wlansvc Files
1.Press Windows Key + R then type services.msc and hit Enter.
2.Scroll down till you find WWAN AutoConfig then right-click on it and select Stop.

3.Again press Windows Key + R then type “ C:\ProgramData\Microsoft\Wlansvc\ ” (without quotes) and hit Enter.
4.Delete everything (most probably the MigrationData folder) in the Wlansvc folder except for profiles.
5.Now open the Profiles folder and delete everything except the Interfaces.
6.Similarly, open the Interfaces folder then delete everything inside it.

7.Close File Explorer, then in services window right-click on WLAN AutoConfig and select Start.
Method 8: Disable Microsoft Wi-Fi Direct Virtual Adapter
1.Press Windows Key + R then type devmgmt.msc and hit Enter to open Device Manager.
2.Expand Network adapters then click on View and select Show hidden devices.

3.Right-click on Microsoft Wi-Fi Direct Virtual Adapter and select Disable.

4.Reboot your PC to save changes.
Method 9: Install Intel PROSet/Wireless Software
Sometimes the problem is caused due to outdated Intel PROSet Software, hence updating it seems to Fix Network Adapter Missing in Windows 10 . Therefore, go here and download the latest version of PROSet/Wireless Software and install it. This is a third party software which manages your WiFi connection instead of Windows and if PROset/Wireless Software is outdated is can cause drivers issue in Wireless Network Adapter. Read How to Update Network Adapter Drivers on Windows 10. Read How to Update Network Adapter Drivers on Windows 10.
Method 10: Registry Fix
Note: Make sure to backup Registry just in case something goes wrong.
1.Press Windows Key + R then type regedit and hit Enter to open Registry Editor.

2.Navigate to the following registry key:
HKEY_LOCAL_MACHINE\SOFTWARE\Policies\Microsoft\Windows\WcmSvc
3.Expand WcmSvc in the left pane and see if it has GroupPolicy key , if not then right-click on WcmSvc and select New > Key.

4.Name this new key as GroupPolicy and hit Enter.
5.Now right-click on GroupPolicy and select New > DWORD (32-bit) value.

6.Next, name this new key as fMinimizeConnections and hit Enter.

7.Reboot your PC to save changes.
Method 11: Disable Fast Startup
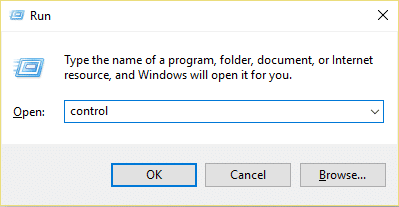
1.Press Windows Key + R then type control and hit Enter to open Control Panel.
2.Click on Hardware and Sound then click on Power Options .

3.Then from the left window pane select “ Choose what the power buttons do. ”

4.Now click on “ Change settings that are currently unavailable. ”

5.Uncheck “ Turn on fast startup ” and click on Save changes.

6.Reboot your PC to save changes and see if you’re able to Fix WiFi doesn’t connect automatically as WiFi Option Not Showing in Windows 10 .
Method 12: Run SFC and DISM
1.Press Windows Key + X then click on Command Prompt(Admin).

2.Now type the following in the cmd and hit enter:
Sfc /scannow

sfc /scannow /offbootdir=c:\ /offwindir=c:\windows (If above fails then try this one)

3.Wait for the above process to finish and once done restart your PC.
4.Again open cmd and type the following command and hit enter after each one:
a) Dism /Online /Cleanup-Image /CheckHealth

b) Dism /Online /Cleanup-Image /ScanHealth

c) Dism /Online /Cleanup-Image /RestoreHealth

5.Let the DISM command run and wait for it to finish.
- If the above command doesn’t work then try on the below:
Dism /Image:C:\offline /Cleanup-Image /RestoreHealth /Source:c:\test\mount\windows

Dism /Online /Cleanup-Image /RestoreHealth /Source:c:\test\mount\windows /LimitAccess
Note: Replace the C:\RepairSource\Windows with the location of your repair source (Windows Installation or Recovery Disc).
7.Reboot your PC to save changes.
Recommended:
- Fix Unable to Set Default Printer Error 0x00000709
- Fix Microphone Not Working on Windows 10
- Remove Candy Crush Soda Saga from Windows 10
- How to Map Network Drive in Windows 10
That’s it you have successfully Fix WiFi doesn’t connect automatically in Windows 10 but if you still have any questions regarding this article then feel free to ask them in the comment’s section.
Fix Unable to Set Default Printer Error 0x00000709: If you’re facing error message “Operation could not be completed” with error code 0x00000709 then this means you’re unable to set default printer on Windows 10. The main issue is just a registry entry because of which the default printer is automatically set to the previous printer. The full error message is listed below:
Operation could not be completed error (0x00000709). Double check the printer name and make sure that printer is connected to the network.

The problem is that Windows 10 has removed the Network Location aware feature for Printers and because of which you cannot set the default printer of your choice. Anyway, without wasting any time let’s see how to Fix Unable to Set Default Printer Error 0x00000709 with the help of the below-listed troubleshooting guide.
- Fix Unable to Set Default Printer Error 0x00000709
- Method 1: Disable Windows 10 to Automatically Manage your Printer
- Method 2: Manually Set the Default Printer
- Method 3: Registry Fix
- Method 4: Create a New User Account
Fix Unable to Set Default Printer Error 0x00000709
Make sure to create a restore point just in case something goes wrong.
Method 1: Disable Windows 10 to Automatically Manage your Printer
1.Press Windows Key + I to open Settings then click Devices.

2.Now from the left-hand menu select Printers & scanners.
- Disable the toggle under “ Let Windows manage my default printer. “

4.Close everything and reboot your PC.
Method 2: Manually Set the Default Printer
1.Press Windows Key + X then select Control Panel.
2.Click Hardware and Sound and then select Devices and Printers.

3.Right-click on your printer and select Set as a default printer.

4.Restart your PC to save changes and see if you’re able to Fix Unable to Set Default Printer Error 0x00000709.
Method 3: Registry Fix
1.Press Windows Key + R then type regedit and hit Enter.
2.Now navigate to the following registry key:
HKEY_CURRENT_USER\Software\Microsoft\Windows NT\CurrentVersion\Windows
3.Right-click on Windows key and select Permissions.

4.From Group or Usernames select your administrator account and checkmark Full Control.

5.Click Apply followed by OK.
6.Next, select the Windows registry key then in the right window pane double-click on Device key.
7.Under the value data field type in your printer name and click OK.

8.Exit everything and reboot your PC to save changes.
9.If even after restarting you are unable to set default printer then delete the device key in Registry Editor and again restart your PC.
Method 4: Create a New User Account
1.Press Windows Key + R then type netplwiz and hit Enter to open User Accounts.

2.Now click on Add in order to add a new user account.

3.On the How will this person sign in screen click on Sign in without a Microsoft account.

4.This would display two options for signing in: Microsoft account and Local account.

5.Click on Local account button at the bottom.
6.Add Username & password and click Next.
Note: Leave the password hint empty.

7.Follow-on screen instruction to create a new user account.
Recommended:
- Fix DISM Source Files Could not be Found Error
- Fix Microphone Not Working on Windows 10
- Remove Candy Crush Soda Saga from Windows 10
- How to Map Network Drive in Windows 10
That’s it you have successfully Fix Unable to Set Default Printer Error 0x00000709 but if you still have any queries regarding this guide then feel free to ask them in the comment’s section.
