If you’re facing the error message “ Your PC will automatically restart in one minute, Windows ran into a problem and needs to restart, You should close this message now and save your work ” then don’t worry as sometimes Windows shows this error message. If you are facing the above error only once or twice then there is no issue and you don’t have to do anything.

But even after the system restarts, you again face the error message and the system reboots then this means you’re stuck in an infinite loop. So without wasting any time let’s see How to Fix Your PC will automatically restart in one minute loop with the help of the below-listed troubleshooting guide.
- Fix Your PC will automatically restart in one minute
- Method 1: Temporarily Disable Antivirus and Firewall
- Method 2: Delete Content of SoftwareDistribution Folder
- Method 3: Perform Automatic Repair
- Method 4: Run SFC and DISM
- Method 5: Repair MBR
- Method 6: Perform System Restore
- Method 7: Reset or Refresh Windows 10
- Method 8: Repair Install Windows 10
Fix Your PC will automatically restart in one minute
If you can’t access the Windows then you may need to boot into safe mode and then follow the below-listed steps:
Method 1: Temporarily Disable Antivirus and Firewall
Sometimes the Antivirus program can cause the above issue and in order to verify this is not the case here, you need to disable your antivirus for a limited time so that you can check if the error still appears when the antivirus is off.
1.Right-click on the Antivirus Program icon from the system tray and select Disable.

2.Next, select the time frame for which the Antivirus will remain disabled.

Note: Choose the smallest amount of time possible for example 15 minutes or 30 minutes.
3.Once done, again try to start your PC and check if the error resolves or not.
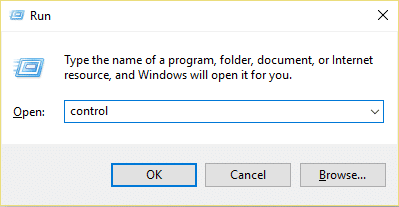
4.Press Windows Key + R then type control and hit Enter to open Control Panel.
5.Next, click on System and Security.
6.Then click on Windows Firewall.

7.Now from the left window pane click on Turn Windows Firewall on or off.

- Select Turn off Windows Firewall and restart your PC.
Again try to start your PC and see if you’re able to resolve the Your PC will automatically restart in one minute loop error.
Method 2: Delete Content of SoftwareDistribution Folder
Windows updates are important as it provides security updates & patches, fixes a lot of bugs and improves your system performance. SoftwareDistribution folder is located in the Windows directory and is managed by WUAgent ( Windows Update Agent ).

SoftwareDistribution folder should be left alone but there comes a time when you may need to clear the contents of this folder. One such case is when you’re unable to update Windows or when Windows updates which are downloaded & stored in the SoftwareDistribution folder are corrupt or incomplete. Many users have reported that deleting the content of the SoftwareDistribution Folder has helped them resolve the Your PC will automatically restart in one minute loop error.
Method 3: Perform Automatic Repair
1.Insert the Windows 10 bootable installation DVD and restart your PC.
2.When prompted to Press any key to boot from CD or DVD, press any key to continue.

3.Select your language preferences, and click Next. Click Repair your computer in the bottom-left.

4.On choose an option screen, click Troubleshoot .

5.On Troubleshoot screen, click Advanced option .

6.On the Advanced options screen, click Automatic Repair or Startup Repair .

7.Wait til the Windows Automatic/Startup Repairs complete.
8.Restart and you have successfully Fix Your PC will automatically restart in one minute loop error.
If your system responds to the Automatic Repair then it will give you the option to Restart the System otherwise it will show that Automatic Repair failed to fix the issue. In that case, you need to follow this guide: How to fix Automatic Repair couldn’t repair your PC

Method 4: Run SFC and DISM
1.Press Windows Key + X then click on Command Prompt (Admin).

2.Now type the following in the cmd and hit enter:
Sfc /scannow

sfc /scannow /offbootdir=c:\ /offwindir=c:\windows (If above fails then try this one)

3.Wait for the above process to finish and once done restart your PC.
4.Again open cmd and type the following command and hit enter after each one:
Dism /Online /Cleanup-Image /CheckHealth

Dism /Online /Cleanup-Image /ScanHealth

Dism /Online /Cleanup-Image /RestoreHealth

5.Let the DISM command run and wait for it to finish.
- If the above command doesn’t work then try on the below:
Dism /Image:C:\offline /Cleanup-Image /RestoreHealth /Source:c:\test\mount\windows

Dism /Online /Cleanup-Image /RestoreHealth /Source:c:\test\mount\windows /LimitAccess
Note: Replace the C:\RepairSource\Windows with the location of your repair source ( Windows Installation or Recovery Disc).
7.Reboot your PC to save changes.
Method 5: Repair MBR
Master Boot Record is also known as Master Partition Table which is the most important sector of the drive that is located at the beginning of a drive which identifies the location of the OS and allows Windows 10 to boot. The MBR contains a boot loader in which the operating system is installed with the drive’s logical partitions. If Windows is not able to boot then you may need to fix or repair your Master Boot Record (MBR) , as it might be corrupted.

Method 6: Perform System Restore
1.Open Start or press Windows Key.
2.Type Restore under Windows Search and click on Create a restore point .

3.Select the System Protection tab and click on the System Restore button.

4.Click Next and choose the desired System Restore point .

4.Follow the on-screen instruction to complete the System Restore .
5.After reboot, again check if you’re able to fix Your PC will automatically restart in one minute error.
Method 7: Reset or Refresh Windows 10
Note: If you can’t access your PC then restart your PC a few times until you start Automatic Repair or use this guide to access Advanced Startup options . Then navigate to Troubleshoot > Reset this PC > Remove everything.
1.Press Windows Key + I to open Settings then click on Update & Security icon.
2.From the left-hand menu select Recovery.
3.Under Reset this PC click on the “ Get Started ” button.

4.Select the option to Keep my files .

5.For the next step you might be asked to insert Windows 10 installation media, so ensure you have it ready.
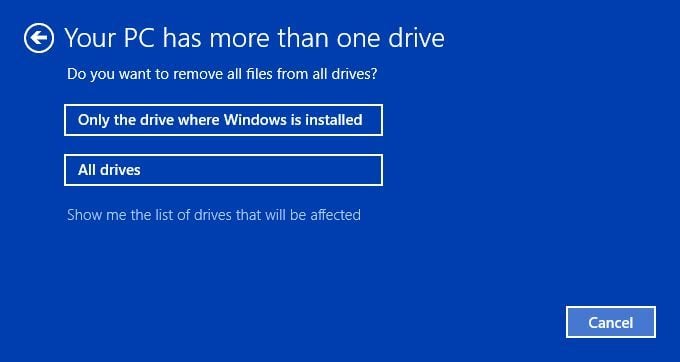
6.Now, select your version of Windows and click on only the drive where Windows is installed > Just remove my files.
7.Click on the Reset button.
8.Follow the instructions on the screen to complete the reset.
Method 8: Repair Install Windows 10
This method is the last resort because if nothing works out then this method will surely repair all problems with your PC and will fix the “Your PC will automatically restart in one minute” error. Repair Install just uses an in-place upgrade to repair issues with the system without deleting user data present on the system. So follow this article to see How to Repair Install Windows 10 Easily.
Recommended:
- Fix Faulty Hardware corrupted page error on Windows 10
- How to install Internet Explorer on Windows 10
- Fix Printer Driver is unavailable on Windows 10
- 3 Ways to change DNS settings on Windows 10
I hope the above steps were able to help you Fix Your PC will automatically restart in one minute loop but if you still have any questions regarding this guide then feel free to ask them in the comment section.
Fix Printer Driver is unavailable on Windows 10: If you’re not able to use your Printer and you face the error message that says “Driver is unavailable” then this means that the driver installed for your Printer is not compatible, outdated or corrupted. In any case, until you resolve this error you won’t be able to access your Printer. To view this message you need to head over to Devices and Printers then select your Printer and under Status, you will see “Driver is unavailable”.

This error message can be annoying, especially is you need to use the printer urgently. But don’t worry there are few easy fixes which can resolve this error and in no time you will be able to use your printer. So without wasting any time let’s see How to Fix Printer Driver is unavailable on Windows 10 with the help of the below-listed troubleshooting guide.
- Fix Printer Driver is unavailable on Windows 10
- Method 1: Uninstall the Printer Drivers
- Method 2: Make sure Windows is up to date
- Method 3: Verify the Admin Account
- Method 4: Install the Printer Drivers in Compatibility mode
- Method 5: Reinstall your Printer Drivers
- Method 6: Reset your PC
Fix Printer Driver is unavailable on Windows 10
Make sure to create a restore point just in case something goes wrong.
Method 1: Uninstall the Printer Drivers
1.Type control in Windows Search then click on the search result which says Control Panel.

2.From the Control Panel click on Hardware and Sound.

3.Next, click on Device and Printers.

4.Right-click on the printer device which shows the error “ Driver is unavailable ” and select Remove device.

5.Press Windows Key + R then type devmgmt.msc and hit Enter to open Device Manager.

6.Expand Print queues then right-click on your Printer device and select Uninstall.

Note: If you don’t have your device listed then don’t worry as it may already be removed when you remove the printer device from Devices and Printers.
7.Again click on Uninstall to confirm your actions and this will successfully remove the printer drivers from your PC.
8.Now press Windows Key + R then type appwiz.cpl and hit Enter.

9.From the Programs and Features window, uninstall any application related to your printer.

10.Disconnect your Printer from the PC, shut down your PC and router, power off your printer.
11.Wait for a few minutes then plug everything the back as it was earlier, make sure to connect your Printer to the PC using a USB cable and see if you’re able to Fix Printer Driver is unavailable on Windows 10.
Method 2: Make sure Windows is up to date
1.Press Windows Key + I to open Settings then click on Update & Security.
2.From the left-hand side, menu click on Windows Update.
3.Now click on the “ Check for updates ” button to check for any available updates.

4.If any updates are pending then click on Download & Install updates.
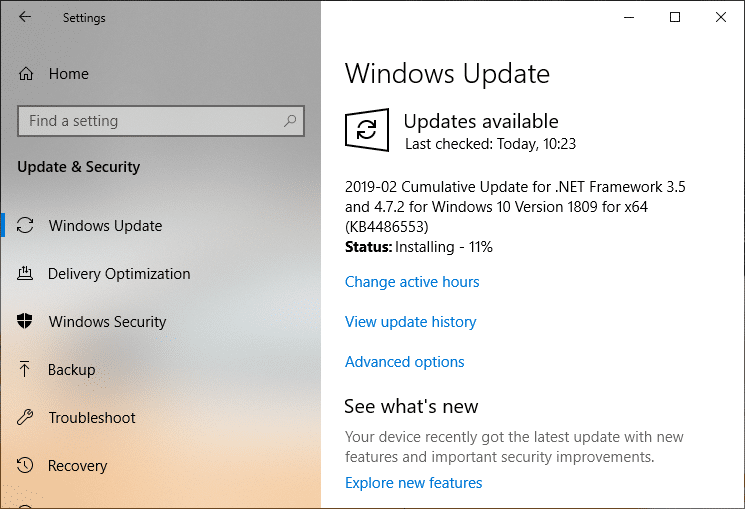
Once the updates are downloaded, install them and your Windows will become up-to-date.
Method 3: Verify the Admin Account
1.Press Windows Key + R then type control and hit Enter to open Control Panel.
2.Click on User Accounts then again click on User Accounts.

3.Now click on the “ Make changes to my account in PC settings ” link.

4.Click on the verify link and follow the on-screen instructions to verify your admin account.

5.Once finished, reboot your PC and again install the printer without any issues.
Method 4: Install the Printer Drivers in Compatibility mode
1.Press Windows Key + R then type devmgmt.msc and hit Enter to open Device Manager.
2.Expand Print queues then right-click on your Printer device and select Uninstall.
3.If you’re prompted to confirm then again click on the Uninstall button.
4.Now go to your printers manufacturer’s website and download the latest drivers for your printer.
5.Right-click on the setup file and select Properties.

Note: If the drivers are in a zip file make sure to unzip it then right-click on the .exe file.
6.Switch to the Compatibility Tab and checkmark “ Run this program in Compatibility mode “.
7.From the drop-down select Windows 7 or 8 and then checkmark “ Run this program as an administrator “.

8.Finally, double-click on the setup file and let the drivers install.
9.Once finished, reboot your PC and see if you’re able to fix the issue.
Method 5: Reinstall your Printer Drivers
1.Press Windows Key + R then type control printers and hit Enter to open Devices and Printers.

- Right-click on your printer and select “ Remove device ” from the context menu.
3.When the confirm dialog box appears , click Yes.

4.After the device is successfully removed, download the latest drivers from your printer manufacturer website .
5.Then reboot your PC and once the system restarts, press Windows Key + R then type control printers and hit Enter.
Note: Make sure your printer is connected to the PC via USB, Ethernet or wirelessly.
6.Click on the “ Add a printer ” button under Device and Printers window.

7.Windows will automatically detect the printer, select your printer and click Next.

- Set your printer as default and click Finish.

Method 6: Reset your PC
Recommended:
- Mouse Lags or Freezes on Windows 10? 10 Effective ways to fix it!
- 4 Ways to Clear Clipboard History in Windows 10
- How to Fix Computer Shuts Down Randomly
- Fix Logitech Wireless Mouse Not Working
That’s if you have successfully Fix Printer Driver is unavailable on Windows 10 but if you still have any questions regarding this article then please feel free to ask them in the comment section.
