How to Change IP address in Windows 10: IP address is the unique numerical label each device possesses on any particular computer network. This address is used to send and receive messages between the devices on a network.
The dynamic IP address is provided by the DHCP server (your router). A device’s dynamic IP address changes every time it connects to the network. The static IP address, on the other hand, is provided by your ISP and remains the same until it manually changes by the ISP or the administrator. Having dynamic IP addresses reduces the risk of being hacked than having static IP addresses.

On a local network, you might want to have resource sharing or port forwarding. Now, both of these require a static IP address to work. However, the IP address assigned by your router is dynamic in nature and will change every time you restart the device. In such a situation, you will need to manually configure a static IP address for your devices. There are many ways to do it. Let’s check them out.
- How to Change IP address in Windows 10
- Method 1: USE CONTROL PANEL TO CHANGE IP ADDRESS
- Method 2: USE COMMAND PROMPT TO CHANGE IP ADDRESS
- Method 3: USE POWERSHELL TO CHANGE IP ADDRESS
- Method 4: CHANGE IP ADDRESS IN WINDOWS 10 SETTINGS
How to Change IP address in Windows 10
Make sure to create a restore point just in case something goes wrong.
Method 1: USE CONTROL PANEL TO CHANGE IP ADDRESS
1.Use the search field beside the windows icon on the taskbar and search for the control panel.
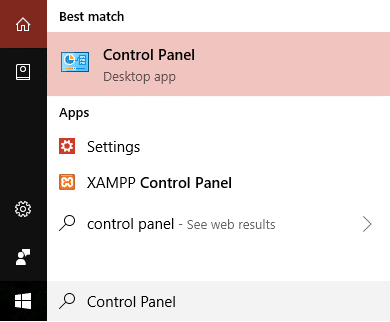
2.Open control panel.
3.Click on ‘ Network and Internet ’ and then on ‘ Network and sharing center ’.

4.Click on ‘ Change adapter settings ’ on the left side of the window.

5.Network connection windows will open.

6.Right-click on the relevant network adapter and click on properties.

7.In the networking tab, select ‘ Internet Protocol Version 4 (TCP/IPv4) ’.
8.Click on Properties .

9.In the IPv4 Properties window, select the ‘ Use the following IP address ’ radio button.

10.Enter the IP address you want to use.
11.Enter the subnet mask. For a local network that you use at your home, subnet mask would be 255.255.255.0.
12.In the Default gateway, enter your router’s IP address.
13.In the Preferred DNS server, enter the IP address of the server which provides DNS resolutions. It is usually your router’s IP address.

14.You can also add an alternate DNS server to connect to in case your device can’t reach the preferred DNS server.
15.Click on OK to apply your settings.
16.Close the window.
17.Try navigating a website to see if it works.
This how you can easily Change IP Address in Windows 10, but if this method doesn’t work for you then make sure to try the next one.
Method 2: USE COMMAND PROMPTTO CHANGE IP ADDRESS
1.Press Windows Key + X then select Command Prompt(Admin) .

2.To see your current configurations, type ipconfig /all and hit Enter.

3.You will be able to see the details of your network adapter configurations.

4.Now, type:
netsh interface ip set address name=”yourNetworkAdapter” static 10.20.30.40 255.255.255.0 2.4.6.8
Note: These three addresses being your device’s static IP address you want to assign, subnet mask, and default getaway address, respectively.

5.Press enter and this will assign a static IP address to your device.
6.To set your DNS server address type the following command and hit Enter:
netsh interface ip set dns name=”yourNetworkAdapter” static 10.20.30.1
Note: The last address being that of your DNS server.

7.To add an alternate DNS address, type
netsh interface ip add dns name=”alternateServer” 8.8.8.8 index=2
Note: This address will be the alternate DNS server address.

8.Try navigating a website to see if it works.
Method 3: USE POWERSHELLTO CHANGE IP ADDRESS
1.Press Windows Key + S to bring up the Search then type PowerShell.
2.Right-click on Windows PowerShell shortcut and select ‘ Run as administrator ’.

3.To see your current IP configurations, type Get-NetIPConfiguration and hit Enter.

4.Note down the following details:
InterfaceIndex

IPv4Address

IPv4DefaultGateway

DNSServer
5.To set a static IP address, run the command:
New-NetIPAddress -InterfaceIndex 13 -IPAddress 10.20.30.40 –PrefixLength 24 -DefaultGateway 2.4.6.8
Note: Here, replace InterfaceIndex number and DefaultGateway with the those you noted down in previous steps and IPAddress with the one you want to assign. For subnet mask 255.255.255.0, PrefixLength is 24, you can replace it if you require to with correct bit number for subnet mask.
6.To set DNS server address, run the command:
Set-DnsClientServerAddress -InterfaceIndex 3 -ServerAddresses 10.11.12.13
Or, if you want to add another alternate DNS address then use the command:
Set-DnsClientServerAddress -InterfaceIndex 3 –ServerAddresses 10.11.12.13, 8.8.8.8
Note: Use the relevant InterfaceIndex and DNS server addresses.
7.This how you can easily Change IP Address in Windows 10, but if this method doesn’t work for you then make sure to try the next one.
Method 4:CHANGE IP ADDRESS IN WINDOWS 10SETTINGS
Note: This method works only for wireless adapters.
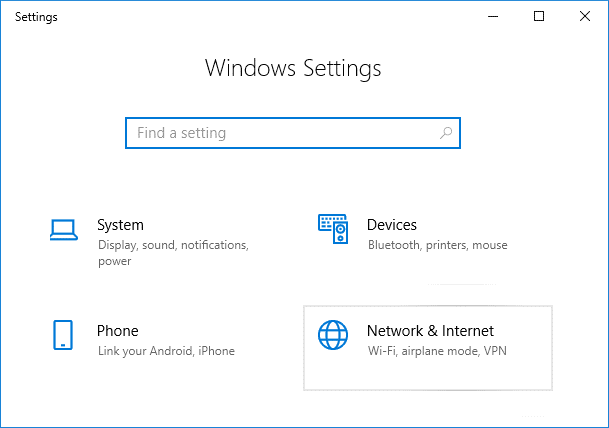
1.Press Windows Key + I to open Settings then click on ‘ Network & Internet ’.
2.Click on Wi-Fi from the left pane and select your required connection.

3.Scroll down and click on Edit button under IP settings .

4.Select ‘ Manual ’ from the drop-down menu and toggle on the IPv4 switch.

5.Set IP address, Subnet prefix length (24 for subnet mask 255.255.255.0), Gateway, Preferred DNS, Alternate DNS and click on Save button.
Using these methods, you can easily set a static IP address for your computer.
Recommended:
- How to Setup Gmail in Windows 10
- Add a Printer in Windows 10 [GUIDE]
- Microsoft Word has Stopped Working [SOLVED]
- How to Disable Google Chrome PDF Viewer
I hope the above steps were able to help you Change IP address in Windows 10 but if you still have any questions regarding this guide then feel free to ask them in the comment’s section.
Add a Printer in Windows 10: You have bought a new printer, but now you need to add that printer to your system or Laptop. But, you don’t have any idea what you must do to attach the printer. Then, you are at the right place, as in this article we are going to learn how to attach a local and wireless printer to the laptop and how to make that printer shared across the homegroup.

- How to Add a Printer in Windows 10 [GUIDE]
- Method 1: Add a Local Printer in Windows 10
- Method 2: Add a Wireless Printer in Windows 10
- Method 3: Add a Shared Printer in Windows 10
How to Add a Printer in Windows 10 [GUIDE]
Make sure to create a restore point just in case something goes wrong.
Let’s start then, we will cover all scenarios one by one:
Method 1: Add a Local Printer in Windows 10
1.First, connect your printer with PC and turn it on.
2.Now, go to start and click on the setting app.
3.Once, the setting screen appears, go to the “ Device ” option.

4.In the device screen, there will be multiple options on the left side of the screen, select “ Printers & Scanners ”.

5.After this there will be “ Add a printer or scanner ” option, this will show you all the printers which are already added. Now, choose the printer which you want to add to your desktop.
6.If the printer you want to add is not listed. Then, choose the link “ The printer that I want isn’t listed ” from the options present below.

It will open a troubleshooting guide that will show you all the available printer which you can add, find your printer in the list and add it to the desktop.

Method 2: Add a Wireless Printer in Windows 10
The different wireless printer has different methods for installation, it solely depends on the manufacturer of the printer. However, new age wireless printer has inbuilt functionality of installation, it gets automatically added to your system if both system and printer are in the same network.
- Firstly, do the initial wireless setting in the setup option from the LCD panel of the printer.
- Now, select your own Wi-Fi Network SSID , you can find this network at the Wi-Fi icon, which is on the bottom of your screen’s taskbar.
- Now, just enter your network password and it will connect your printer with the PC or laptop.
Sometimes, there is a case that you must connect your printer with the USB cable to install software. Otherwise, you can find your printer in the Setting->Device section . I have already explained the method to find the device in “ Add a Local Printer ” option.
Method 3: Add a Shared Printer in Windows 10
You need a Homegroup to share the printer with other computers. Here, we will learn to connect the printer with the help of homegroup. Firstly, we will create a homegroup and then add the printer to homegroup, so that it will get shared between all the computers connected in the same homegroup.
Steps to setup Homegroup
1.First, go to the taskbar and go to Wi-Fi, now right click on it and popup appears, pick option “ Open Network and Sharing Center ” in the pop-up.

2.Now, there will be homegroup option, if it is showing “ Joined ” it means homegroup already exists for the system else “ Ready to Create ” will be there, just click on that option.

3.Now, it will open homegroup Screen, just click on the “ Create a Homegroup ” option.

4.Click Next and a screen will appear, where you can choose what you want to share in the homegroup. Set “ Printer and device ” as shared, if it is not shared.

5.The window will create “ Homegroup Password ”, you will need this password if you want to join your computer to Homegroup.
6.After this click Finish , now your system connected to the homegroup.
Steps to Connect to a Shared Printer in Desktop
1.Go to the file explorer and click on the homegroup and then press “ Join Now ” button.

2.A screen will appear, click “ Next ”.

3.In the next screen, choose all the libraries and folder you want to share , choose “ Printer and Devices ” as shared and click Next.
4.Now, give the password in the next screen , which is generated by the window in the earlier step.
5.At last, just click Finish .
6.Now, in file explorer, go to network and you will your printer connected , and the name of the printer will appear on printer option.

These are a different method to attach the printer to your system. Hope this article proved helpful.
Recommended:
- How to Fix IP Address Conflict
- Microsoft Word has Stopped Working [SOLVED]
- How to Disable Google Chrome PDF Viewer
- Delete Gmail Account Permanently (With Pictures)
Hopefully, one of the above-mentioned methods will surely help you to Add a Printer in Windows 10 but if you still have any questions regarding this guide then feel free to ask them in the comment’s section.
