If you are planning on a clean installation of Windows 10, you need to create a bootable USB flash drive, or in case of recovery, you will need the bootable USB or DVD. Since the release of Windows 10 and if you’re on a newer device then your system uses UEFI mode ( Unified Extensible Firmware Interface) instead of the legacy BIOS (Basic Input/Output System) and because of this, you need to be sure that the installation media includes the correct firmware support.

Now there are many ways to create a Windows 10 bootable USB flash drive, but we will show you how to do that using Microsoft Media Creation Tool and Rufus. So without wasting any time, let’s see How to Create Bootable USB Flash Drive to install Windows 10 with the help of the below-listed guide.
- How to Create Windows 10 Bootable USB Flash Drive
- Method 1: Create bootable USB media to install Windows 10 using Media Creation Tool
- Method 2: How to create Windows 10 Bootable USB using Rufus
How to Create Windows 10 Bootable USB Flash Drive
Method 1: Create bootable USB media to install Windows 10 using Media Creation Tool
Download the Media Creation Tool from the Microsoft website .
Double-click on the MediaCreationTool.exe file to launch the application.
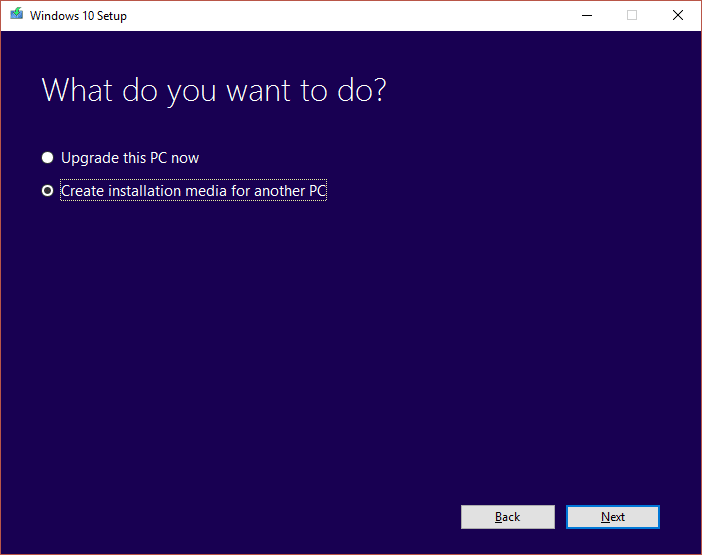
Click Accept then select “ Create installation media (USB flash drive, DVD , or ISO file ) for another PC ” and click Next.
- Now the language, edition, and architecture will automatically be selected according to your PC configuration but if you still want to set them yourself uncheck the option at the bottom saying “ Use the recommended options for this PC “.

- Click Next and then select the USB flash drive option and again click Next.

Make sure to insert the USB and then click Refresh drive list.
Select your USB and then click Next.
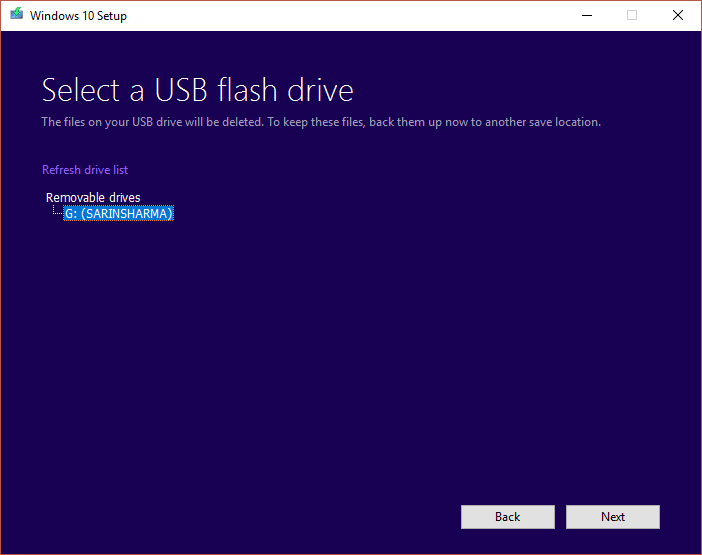
Note: This will format the USB and will erase all data.
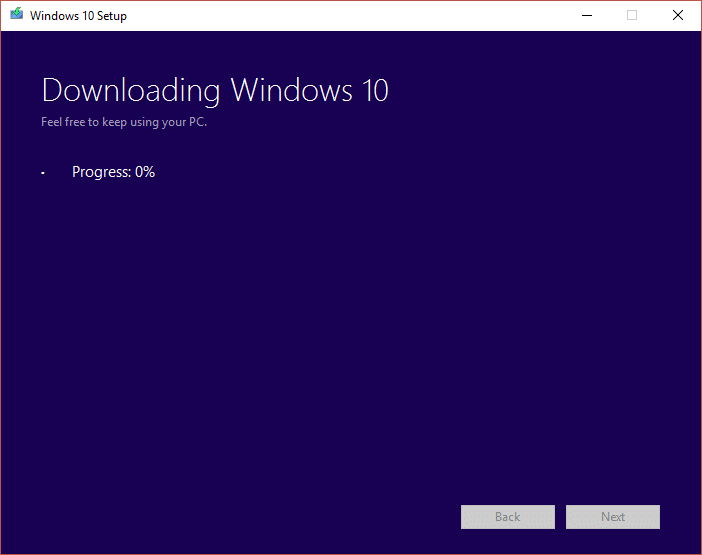
- Media Creation Tool will begin downloading Windows 10 files, and it will create the bootable USB.
Method 2: How to create Windows 10 Bootable USB using Rufus
- Insert your USB Flash Drive into PC and make sure it’s empty.
Note: You will need at least 7 GB of free space on the drive.
Download Rufus and then double-click on the .exe file to launch the application.
Select your USB device under Device, then under “Partition scheme and target system type” select the GPT partition scheme for UEFI.

Under New volume label type Windows 10 USB or any name you desire.
Next, under Format Options, make sure:
Uncheck “Check the device for bad blocks.” Check “Quick Format.” Check “Create a bootable disk using”and select ISO image from the drop-down Check “Create extended label and icon files

- Now under “ Create a bootable disk using ISO image ” click the drive icon next to it.
- Select the Windows 10 image and click Open.
Note: You could download the Windows 10 ISO using Media Creation Tool and follow method 1 instead of USB select ISO file.
- Click Start and click OK to confirm the format of the USB.
Recommended:
- Fix Microsoft Print to PDF Not Working
- Hide Email Address on Windows 10 Login Screen
- Fix 100% Disk Usage by System and Compressed Memory
- Fix The Operating System Version Is Incompatible with Startup Repair
That’s it you have successfully learned How to Create Windows 10 Bootable USB Flash Drive but if you still have any queries regarding this post then feel free to ask them in the comment’s section.
Fix Microsoft Print to PDF Not Working: One of the best features about Windows 10 is it’s print to PDF function where users can print their web pages, files, jpg or word file as a PDF file using an inbuilt PDF Printer by Microsoft called Microsoft Print to PDF. However, reports are coming in that the Print to PDF is not working on their System. When a user clicks on Print to PDF the web browser simply becomes unresponsive and there is no downloading progress or save to dialogue box.
![[SOLVED] Microsoft Print to PDF Not Working - 10](https://techcult.com/wp-content/uploads/2018/03/SOLVED-Microsoft-Print-to-PDF-Not-Working.png)
Users don’t see any output when they click on Print to PDF and the browser saves the PDF file but there is no mention of where the file was saved and the save to dialogue box doesn’t appear at all. So without wasting any time let’s see how to actually Fix Microsoft Print to PDF Not Working with the help of below-listed troubleshooting guide.
- [SOLVED] Microsoft Print to PDF Not Working
- Method 1: Check the User Folder
- Method 2: Disable then Re-Enable the Microsoft Print to PDF feature
- Method 3: Set Microsoft Print to PDF as the default printer
- Method 4: Re-install Microsoft Print to PDF Drivers
[SOLVED] Microsoft Print to PDF Not Working
Make sure to create a restore point , just in case something goes wrong.
Method 1: Check the User Folder
Before doing anything, first go to the following directory:
C:\users%username%
Press Windows Key + R then type C:\Users%username% and hit Enter. Now look for the PDF file that went missing, if you still couldn’t find the file then go to the following folder: C:\users%username%\Documents and again search for the specific file.
Method 2: Disable then Re-Enable the Microsoft Print to PDF feature
1.Press Windows Key + R then type appwiz.cpl and hit Enter to open Programs and Features.

2.Now from the left-hand menu click on Turn Windows features on or off.

3.Scroll down then uncheck the box next to Microsoft Print to PDF and click OK.

4.Reboot your PC to save changes.
5.Next, again follow the steps from 1 to 3 but this time checkmark the box next to Microsoft Print to PDF.

6.Click Ok to save changes and restart your PC then see if you’re able to Fix Microsoft Print to PDF Not Working Issue.
Method 3: Set Microsoft Print to PDF as the default printer
1.Press Windows Key + R then type “ control printers ” (without quotes) and hit Enter to open Devices and Printers.

2.Now right-click on Microsoft Print to PDF and then select Set as Default Printer.

3.Reboot your PC to save changes and see if you’re able to Fix Microsoft Print to PDF Not Working Issue.
Method 4: Re-install Microsoft Print to PDF Drivers
1.Press Windows Key + R then type “ control printers ” (without quotes) and hit Enter to open Devices and Printers.
2.Now right-click on Microsoft Print to PDF and then select Remove device.

3.Once you have removed Microsoft Print to PDF then click on Add a printer from the menu.

4.Click “ The printer that I want isn’t listed” at the bottom of the Add a device screen.

5.Checkmark “ Add a local printer or network printer with manual setting s” and click Next.

6.Select PORTPROMPT: (Local Port) from “Use an existing port” drop-down and click Next.

7.Next, from the Manufacturer column select Microsoft than from the Printers column select Microsoft Print to PDF and then click Next.

8.Select Replace the current driver and then click Next.

9.Under Printer name type Microsoft Print to PDF and then click Next.

10.Click Finish to complete the process and reboot your PC.
Recommended:
- Fix Windows can’t set up a HomeGroup on this computer
- Hide Email Address on Windows 10 Login Screen
- Fix Windows 10 Taskbar Won’t Auto Hide
- How to Read Memory Dump Files in Windows 10
That’s it you have successfully Fix Microsoft Print to PDF Not Working but if you still have any queries regarding this post then feel free to ask them in the comment’s section.
