RAM (Random Access Memory) is computer hardware where short-term memory data is stored. RAM is used to store working data and machine code which can be quickly read by the system and modified in any order. More RAM allows you to run more programs at once without negatively impacting the system’s performance. If your PC runs low on RAM, it can slow down the processing of programs on the working system. Therefore, to maintain your PC’s good pace, you need to increase computer memory Windows 10. Are you wondering how do I increase RAM on my PC? Then you are at the right place. If you are struggling with how to boost computer memory and want to know all the details about RAM, how to check it, and most importantly, how to increase RAM on Windows 7 & 10, then we have a perfect guide for you. Our guide will cover all the required specifics about how to increase my PC memory and present you with different methods of adding more RAM to your electronic brain. Read till the end to know how to increase available physical memory Windows 10.

- How to Increase RAM on Windows 7 & 10
- Why Do You Need More RAM?
- Things to do Before Increasing RAM
- Method 1: Restart PC
- Method 2: Clear RAM Hogging Processes
- Method 3: Clear Startup Programs
- Method 4: Update Apps
- Method 5: Run Malware Scan
- Method 6: Update Device Drivers
- Method 7: Clear Memory Cache
- Method 8: Reduce Visual Effects
- Method 9: Adjust Virtual Memory
- Method 10: Clear Page File at Shutdown
- Method 11: Add More RAM
How to Increase RAM on Windows 7 & 10
Before starting with ways to increase computer memory in Windows 10 , you must know how much RAM your PC actually needs. Let us look at these requirements given in the list below:
- For lightweight browsing and word processing, you would need at most 4 GB RAM for your PC.
- In case of multitasking and maintaining the good overall performance of the PC, you need 8 GB RAM .
- While using high-intensity programs and apps on the PC or optimizing gaming performance, your system needs at least 16 GB RAM .
- PCs that must be used for education, professional, or enterprise purposes can handle up to 128 GB of RAM .
- Professional PCs that need multitasking and heavy programs to run need about 192 GB of RAM .
Why Do You Need More RAM?
Along with knowing how to boost computer memory, you must also be aware of the need to increase RAM. Usually, the need for more RAM arises from the fact that no more free RAM space is available on your PC, which makes the computer lag. Apart from insufficient RAM space that slows down the PC, there are other factors too that can affect the performance of your system:
- Frequent power surges degrade system components
- Memory leaks from the system software
- Bad memory chips or bad hard drive sectors
- Viruses and malware degrading system resources
- Excessive software launching during startup
Although system aging is not in your hands, you can still boost your computer by increasing its RAM, and there’s a lot you can do about it.
Physical memory in a system can be increased by reducing the amount of RAM used. There are multiple methods to do so, which we will unfold in the upcoming paragraphs. Apart from it, if reducing the workload on a PC does not work, you can try adding the RAM manually to your system. So, let us begin with our first method on how do I increase RAM on my PC.
Things to do Before Increasing RAM
Follow these steps before increasing the RAM.
Step I: Check Current RAM
The first method that needs to be followed to make more RAM space in your system is to check your current RAM initially. Before implementing methods that will increase physical memory, it is essential to know how much space has already been used by your system, and this can be done in a few easy steps that you can read down below:
Press Ctrl + Shift + Esc keys simultaneously to open Task Manager .
Click on the Performance tab at the top and select Memory .

- Now, check the In use and Available RAM space on your system.

Step II: Check Needed RAM Amount
Once you are aware of the current RAM, the next step to know how to increase my PC memory is checking the amount of RAM needed. This can be done by accessing Performance Monitor as done in the steps below:
- Press the Windows key , type Performance Monitor and click on Open .

- Click on Performance Monitor under Monitoring Tools on the left-side panel.

- Click on the + green symbol at the top.

- Select Paging File from the list and click on Add » button.

- Click on OK .

- Analyze how much more RAM you need from the chart . As can be seen, the graph for Process Time is above Usage Peak (represented by a green line), which indicates the need for more RAM.

Usually, 4 GB extra RAM is enough to carry out normal processes, but you can also use 8 GB RAM if you have to multitask on your system.
Here are the methods to increase available physical memory in Windows 10.
Method 1: Restart PC
Now that you have checked your current available RAM and how much RAM you need, it is time to attempt one of the first troubleshooting fixes for how to increase RAM on Windows 7 & 10. Restarting the PC is indeed quite a simple yet effective method to try in this situation. As you might already know, restarting the system clears RAM content and restarts all the processes active in the background. This helps clear space from RAM and makes more space in it.
Also, restarting your PC regularly is always advised if used often and constantly. Apart from following routine ways to restart the computer, you can read about some different methods in our guide on 6 Ways to Reboot or Restart a Windows 10 Computer .

Method 2: Clear RAM Hogging Processes
Even after a restart, some processes can continue consuming the system resources and keep you wondering how to increase available physical memory Windows 10. In such a scenario, it is best to clear these processes in the Task Manager window manually.
To know more about making space in RAM, follow our guide on How to End Task in Windows 10 and implement the same.

Method 3: Clear Startup Programs
Even though you have cleared Task Manager processes, sometimes they are not enough to increase computer memory Windows 10. In this case, you can try clearing the Startup programs that usually launch every time you start your computer or laptop and consume the available RAM.
Read our guide on 4 Ways to Disable Startup Programs in Windows 10 and implement the same on how to increase RAM on Windows 7 & 10.

When you are done with disabling unrequired programs, you can access some space on RAM that is cleared.
Method 4: Update Apps
Along with enhancing the system’s performance, updating apps also comes in handy in reducing RAM waste. Memory leaks are a common issue that can be encountered with the apps, which occur when a program does not return RAM to the pool once it has used the resources. Installing the latest update for the app can help fix the memory leak issue. Moreover, with an update comes more improvements that take up less RAM space. Follow the steps below to update apps using Microsoft Store:
- Hit the Windows key , type Microsoft Store , then click on Open .

- Click on the Library option.

- Click on Update all , if updates are available.

Method 5: Run Malware Scan
If you want to know how to increase my PC memory, then checking for malware can help you. Sometimes software hogging resources can also be a reason why your system’s RAM is left with no space. To ensure that your system is not corrupt with malware, you can check our guide on How do I Run a Virus Scan on my Computer .

If you want to remove malware from your computer, follow our guide on How to Remove Malware from your PC in Windows 10 and implement the same.
Method 6: Update Device Drivers
The next fix for how to boost computer memory includes keeping a check on your device drivers. Corrupt driver files or conflicts can lead to memory leaks and excessive RAM consumption. Therefore, it is important to check drivers from time to time to save up space for RAM. You can check each driver individually in the Device Manager window and make sure there is no alert for any of the drivers. If there is one, then update the problematic drivers one by one.
You can learn a great deal about updating them with the help of our guide on How to Update Device Drivers on Windows 10 .

Method 7: Clear Memory Cache
Memory cache is another reason why your RAM is filling up fast. While closing applications, some programs don’t close properly and can consume RAM. This memory cache can also have an impact on the performance of your system. Hence, make sure that you clear the cache from your system.
Get the help of our guide Quickly Clear All Cache in Windows 10 [The Ultimate Guide] to clear all types of cache from your PC.

Method 8: Reduce Visual Effects
Visual effects can be great for a system with sufficient RAM, but for Windows with low memory, it can be a lot on the RAM, and the only option left in such a case of how to increase RAM on Windows 7 & 10 is to reduce these visual effects.
Open File Explorer on your PC by pressing Windows + E keys together.
Right-click on This PC and select the Properties option.

- Select Advanced system settings from the right panel.

- Click on Settings… in the Advanced section.

- In the Visual Effects tab, check the box for Adjust for best performance and click on OK .

Method 9: Adjust Virtual Memory
To increase computer memory Windows 10, you can also adjust virtual memory on your PC. It is an effective method and helps enhance a computer’s performance. Follow our guide on Manage Virtual Memory (Pagefile) In Windows 10 and implement the same.

Method 10: Clear Page File at Shutdown
Shutting down the system and applications does clear the system RAM, but it does not clear the page file that is stored on the hard disk. This page file is the pretend RAM that the system uses when RAM gets full and clearing this page file is therefore important to ensure there is enough space left for the next time you have to use your system. To do so, you need to follow the steps given below and perform them on your PC:
Note : Make a backup of registry keys to restore to previous settings in case of manual errors during modification.
- Open the search menu , type regedit , and click on Open to launch the Registry Editor .

- Navigate to the following folder path in Registry Editor.
Computer\HKEY_LOCAL_MACHINE\SYSTEM\CurrentControlSet\Control\Session Manager\Memory Management

- Now, double-click on ClearPageFileAtShutdown key.

- Set Value data as 1 and then click on OK .

Method 11: Add More RAM
If you are struggling with finding a solution to how to increase available physical memory Windows 10 after trying all the above-given methods, then it is certain that your system is in dire need of more RAM. Trying methods to clear some RAM space is insufficient in this case, so you need to add more RAM to your system manually.
Manually adding RAM involves physically adding sticks of memory to your device. This can be done with the help of a manual, taking support from the manufacturer’s website, or leaving it to the professional. If you are planning to add RAM on your own, then follow the steps that are provided below:
Note : The steps given below are to be performed on a laptop.
Remove the plastic cover from the RAM compartment. This will expose two slots of RAM , out of which either one or both can be filled.
Now, to take the RAM module out , pull the clamps present on both sides.
Insert a new RAM module in the slot at a 45-degree angle and push it down.
Finally, reassemble your PC and reboot it in BIOS to check if the RAM inserted has been recognized by the system.
Hence, this is how to increase my PC memory.
Recommended:
- How to Find Hidden Things on iPhone
- Fix Printer Installation Issues in Windows 10
- Fix NVIDIA Container High CPU Usage on Windows 10
- How to Check RAM Frequency on Windows 10
Microsoft frequently rolls out updates for Windows 10 to improve the operating system on various functionalities such as system efficiency, security, stability, etc. Although each bug brings a host of improvements to the operating system, it also brings new bugs that plague many users. One of these is the Windows update released in March 2021, update KB500080. This update caused many issues with the printer drivers already installed in the system. Users reported errors like Windows update for printer drivers not working. These printer installation issues were so prominent and serious that some users even reported receiving BSOD (Blue Screen of Death – the screen displayed after a system crash due to Windows failure) while printing. This made printing impossible. If you are wondering how to solve this Windows update can’t get list of devices issue, you are at the right article. Here, we discuss the possible causes and some potential solutions so we can tackle this error. Let’s get started!

- How to Fix Printer Installation Issues in Windows 10
- Method 1: Discharge Printer
- Method 2: Run Printer Troubleshooter
- Method 3: Update Device Drivers
- Method 4: Manually Install Generic Drivers
- Method 5: Restart Print Spooler Service
- Method 6: Install Drivers from Windows Update Catalog
- Method 7: Reinstall Printer
How to Fix Printer Installation Issues in Windows 10
Before getting onto the fixes, let us see some causes for this issue:
- Printer is old and has no latest software support
- Windows update bug
- Issues with printer service
- Issues with printer drivers and software
- Printer is incorrectly connected
Method 1: Discharge Printer
You can try discharging the printer of all electricity by removing it from the main switch, removing it from the computer for 2–5 minutes, and connecting it back again. Make sure to properly connect the printer to the main switch and the computer before turning it off, and check if the issue is fixed.
Method 2: Run Printer Troubleshooter
There is an in-built Windows troubleshooter for printer issues. You can access it easily by accessing settings. Running printer troubleshooter will resolve Windows update for printer drivers not working issue.
Press Windows + I keys simultaneously to launch Settings .
Click on the Update & Security tile, as shown.

Go to Troubleshoot menu in the left pane.
Select Printer troubleshooter and click on Run the troubleshooter button shown highlighted below.

- Wait for the troubleshooter to detect and fix the problem. Once the process is complete, click Apply this fix and restart your PC .
Windows will automatically search for any problems and attempt to fix them automatically. Also, you can run Hardware and Devices Troubleshooter on Windows 10 to resolve the issue.

Method 3: Update Device Drivers
As Windows users reported errors after the Windows update, there could be problems with the printer driver. Updating printer drivers could be a potential fix. Various methods to update the printer drivers are highlighted below if one of them does not work for you.
Read our guide on How to Update Device Drivers on Windows 10 and implement the different methods given in this link for printer devices.

Note : If your printer came with an installation disc, it could be a driver installation disc. Insert it into your DVD/CD driver and follow the onscreen instructions to install the driver.
Method 4: Manually Install Generic Drivers
If you have an old printer or your manufacturer has not yet released a driver for Windows 10, printer installation issues can occur. This can be an ongoing issue since the printer will be unusable without proper usable driver software. In this scenario, Windows will automatically install Generic drivers suitable for your printer. If not, then you can install them manually.
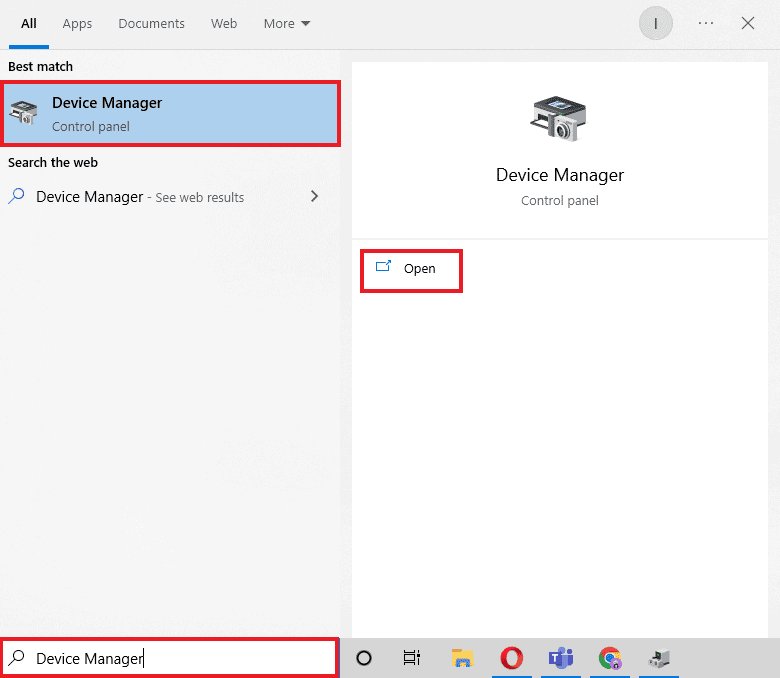
- Press the Windows key , type Device Manager , and click on Open .
- Under the Print queues section, right-click on Microsoft XPS writer and select the Update driver option.

- Click on the Browse my computer for driver software option.

- Next, click on Let me pick from a list of available drivers on my computer .

- Finally, choose Generic software device and click on Next .

This will install the required driver and fix the printer installation issue.
Method 5: Restart Print Spooler Service
When a Windows user sends print requests to the printer, the print spooler is the software that manages these requests sent by the user. Resetting it can be a potential solution. Follow the below steps:
Hit the Windows + R keys together to open the Run dialog box.
Type services.msc and click on OK to launch the Services window.

- Right-click on Print Spooler and click on Stop to stop the service.

Now, navigate to the Run dialog box again by simultaneously pressing Windows + R keys .
Enter the below command and click on OK .
%WINDIR%\system32\spool\printers

Select all the files in the folder by holding Ctrl + A keys simultaneously.
Now, press Shift + Delete to delete all the files present in that folder permanently.
Go back to the Services window and double-click on the Print Spooler service.

Make sure the Startup type drop-down is set to Automatic .
Finally, click on Start under the Service status section.

- Click on Apply > OK to confirm.
Check if Windows Update can’t get list of devices issue gets resolved or not.
Method 6: Install Drivers from Windows Update Catalog
Sometimes, using a generic driver does not help and might still throw up printer installation issues. If you face issues with the printer and you have an old printer, then you can try an official Microsoft Windows Update Catalog. Here, the updates are archived so year-old drivers can easily download and use them. Let us see how to use it.
Go to the Microsoft Catalog website in a browser.
Type the model of your printer (e.g. HP LaserJet 4000 ) and click on Search to search drivers for your hardware.
If you find the driver for your hardware, click on Download .

- Here, click on the cab link to download the driver.

Right-click on the downloaded file and choose Extract .
Update your printer driver manually by locating the folder where you extracted the drivers.
Method 7: Reinstall Printer
You can reinstall the printer completely from the start to see if that works. This involves removing the printer and device driver with all powers and connecting them back.
- Hit the Windows key , type Control Panel , then click on Open .

- Set View by > Category , then click on View devices and printers .

Under the Printers section, right-click on your printer .
Choose the Remove device option.

Click on Yes in the UAC prompt to remove the device.
Now, reboot the PC and reconnect your printer.
Go to Devices and Printers and right click on the printer and select Set as default printer .

This will solve printer installation issues.
Recommended:
- Fix Daemon Tools Unable to Access Image File MDF
- Fix Epson Scanner Cannot Communicate in Windows 10
- Fix Error Printing in Windows 10
- Where is the WPS Button on Canon Printer?
We hope that this article was helpful, and you were able to resolve printer installation issues in Windows 10. If you have any doubts or suggestions, comment below. Also, let us know what you want to learn next.
