If you want to shut down your computer at a certain time or in the night, you have to schedule the shutdown using Task Scheduler. There are many possible reasons for you to schedule the shutdown like you don’t want to wait until the download completes in the night, so what you do instead is you schedule the shutdown after 3-4 hours then you sleep peacefully. This saves you a lot of trouble, for example, a video file is rendering, and you need to leave for work then the scheduled shutdown comes in handy.

Now there is another method with which you could easily delay the shutdown of your PC, but that is a little complicated, so it’s better to use Task Scheduler. To give you hint the method uses the command Shutdown /s /t 60 in cmd window and the 60 is the time in seconds by which the shutdown is delayed. So without wasting any time, let’s see How to Schedule Automatic Computer Shutdown with the help of the below-listed guide.
How to Schedule Computer Shutdown using Task Scheduler
Make sure to create a restore point just in case something goes wrong.
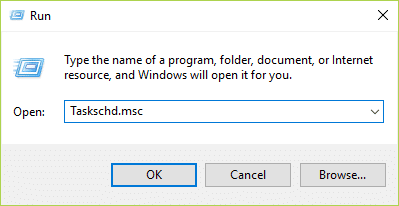
- Press Windows Key + R then type taskschd.msc and hit Enter to open Task Scheduler.
- Now, from the right-hand window under Actions, click on Create Basic Task.

- Type any name and description you want in the field and click Next.

- On the next screen, set when you want the task to start, i.e. daily, weekly, monthly, one time etc. and click Next.

- Next set the Start date and time.

- Select “ Start a program ” on the Action screen and click Next.

- Under Program/Script either type “ C:\Windows\System32\shutdown.exe ” (without quotes) or browse to the shutdown.exe under the above directory.

8.On the same window, under “ Add arguments (optional) ” type the following and then click Next:
/s /f /t 0

Note: If you want to shut down the computer say after 1 minute then type 60 in place of 0, similarly if you want to shut down after 1 hour then type 3600. This is also an optional step as you have already selected the date & time to start the program so you could leave it at 0 itself.
- Review all the changes you have done until now, then checkmark “ Open the Properties dialog for this task when I click Finish ” and then click Finish.

- Under the General tab, tick the box which says “ Run with highest privileges “.

- Switch to the Conditions tab and then uncheck “ Start the task only if the computer is on AC power “.

- Similarly, switch to the Settings tab and then checkmark “ Run task as soon as possible after a scheduled start is missed “.

- Now your computer will shut down at the date & time you selected.
Note: If you want more options or want to know more about this command, then open command prompt type shutdown /? and hit Enter. If you want to restart your PC, use the /r parameter instead of the /s parameter.

Recommended:
- How to fix Printer not activated Error Code 20
- Fix Webcam not working after Windows 10 Anniversary Update
- How to Fix PNP Detected Fatal Error Windows 10
- Fix ERR_EMPTY_RESPONSE Google Chrome Error
That’s it you have successfully learned How to Schedule Computer Shutdown using Task Scheduler but if you still have any queries regarding this guide then feel free to ask them in the comment’s section.
How to fix Printer not activated Error Code 20: If you’re facing the error message “Printer not activated – Error Code 20” then you’re at the right place as today we are going to see how to fix the issue. The issue is generally seen in systems in which user have upgraded from earlier version of Windows or using the QuickBooks software. In anyway case, let’s see how to fix Printer not activated Error Code 20 with the help of the below-listed guide.

- How to fix Printer not activated Error Code 20
- Method 1: Set the Default Printer
- Method 2: Re-install the USB Composite Device from Device Manager
- Method 3: Run Printer Troubleshooter
- Method 4: Registry Fix
- Method 5: Grant Permission using PowerShell
- Method 6: Reinstall QuickBook
How to fix Printer not activated Error Code 20
Make sure to create a restore point just in case something goes wrong.
Method 1: Set the Default Printer
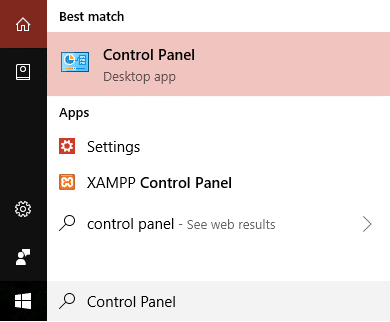
1.Type control in Windows Search then click on Control Panel.
2.Click Hardware and Sound and then select Devices and Printers.

3.Right-click on your printer and select Set as a default printer.

4.Restart your PC to save changes.
Method 2: Re-install the USB Composite Device from Device Manager
1.Press Windows Key + R then type devmgmt.msc and hit Enter.

2.Expand Universal Serial Bus Controllers.
3.Right-click on USB Composite Device and select Uninstall.

4.If asks for confirmation select Yes/OK.
- Disconnect the Printer USB from the PC and then reconnect it.
6.Follow the instructions in the Found New Hardware wizard to install the drivers.

7.Right-click the printer icon, and then click Print Test Page to print a Windows self-test page.
8.Restart your PC to save changes.
Method 3: Run Printer Troubleshooter
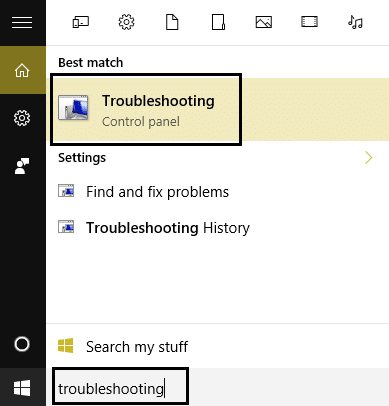
1.type “troubleshooting” in Windows Search bar and click on Troubleshooting.
6.Next, from the left window pane select View all.
7.Then from the Troubleshoot computer problems list select Printer.

8.Follow on-screen instruction and let the Printer Troubleshooter run.
9.Restart your PC and you may be able to Fix Printer not activated Error Code 20.
Method 4: Registry Fix
1.Press Windows Key + R then type regedit and hit Enter to open Registry Editor.

2.Navigate to the following registry key:
HKEY_CURRENT_CONFIG\Software
3.Right-click on Software folder then select Permissions.

4.Now in the permission window, ensure that Administrator and users have Full Control checked, if not then checkmark them.

5.Click Apply followed by OK.
6.Restart your PC to save changes and see if you’re able to fix the issue.
Method 5: Grant Permission using PowerShell
1.Type powershell in Windows Search then right-click on PowerShell and select Run as Administrator.

2.Now type the following command in PowerShell and hit Enter:
PowerShell.exe -NoProfile -NoLogo -NonInteractive -Command “$key = [Microsoft.Win32.Registry]::CurrentConfig.OpenSubKey(‘Software’,[Microsoft.Win32.RegistryKeyPermissionCheck]::ReadWriteSubTree,[System.Security.AccessControl.RegistryRights]::ChangePermissions); $acl =$key.GetAccessControl(); $rule = New-Object System.Security.AccessControl.RegistryAccessRule (‘Users’,’FullControl’,’ObjectInherit,ContainerInherit’,’None’,’Allow’); $acl.SetAccessRule($rule); $key.SetAccessControl($acl);”

3.Reboot your PC to save changes.
Method 6: Reinstall QuickBook
1.Press Windows Key + R then type appwiz.cpl and hit Enter.

2.Find QuickBook from the list and uninstall it.
3.Next, download QuickBooks from here .
4.Run the installer and follow on-screen instructions to install QuickBook.
5.Restart your PC.
Recommended:
- Fix BAD_SYSTEM_CONFIG_INFO Error
- Fix Webcam not working after Windows 10 Anniversary Update
- How to Fix PNP Detected Fatal Error Windows 10
- Fix ERR_EMPTY_RESPONSE Google Chrome Error
That’s it you have successfully Fix Printer not activated Error Code 20 but if you still have any queries regarding this post then feel free to ask them in the comment’s section.
