Unfortunately, yahoo mail avid users no longer can get their mail access on Windows 10 through Yahoo! Mail app. Yahoo has stopped its official app on the Windows 10 operating system. Moreover, you cannot get Yahoo mail app in the Microsoft app store . Yahoo has suggested its users switch to web browsers to check their emails. What do you think about this update? If you are looking for some solutions to get your Yahoo mails on Windows 10, we can help you with that. Luckily, Windows 10 mail app supports Yahoo mail. Windows 10 Mail app can be your saviour because you can use it to get your Yahoo mails with several features such as notification live updated and more. This article will walk you through the steps to set up Yahoo mail account in Windows 10 Mail App and how to customize it.

- How to add Yahoo Mail in Windows Mail App
- How to Configure Yahoo Mail in Windows Mail App
- Delete Yahoo Mail Account in Windows 10
How to add Yahoo Mail in Windows Mail App
Make sure to create a restore point just in case something goes wrong.
Windows mail app is pretty much easy to use as it guides you through adding your mail account of different service providers . It would help if you had your Yahoo mail account credentials because you have to enter your Yahoo account’s username and password while getting it synced with Windows mail app.
Open Settings by pressing Windows + I on your system
Here, you need to select the Accounts section.

Once you are in the account section, you need to click on the left panel’s Email & accounts section.
Now click on the Add an account option to start adding Yahoo account.

Or you can directly open Windows 10 Mail App then click on Add account.

- On the next screen, you need to choose the Yahoo from the list of providers.

- Enter your Yahoo Mail ID and Username.

- Agree to the terms and conditions of the Yahoo and go ahead in setting up the account in your Windows 10 operating system.

- You can let Windows remember your sign-in name and password so that you don’t have to or you can click Skip.

Finally, you have set up Yahoo email account in Windows 10 Mail App. Now you can enjoy getting notifications of your yahoo mail on your Windows 10 Mail App.

How to Configure Yahoo Mail in Windows Mail App
You have the customization option to make Yahoo mail settings more personalized as per your preferences. You can choose what you want to have in your email. It is quite interesting to have all your emails on your device without having any problem. If you do face any issues, read How to Fix Yahoo Mail Error 0x8019019a .
You can customize the sync settings such as when the mail app should sync your Yahoo emails – in 2 hours, 3 hours, etc.
Whether you want to sync only emails or other products, such as calendar and Yahoo contacts.

- You can choose the name to display in your mail that you send to others.
While customizing your mail, you need to prioritize your preferences.
Delete Yahoo Mail Account in Windows 10
What if you want to delete or uninstall your yahoo account ? Yes, you can easily delete the account from your mail app. All you need to do is follow the below steps.
- Open Settings then click on Accounts icon.
Navigate to Email & accounts section from the left-hand window pane.
Click on the account which you want to uninstall or delete.
Click on Manage option where you will get the option to delete the account.

- Finally, click “ Delete account ” to remove your Yahoo account from Windows 10 Mail App.
However, you need to ensure that you get all your account settings and security aspects intact during the process. Yahoo may ask you to enter your two-step verification code while configuring your account or syncing with the Windows mail app. Therefore, you need to make sure is that you have complete access to your Yahoo mail. It might also interest you to read How to Delete Your ICQ Account Permanently .
Recommended:
- Kill Resource Intensive Processes with Windows Task Manager (GUIDE)
- What is the Difference Between CC and BCC in an Email?
- Fix Cursor Jumps or moves randomly in Windows 10
- Print Spooler Keeps Stopping? Here is how to fix it!
I hope this article was helpful and now you can easily set up Yahoo email account in Windows 10 Mail App , but if you still have any questions regarding this tutorial then feel free to ask them in the comment’s section.
If you’re facing the error message “ The print spooler service is not running ” when you try to print a document or any file then don’t worry as we are going to see how to fix print spooler keeps stopping on Windows 10 issue . After facing this error, you may try to start the print spooler service but you will notice that it is automatically stopped after a few seconds. It seems like the print spooler service keeps crashing on Windows 10. But before going to fix the issue lets us see what this Print spooler actually is?

What is Print Spooler?
Print spooler is a utility program that comes with the Windows operating system which helps in managing all the print jobs users sent to their printer. The print spooler helps your Windows to interact with the printer, and orders the print jobs in your queue. If the print spooler service isn’t running, your printer won’t work.

Now you might be wondering what is the cause behind this error? Well, there can be many reasons why you’re facing this issue but the main cause seems to be the outdated, incompatible printer drivers. Normally if the print spooler service stops working, it will not pop-up or show any error or warning message. But in this case, you will receive an error message pop-up, so without wasting any time let’s see How to Fix Print Spooler Keeps Stopping Automatically with the help of the below-listed troubleshooting guide.
- Fix Print Spooler Keeps Stopping on Windows 10
- Method 1: Delete content from the Spool folder
- Method 2: Restart your Print Spooler service
- Method 3: Set Print Spooler Service to Automatic
- Method 4: Change the Print Spooler Recovery Options
- Method 5: Update your Printer driver
- Method 6: Take Ownership of spoolsv.exe
- Method 7: Delete unnecessary key from Registry
- Method 8: Reinstall your Printer Drivers
- Method 9: Scan your PC with Anti-Malware
Fix Print Spooler Keeps Stopping on Windows 10
Make sure to create a restore point just in case something goes wrong.
Method 1: Delete content from the Spool folder
Using this approach, you have to delete all the content inside the PRINTERS and drivers folder. This method works for all Windows OS right from Windows 10 till Windows XP. To solve using this approach, the steps are:
1.Open the File Explorer then navigate to the following path: C:\Windows\System32\spool
2.Double-click on “ drivers ” folder then delete all files & folders under it.

3.Similarly, you have to delete all contents from the PRINTERS folder and then restart the “ Print Spooler ” service.
4.Then reboot your system to save changes.
Method 2: Restart your Print Spooler service
In this approach, you have to restart your Print Spooler Services. To do this the steps are –
1.Press Windows Key + R then type “ services.msc ” (without quotes) and hit Enter to open the Services window.

2.Scroll down & look for Print Spooler service and then select it.

3.Right-click on Print Spooler service then select Restart.
4.Now check whether the printer is working or not. If your printer is working then this means you were able to Fix Print Spooler Keeps Stopping on Windows 10 issue.
Method 3: Set Print Spooler Service to Automatic
1.Use the keyboard shortcut key combination Windows key + R to open the Run application.
2.Type “ services.msc ” and hit Enter to open the Services window.

- Right-click Print Spooler & choose the Properties.

4.Change the “ Startup type ” to ‘ Automatic ’ from the drop-down list & then click Apply > OK.

See if you’re able to Fix Print Spooler Keeps Stopping on Windows 10 issue, if not then continue to the next method.
Method 4: Change the Print Spooler Recovery Options
In case the Print Spooler recovery settings are not configured properly, then in case of any failure, the print spooler will not restart automatically. To recover that the steps are –
1.Press Windows Key + R then type service.msc and hit Enter.
2.Right-click Print Spooler & select Properties.
3.Switch to the Recovery tab then make sure the First failure, Second failure, & Subsequent failures are set to “ Restart the Service ” from their respective drop-downs.

4.Then, click Apply followed by OK.
Method 5: Update your Printer driver
1.Press Windows Key + R then type “ services.msc ” and hit enter.
2.Find Print Spooler service then right-click on it and select Stop.

3.Again press Windows Key + R then type printui.exe /s /t2 and hit enter.
4.In the Printer Server Properties window search for the printer which is causing this issue.
5.Next, remove the printer, and when asked for confirmation to remove the driver as well, select yes.

6.Now again go to services.msc and right-click on Print Spooler and select Start.

7.Next, navigate to your printer manufacturer website, download and install the latest printer drivers from the website.
For example , in case you have an HP printer then you need to visit HP Software and Drivers Downloads page . Where you can easily download the latest drivers for your HP printer.
8.If you’re still not able to fix Print Spooler Keeps Stopping issue then you can use the printer software that came with your printer. Usually, these utilities can detect the printer on the network and fix any issues that are causing the printer to appear offline.
For example, you can use HP Print and Scan Doctor to fix any issues regarding HP Printer.
Method 6: Take Ownership of spoolsv.exe
1.Open the File Explorer then navigate to this path: C:\Windows\System32
2.Next, find ‘ spoolsv.exe ’ then right-click on it and select Properties.

3.Switch to the “ Security ” tab.
4.Now under Group and user names choose your user account & then click on the “ Advanced ” button.

5.Now click on “ Change ” next to the current Owner .

6.Now from the “ Select User or Group ” window click on the Advanced button at the bottom.

7.Next, click on Find Now then select your user account then click OK.

8.Again click OK on the next window.

9.You will be again on the Advanced Security Settings window of spoolsv.exe , just click Apply followed by OK.

10.Now under spoolsv.exe Properties window , select your user account (which you selected in step 7) then click on the Edit button.

11.Checkmark “ Full control ” then click Apply followed by OK.

- Restart Print Spooler service (Run > services.msc > Print Spooler).
13.Reboot your system to apply changes and see if you’re able to Fix Print Spooler Keeps Stopping on Windows 10 issue .
Method 7: Delete unnecessary key from Registry
Note: Make sure to back up your Registry just in case something goes wrong then you can easily restore the registry using this backup.
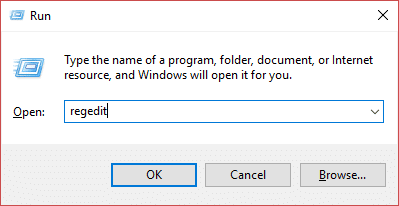
1.Press Windows Key + R then type regedit and hit Enter to open Registry Editor.
2.Now navigate to the following registry key:
HKEY_LOCAL_MACHINE\SYSTEM\CurrentControlSet\Control\Print\Providers
3.Under Providers you will find two default sub-keys which are LanMan Print Services and Internet Print Provider.

4.Above two sub-keys are the default and should not be deleted.
5.Now apart from the above sub-keys delete any other key present under Providers.
6.In our case, there is an additional subkey which is Printing Services.
7.Right-click on Printing Services then select Delete.

8.Close Registry Editor & Restart Print Spooler service.
Method 8: Reinstall your Printer Drivers
1.Press Windows Key + R then type control printers and hit Enter to open Devices and Printers.

- Right-click on your printer and select “ Remove device ” from the context menu.

3.When the confirm dialog box appears , click Yes.

4.After the device is successfully removed, download the latest drivers from your printer manufacturer’s website .
5.Then reboot your PC and once the system restarts, press Windows Key + R then type control printers and hit Enter.
Note: Make sure your printer is connected to the PC via USB, Ethernet, or wirelessly.
6.Click on the “ Add a printer ” button under the Device and Printers window.

7.Windows will automatically detect the printer, select your printer and click Next.

- Set your printer as default and click Finish.

Method 9: Scan your PC with Anti-Malware
Malware can cause tremendous trouble in printing services. It can corrupt system files or may change any values in the registry. The possibilities of creating issues by malware are endless. So, it is recommended to download and install applications like Malwarebytes or other anti-malware applications to scan for malware in your system. Scanning your PC for malware may fix the Print Spooler stopping issue.
1.Download and install CCleaner & Malwarebytes.
- Run Malwarebytes and let it scan your system for harmful files.

3.If malware is found it will automatically remove them.
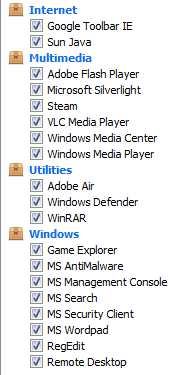
4.Now run CCleaner and in the “Cleaner” section, under the Windows tab, we suggest checking the following selections to be cleaned:
5.Once you’ve made certain the proper points are checked, simply click Run Cleaner, and let CCleaner run its course.
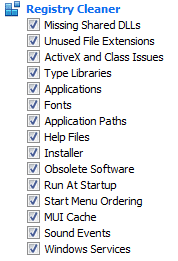
6.To clean your system further select the Registry tab and ensure the following are checked:
7.Select Scan for Issue and allow CCleaner to scan, then click Fix Selected Issues.
8.When CCleaner asks “ Do you want backup changes to the registry? ” select Yes.
9.Once your backup has completed, select Fix All Selected Issues.
10.Restart your PC to save changes.
Recommended:
- Kill Resource Intensive Processes with Windows Task Manager (GUIDE)
- Clear Clipboard using Command Prompt or Shortcut
- What is a VPN and how it works?
- Install Group Policy Editor (gpedit.msc) on Windows 10 Home
I hope this article was helpful and now you can easily Fix Print Spooler Keeps Stopping on Windows 10 , but if you still have any questions regarding this tutorial then feel free to ask them in the comment section.
