Process and Compressed Memory is a Windows 10 feature responsible for memory compression (also referred to as RAM compression and memory compression). This feature basically utilizes data compression to reduce the size or number of paging request to and from the auxiliary storage. In short, this feature is designed to take less amount of disk space and memory but in this case the System and Compressed Memory process start using 100% Disk and Memory, causing the affected PC to become slow.

In Windows 10, a compressions store is added to the concept of Memory Manager, which is an in-memory collection of compressed pages. So whenever the memory starts to fill up, the System and Compressed Memory process will compress the unused pages instead of writing them to the disk. The benefit of this is the amount of memory used per process is reduced, which allows Windows 10 to maintain more programs or apps in physical memory.
The problem appears to be incorrect Virtual Memory settings. Someone changed the paging file size from automatic to a particular value, virus or malware, Google Chrome or Skype, corrupt system files etc. So without wasting any time let’s see how to actually Fix 100% Disk Usage by System and Compressed Memory with the help of below-listed troubleshooting guide.
- [SOLVED] 100% Disk Usage by System and Compressed Memory
- Method 1: Repair Corrupt System Files
- Method 2: Set Correct Paging File Size
- Method 3: Disable Fast Startup
- Method 4: Disable Superfetch Service
- Method 5: Adjust your PC for Best Performance
- Method 6: Kill the Speech Runtime Executable Process
- Method 7: Run CCleaner and Malwarebytes
- Method 8: Change configuration of Google Chrome and Skype
- Method 9: Set Correct Permission for System and Compressed Memory Process
- Method 10: Disable System and Compressed Memory Process
[SOLVED] 100% Disk Usage by System and Compressed Memory
Make sure to create a restore point , just in case something goes wrong.
Method 1: Repair Corrupt System Files
- Open Command Prompt. The user can perform this step by searching for ‘cmd’ and then press Enter.

- Now type the following in the cmd and hit enter:
Sfc /scannow

sfc /scannow /offbootdir=c:\ /offwindir=c:\windows (If above fails then try this one)
![SFC scan now command prompt | [SOLVED] 100% Disk Usage by System and Compressed Memory - 3](https://techcult.com/wp-content/uploads/2016/06/SFC-scan-now-command-prompt.png)
Wait for the above process to finish and once done, restart your PC.
Again open cmd and type the following command and hit enter after each one:
Dism /Online /Cleanup-Image /CheckHealth

Dism /Online /Cleanup-Image /ScanHealth

Dism /Online /Cleanup-Image /RestoreHealth

Let the DISM command run and wait for it to finish.
If the above command doesn’t work then try on the below:
Dism /Image:C:\offline /Cleanup-Image /RestoreHealth /Source:c:\test\mount\windows

Dism /Online /Cleanup-Image /RestoreHealth /Source:c:\test\mount\windows /LimitAccess
Note: Replace the C:\RepairSource\Windows with your repair source (Windows Installation or Recovery Disc).
- Reboot your PC to save changes and see if you’re able to Fix 100% Disk Usage by System and Compressed Memory Issue.
Method 2: Set Correct Paging File Size
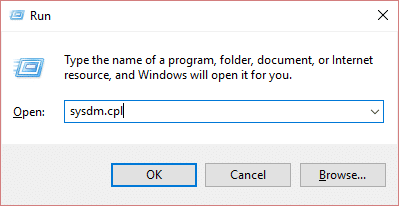
- Press Windows Key + R then type sysdm.cpl and hit Enter to open System Properties.
- Switch to the Advanced tab and then click on Settings under Performance.

- Again switch to the Advanced tab and click Change under Virtual Memory.

- Checkmark “ Automatically manage paging file size for all drives. ”
![Checkmark Automatically manage paging file size for all drives | [SOLVED] 100% Disk Usage by System and Compressed Memory - 8](https://techcult.com/wp-content/uploads/2017/10/Checkmark-Automatically-manage-paging-file-size-for-all-drives.png)
Click OK, then click Apply followed by OK.
Select Yes to Restart your PC to save changes.
Method 3: Disable Fast Startup
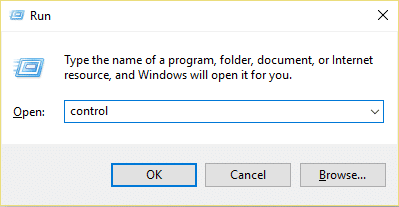
- Press Windows Key + R then type control and hit Enter to open Control Panel.
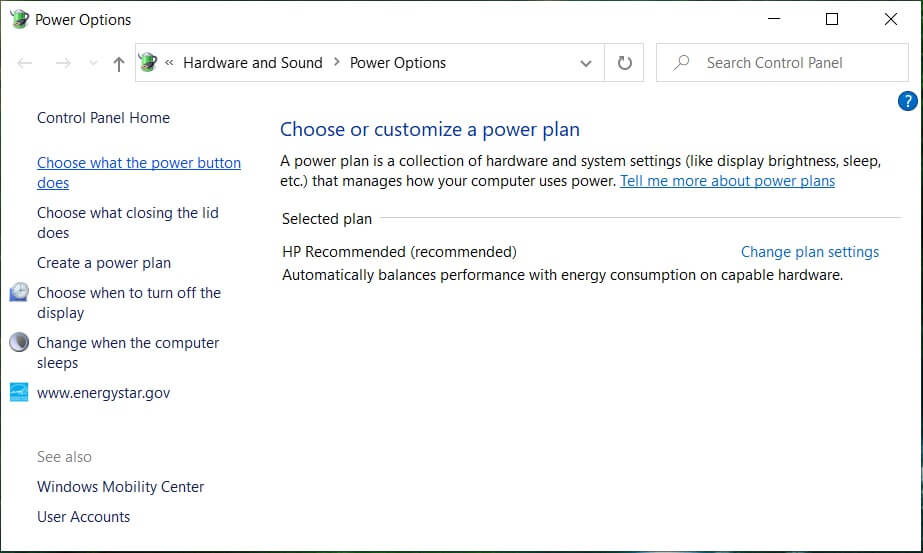
- Click on Hardware and Sound then click on Power Options .

- Then, from the left window pane select “ Choose what the power buttons do. “
- Now click on “ Change settings that are currently unavailable. “

- Uncheck “ Turn on fast startup ” and click on Save changes.
![Uncheck Turn on fast startup | [SOLVED] 100% Disk Usage by System and Compressed Memory - 13](https://techcult.com/wp-content/uploads/2016/06/Uncheck-Turn-on-fast-startup.png)
- Restart your PC and see if you’re able to Fix 100% Disk Usage by System and Compressed Memory Issue.
Method 4: Disable Superfetch Service
- Press Windows Key + R then type services.msc and hit Enter.

- Find Superfetch service from the list then right-click on it and select Properties.

Under Service status, if the service is running, click on Stop.
Now, from the Startup type drop-down select Disabled.

Click Apply, followed by OK.
Reboot your PC to save changes.
If the above method doesn’t disable Superfetch services then you can follow disable Superfetch using Registry:
- Press Windows Key + R then type regedit and hit Enter to open Registry Editor.

- Navigate to the following registry key:
HKEY_LOCAL_MACHINE\SYSTEM\CurrentControlSet\Control\Session Manager\Memory Management\PrefetchParameters
- Make sure you have selected PrefetchParameters then in the right window double click on EnableSuperfetch key and change it’s value to 0 in the Value data field.

Click OK and close the Registry Editor.
Restart your PC to save changes and see if you’re able to Fix 100% Disk Usage by System and Compressed Memory Issue.
Method 5: Adjust your PC for Best Performance
- Press Windows Key + R then type sysdm.cpl and hit Enter to open System Properties.
- Switch to the Advanced tab and then click on Settings under Performance.
- Under Visual Effects checkmark “ Adjust for best performance “.

Click Apply, followed by OK.
Reboot your PC and see if you’re able to Fix 100% Disk Usage by System and Compressed Memory Issue.
Method 6: Kill the Speech Runtime Executable Process
Press Ctrl + Shift + Esc to launch Task Manager.
In the Processes tab , find Speech Runtime Executable.

- Right-click on it and select End Task.
Method 7: Run CCleaner and Malwarebytes
Download and install CCleaner & Malwarebytes.
Run Malwarebytes and let it scan your system for harmful files. If malware is found, it will automatically remove them.

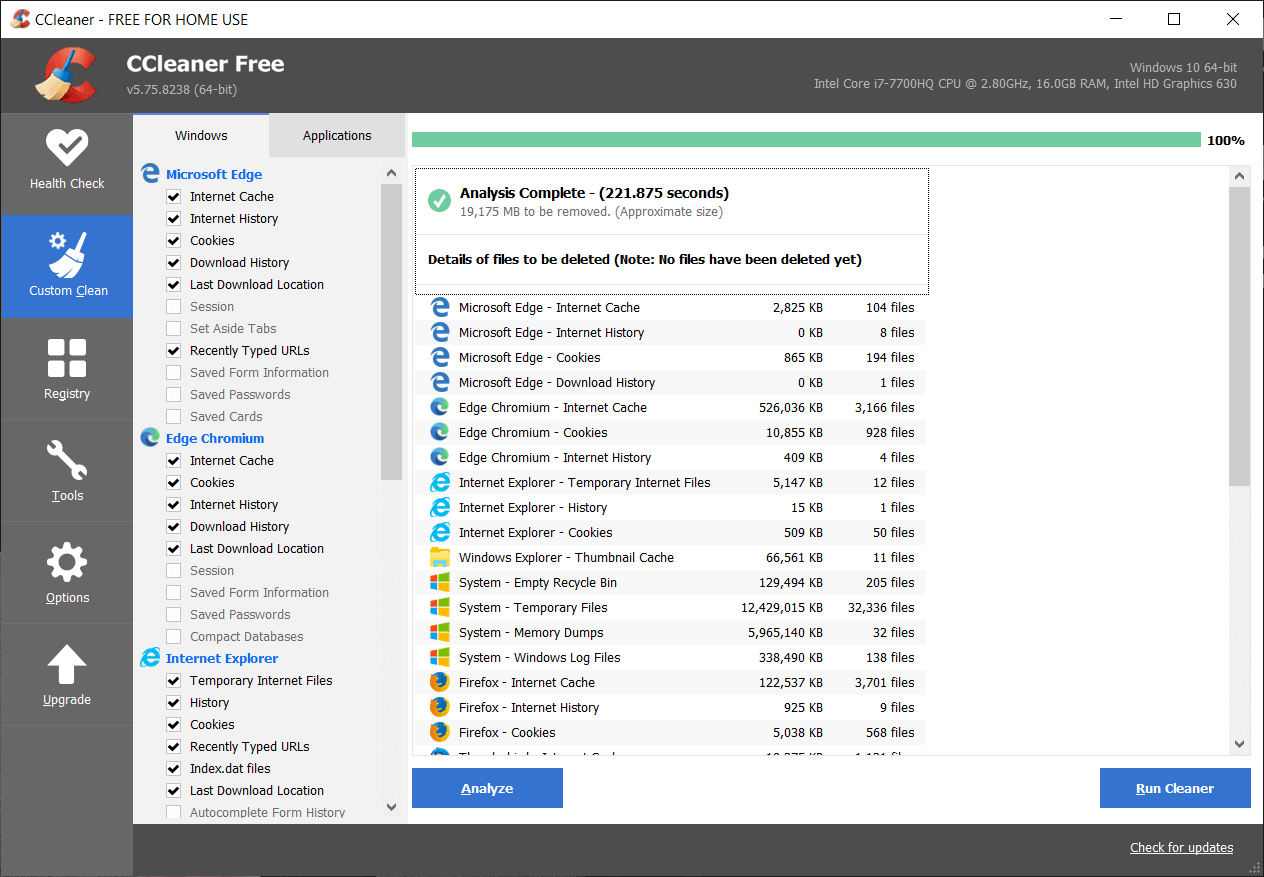
Now run CCleaner and select Custom Clean .
Under Custom Clean, select the Windows tab and checkmark defaults and click Analyze .
![Select Custom Clean then checkmark default in Windows tab | [SOLVED] 100% Disk Usage by System and Compressed Memory - 24](https://techcult.com/wp-content/uploads/2017/07/Select-Custom-Clean-then-checkmark-default-in-Windows-tab.png)
- Once Analyze is complete, make sure you’re certain to remove the files to be deleted.
Finally, click on the Run Cleaner button and let CCleaner run its course.
To further clean your system, select the Registry tab , and ensure the following are checked:
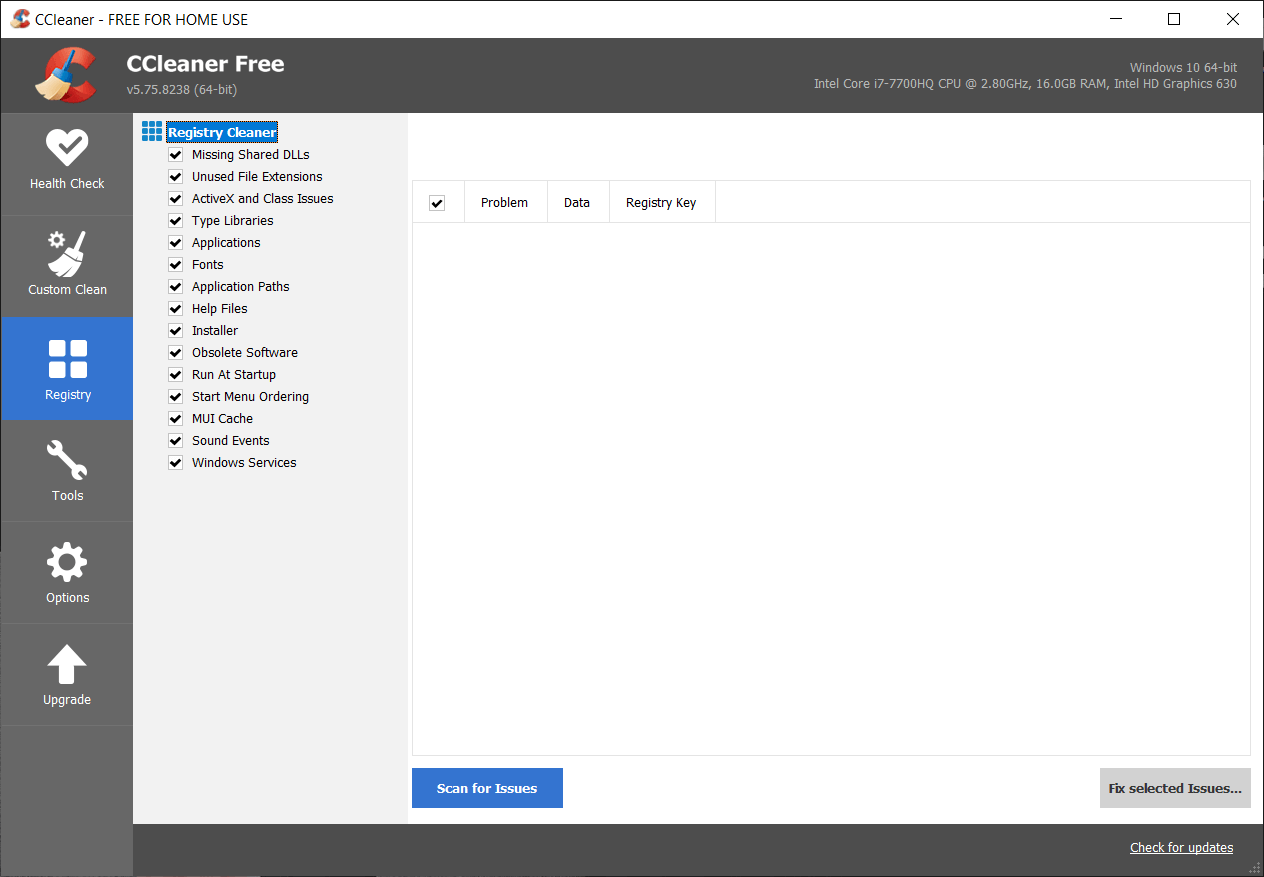
- Click on the Scan for Issues button and allow CCleaner to scan, then click on the Fix Selected Issues button.
![Once scan for issues is completed click on Fix selected Issues | [SOLVED] 100% Disk Usage by System and Compressed Memory - 27](https://techcult.com/wp-content/uploads/2017/07/Once-scan-for-issues-is-completed-click-on-Fix-selected-Issues.png)
When CCleaner asks “ Do you want backup changes to the registry? ” select Yes .
Once your backup has completed, click on the Fix All Selected Issues button.
Restart your PC to save changes.
Method 8: Change configuration of Google Chrome and Skype
For Google Chrome: Navigate to the following under Chrome: Settings > Show Advanced Settings > Privacy > Use a prediction service to load pages more quickly . Disable the toggle next to “Use a prediction service to load pages.”

Change configuration For Skype
Make sure you have exited Skype, if not end task from Task Manager for Skype.
Press Windows Key + R then type the following and click OK:
C:\Program Files (x86)\Skype\Phone\
- Right-click on Skype.exe and select Properties.

- Switch to Security tab and click Edit.

- Select ALL APPLICATION PACKAGES under Group or user names then checkmark Write under Allow.

- Click Apply, followed by OK and see if you’re able to Fix 100% Disk Usage by System and Compressed Memory Issue.
Method 9: Set Correct Permission for System and Compressed Memory Process
- Press Windows Key + R then type Taskschd.msc and hit Enter to open Task Scheduler.
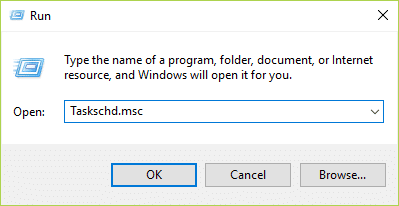
- Navigate to the following path:
Task Scheduler Library > Microsoft > Windows > MemoryDiagnostic
![Double click on ProcessMemoryDiagnostic Events | [SOLVED] 100% Disk Usage by System and Compressed Memory - 33](https://techcult.com/wp-content/uploads/2018/03/Double-click-on-ProcessMemoryDiagnostic-Events.png)
- Double click on ProcessMemoryDiagnostic Events and then click Change User or Group under Security Options.

- Click Advanced and then click Find Now.

- Select your Administrator account from the list then click OK.

Again click OK to add your administrator account.
Checkmark Run with highest privileges and then click OK.

Follow the same steps for RunFullMemoryDiagnosti c and close everything.
Reboot your PC to save changes.
Method 10: Disable System and Compressed Memory Process
Press Windows Key + R then type Taskschd.msc and hit Enter to open Task Scheduler.
Navigate to the following path:
Task Scheduler Library > Microsoft > Windows > MemoryDiagnostic
- Right-click on RunFullMemoryDiagnostic and select Disable.
![Right-click on RunFullMemoryDiagnostic and select Disable | [SOLVED] 100% Disk Usage by System and Compressed Memory - 38](https://techcult.com/wp-content/uploads/2018/03/Right-click-on-RunFullMemoryDiagnostic-and-select-Disable.png)
- Close Task Scheduler and restart your PC.
Recommended:
- Fix Microsoft Print to PDF Not Working
- Hide Email Address on Windows 10 Login Screen
- Fix Windows 10 Taskbar Won’t Auto Hide
- Fix The Operating System Version Is Incompatible with Startup Repair
That’s it you have successfully Fix 100% Disk Usage by System and Compressed Memory but if you still have any questions regarding this post then feel free to ask them in the comment’s section.
Fix Microsoft Print to PDF Not Working: One of the best features about Windows 10 is it’s print to PDF function where users can print their web pages, files, jpg or word file as a PDF file using an inbuilt PDF Printer by Microsoft called Microsoft Print to PDF. However, reports are coming in that the Print to PDF is not working on their System. When a user clicks on Print to PDF the web browser simply becomes unresponsive and there is no downloading progress or save to dialogue box.
![[SOLVED] Microsoft Print to PDF Not Working - 39](https://techcult.com/wp-content/uploads/2018/03/SOLVED-Microsoft-Print-to-PDF-Not-Working.png)
Users don’t see any output when they click on Print to PDF and the browser saves the PDF file but there is no mention of where the file was saved and the save to dialogue box doesn’t appear at all. So without wasting any time let’s see how to actually Fix Microsoft Print to PDF Not Working with the help of below-listed troubleshooting guide.
- [SOLVED] Microsoft Print to PDF Not Working
- Method 1: Check the User Folder
- Method 2: Disable then Re-Enable the Microsoft Print to PDF feature
- Method 3: Set Microsoft Print to PDF as the default printer
- Method 4: Re-install Microsoft Print to PDF Drivers
[SOLVED] Microsoft Print to PDF Not Working
Make sure to create a restore point , just in case something goes wrong.
Method 1: Check the User Folder
Before doing anything, first go to the following directory:
C:\users%username%
Press Windows Key + R then type C:\Users%username% and hit Enter. Now look for the PDF file that went missing, if you still couldn’t find the file then go to the following folder: C:\users%username%\Documents and again search for the specific file.
Method 2: Disable then Re-Enable the Microsoft Print to PDF feature
1.Press Windows Key + R then type appwiz.cpl and hit Enter to open Programs and Features.

2.Now from the left-hand menu click on Turn Windows features on or off.

3.Scroll down then uncheck the box next to Microsoft Print to PDF and click OK.

4.Reboot your PC to save changes.
5.Next, again follow the steps from 1 to 3 but this time checkmark the box next to Microsoft Print to PDF.

6.Click Ok to save changes and restart your PC then see if you’re able to Fix Microsoft Print to PDF Not Working Issue.
Method 3: Set Microsoft Print to PDF as the default printer
1.Press Windows Key + R then type “ control printers ” (without quotes) and hit Enter to open Devices and Printers.

2.Now right-click on Microsoft Print to PDF and then select Set as Default Printer.

3.Reboot your PC to save changes and see if you’re able to Fix Microsoft Print to PDF Not Working Issue.
Method 4: Re-install Microsoft Print to PDF Drivers
1.Press Windows Key + R then type “ control printers ” (without quotes) and hit Enter to open Devices and Printers.
2.Now right-click on Microsoft Print to PDF and then select Remove device.

3.Once you have removed Microsoft Print to PDF then click on Add a printer from the menu.

4.Click “ The printer that I want isn’t listed” at the bottom of the Add a device screen.

5.Checkmark “ Add a local printer or network printer with manual setting s” and click Next.

6.Select PORTPROMPT: (Local Port) from “Use an existing port” drop-down and click Next.

7.Next, from the Manufacturer column select Microsoft than from the Printers column select Microsoft Print to PDF and then click Next.

8.Select Replace the current driver and then click Next.

9.Under Printer name type Microsoft Print to PDF and then click Next.

10.Click Finish to complete the process and reboot your PC.
Recommended:
- Fix Windows can’t set up a HomeGroup on this computer
- Hide Email Address on Windows 10 Login Screen
- Fix Windows 10 Taskbar Won’t Auto Hide
- How to Read Memory Dump Files in Windows 10
That’s it you have successfully Fix Microsoft Print to PDF Not Working but if you still have any queries regarding this post then feel free to ask them in the comment’s section.
