Fix You’ve been signed in with a temporary profile error: When you try to login to Windows using your user account and you receive the following error message “You’ve been signed in with a temporary profile” then this means that your user account profile has been corrupted. Well, all your user profile information and settings are saved in Registry keys which can easily become corrupt. When the user profile gets corrupted Windows will log you in with a temporary profile rather than the standard user profile. In such case you will receive the following error message:
You’ve been signed in with a temporary profile. You can’t access your files, and files created in this profile will be deleted when you sign out. To fix this, sign out and try signing in later. Please see the event log for more details or contact your system administrator.

There is no particular cause of corruption as it can happen due to anything such as installing Windows updates, upgrading your Windows, restarting your PC, installing 3d party apps, changing registry values etc. So without wasting any time let’s see how to actually Fix You’ve been signed in with a temporary profile error with the help of below-listed troubleshooting guide.
- You’ve been signed in with a temporary profile error [SOLVED]
- Method 1: Run SFC and DISM
- Method 2: Run System Restore
- Method 3: Registry Fix
You’ve been signed in with a temporary profile error [SOLVED]
Make sure to create a restore point just in case something goes wrong.
Before doing anything you must enable the built-in administrator account which will help you in troubleshooting:
a)Press Windows Key + X then select Command Prompt (Admin).

b)Type the following command and hit Enter:
net user administrator /active: yes

Note: Once you’re done with the troubleshooting follow the above same steps then type “ net user Administrator /active: no ” in order to disable the built-in administrator account.
c)Restart your PC and login to this new administrator account.
Method 1: Run SFC and DISM
1.Press Windows Key + X then click on Command Prompt(Admin).

2.Now type the following in the cmd and hit enter:
Sfc /scannow

sfc /scannow /offbootdir=c:\ /offwindir=c:\windows (If above fails then try this one)

3.Wait for the above process to finish and once done restart your PC.
4.Again open cmd and type the following command and hit enter after each one:
a) Dism /Online /Cleanup-Image /CheckHealth

b) Dism /Online /Cleanup-Image /ScanHealth

c) Dism /Online /Cleanup-Image /RestoreHealth

5.Let the DISM command run and wait for it to finish.
- If the above command doesn’t work then try on the below:
Dism /Image:C:\offline /Cleanup-Image /RestoreHealth /Source:c:\test\mount\windows

Dism /Online /Cleanup-Image /RestoreHealth /Source:c:\test\mount\windows /LimitAccess
Note: Replace the C:\RepairSource\Windows with the location of your repair source (Windows Installation or Recovery Disc).
7.Reboot your PC to save changes and see if you’re able to Fix You’ve been signed in with a temporary profile error.
Method 2: Run System Restore
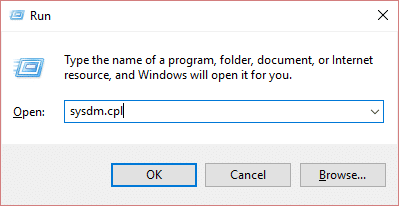
1.Press Windows Key + R and type” sysdm.cpl ” then hit enter.
2.Select System Protection tab and choose System Restore.

3.Click Next and choose the desired System Restore point .

4.Follow the on-screen instruction to complete system restore.
5.After reboot, you may be able to Fix You’ve been signed in with a temporary profile error.
Method 3: Registry Fix
Note: Make sure to backup registry just in case something goes wrong.
1.Press Windows Key + X then select Command Prompt (Admin).
2.Type the following command into cmd and hit Enter:
wmic useraccount where name=’USERNAME’ get sid

Note: Replace USERNAME with your actual account username. Note down the output of the command into a seperate notepad file.
Example: wmic useraccount where name=’aditya’ get sid
3.Press Windows Key + R then type regedit and hit Enter to open Registry Editor.

4.Navigate to the following registry key:
HKEY_LOCAL_MACHINE\SOFTWARE\Microsoft\Windows NT\CurrentVersion\ProfileList
5.Under ProfileList , you will find the SID specific to a users profile . Using the the SID we noted in step 2, find the correct SID of your profile.

6.Now you will find that there would be two SID’s with the same name, one with .bak extension and other without it.
7.Select the SID which doesn’t have .bak extension, then in the right window pane double-click on ProfileImagePath string.

8.In the value data path, it would direct to C:\Users\temp which is creating all the problem.
9.Now right-click on the SID which doesn’t have .bak extension and select Delete.
10.Select SID with the .bak extension then double-click on ProfileImagePath string and change it’s value to C:\Users\YOUR_USERNAME.

Note: Rename YOUR_USERNAME with your actual account username.
11.Next, right-click on SID with .bak extension and select Rename . Remove the .bak extension from the SID name and hit Enter.

12.Close Registry Editor and reboot your PC to save changes.
Recommended:
- Fix Unable to Set Default Printer Error 0x00000709
- How to Fix Microphone Not Working on Windows 10
- Fix Desktop Refers to A Location That Is Unavailable
- Fix WiFi doesn’t connect automatically in Windows 10
That’s it you have successfully Fix You’ve been signed in with a temporary profile error but if you still have any questions regarding this post then feel free to ask them in the comment’s section.
Fix Unable to Set Default Printer Error 0x00000709: If you’re facing error message “Operation could not be completed” with error code 0x00000709 then this means you’re unable to set default printer on Windows 10. The main issue is just a registry entry because of which the default printer is automatically set to the previous printer. The full error message is listed below:
Operation could not be completed error (0x00000709). Double check the printer name and make sure that printer is connected to the network.

The problem is that Windows 10 has removed the Network Location aware feature for Printers and because of which you cannot set the default printer of your choice. Anyway, without wasting any time let’s see how to Fix Unable to Set Default Printer Error 0x00000709 with the help of the below-listed troubleshooting guide.
- Fix Unable to Set Default Printer Error 0x00000709
- Method 1: Disable Windows 10 to Automatically Manage your Printer
- Method 2: Manually Set the Default Printer
- Method 3: Registry Fix
- Method 4: Create a New User Account
Fix Unable to Set Default Printer Error 0x00000709
Make sure to create a restore point just in case something goes wrong.
Method 1: Disable Windows 10 to Automatically Manage your Printer
1.Press Windows Key + I to open Settings then click Devices.

2.Now from the left-hand menu select Printers & scanners.
- Disable the toggle under “ Let Windows manage my default printer. “

4.Close everything and reboot your PC.
Method 2: Manually Set the Default Printer
1.Press Windows Key + X then select Control Panel.
2.Click Hardware and Sound and then select Devices and Printers.

3.Right-click on your printer and select Set as a default printer.

4.Restart your PC to save changes and see if you’re able to Fix Unable to Set Default Printer Error 0x00000709.
Method 3: Registry Fix
1.Press Windows Key + R then type regedit and hit Enter.
2.Now navigate to the following registry key:
HKEY_CURRENT_USER\Software\Microsoft\Windows NT\CurrentVersion\Windows
3.Right-click on Windows key and select Permissions.

4.From Group or Usernames select your administrator account and checkmark Full Control.

5.Click Apply followed by OK.
6.Next, select the Windows registry key then in the right window pane double-click on Device key.
7.Under the value data field type in your printer name and click OK.

8.Exit everything and reboot your PC to save changes.
9.If even after restarting you are unable to set default printer then delete the device key in Registry Editor and again restart your PC.
Method 4: Create a New User Account
1.Press Windows Key + R then type netplwiz and hit Enter to open User Accounts.

2.Now click on Add in order to add a new user account.

3.On the How will this person sign in screen click on Sign in without a Microsoft account.

4.This would display two options for signing in: Microsoft account and Local account.

5.Click on Local account button at the bottom.
6.Add Username & password and click Next.
Note: Leave the password hint empty.

7.Follow-on screen instruction to create a new user account.
Recommended:
- Fix DISM Source Files Could not be Found Error
- Fix Microphone Not Working on Windows 10
- Remove Candy Crush Soda Saga from Windows 10
- How to Map Network Drive in Windows 10
That’s it you have successfully Fix Unable to Set Default Printer Error 0x00000709 but if you still have any queries regarding this guide then feel free to ask them in the comment’s section.
